Maison >interface Web >js tutoriel >Exemple d'implémentation de l'effet carrousel d'images JQuery
Exemple d'implémentation de l'effet carrousel d'images JQuery
- 黄舟original
- 2017-10-26 10:27:351889parcourir
L'éditeur suivant vous présentera un exemple d'utilisation de JQuery pour obtenir l'effet carrousel d'images (recommandé). L'éditeur le trouve plutôt bon, je vais donc le partager avec vous maintenant et le donner comme référence pour tout le monde. Venez jeter un œil avec l'éditeur
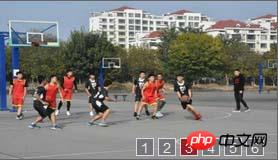
【L'effet est comme sur la photo】


[Brève description du principe]
Voici un résumé de l'ensemble du processus :
Masquer toutes les images sauf la première. >
2. Obtenez les informations alt de la première image et affichez-les dans la barre d'informations, et ajoutez un événement de clic 3, ajoutez des écouteurs de clic pour les 4 boutons, cliquez sur le bouton correspondant et utilisez les méthodes fadeOut et fadeIn pour afficher l'image 4, définissez setInterval, exécutez régulièrement la fonction de commutation[Description du code]
filter(" :visible") : Obtenez tous les éléments visiblesunbind() : Supprimez l'événement lié de l'élément correspondant siblings : Obtenez un ensemble d'éléments contenant tous les éléments frères et sœurs uniques de chaque élément dans l'élément correspondant ensemble d'éléments【Code source du programme】
Introduisez d'abord le fichier JS : <script src="bootstrap/js/jquery-1.11.2.min.js"></script>
<script src="bootstrap/js/bootstrap.min.js"></script>
<link href="bootstrap/css/bootstrap.min.css" rel="external nofollow" rel="stylesheet" type="text/css"/>Partie HTML :
<p id="banner">
   <ul>
    <li class="on"><a href="">1</a></li>
    <li><a href="">2</a></li>
    <li><a href="">3</a></li>
    <li><a href="">4</a></li>
    <li><a href="">5</a></li>
    <li><a href="">6</a></li>
   </ul>
   <p id="banner_list">
    <a href="#" rel="external nofollow" rel="external nofollow" rel="external nofollow" rel="external nofollow" rel="external nofollow" rel="external nofollow" target="_self"><img src="img/a1.jpg" width="280" height="160" /></a>
    <a href="#" rel="external nofollow" rel="external nofollow" rel="external nofollow" rel="external nofollow" rel="external nofollow" rel="external nofollow" target="_self"><img src="img/a2.jpg" width="280" height="160" /></a>
    <a href="#" rel="external nofollow" rel="external nofollow" rel="external nofollow" rel="external nofollow" rel="external nofollow" rel="external nofollow" target="_self"><img src="img/a3.jpg" width="280" height="160" /></a>
    <a href="#" rel="external nofollow" rel="external nofollow" rel="external nofollow" rel="external nofollow" rel="external nofollow" rel="external nofollow" target="_self"><img src="img/a4.jpg" width="280" height="160" /></a>
    <a href="#" rel="external nofollow" rel="external nofollow" rel="external nofollow" rel="external nofollow" rel="external nofollow" rel="external nofollow" target="_self"><img src="img/a5.jpg" width="280" height="160" /></a>
    <a href="#" rel="external nofollow" rel="external nofollow" rel="external nofollow" rel="external nofollow" rel="external nofollow" rel="external nofollow" target="_self"><img src="img/a6.jpg" width="280" height="160" /></a>
   </p>
  </p>
Partie CSS :
<style type="text/css">
 #banner {position:relative; width:280px; height:160px; border:1px solid #666; overflow:hidden;}
 #banner ul { width:138px; height:18px;position:absolute;list-style-type:none;filter: Alpha(Opacity=80);opacity:0.8;z-index:1002;
    margin:0; padding:0; bottom:3px; right:5px; line-height: 18px; text-align: center;}
 #banner ul li { width: 18px; height: 18px; margin:0px 2px;float:left;display:block;color:#FFF;
           border:#e5eaff 1px solid;background:#6C6D6E;cursor:pointer}
 #banner ul li.on { background:#900}
 #banner ul li a { color: white;}
 #banner ul li a:hover{text-decoration: none;}
 #banner_list a{position:absolute;} <!-- 让六张图片都可以重叠在一起-->
 #banner_list{position:absolute; right: 5px; bottom: 5px;}
 </style>
Partie JS :
Ce qui précède est le contenu détaillé de. pour plus d'informations, suivez d'autres articles connexes sur le site Web de PHP en chinois!
Articles Liés
Voir plus- Une analyse approfondie du composant de groupe de liste Bootstrap
- Explication détaillée du currying de la fonction JavaScript
- Exemple complet de génération de mot de passe JS et de détection de force (avec téléchargement du code source de démonstration)
- Angularjs intègre l'interface utilisateur WeChat (weui)
- Comment basculer rapidement entre le chinois traditionnel et le chinois simplifié avec JavaScript et l'astuce permettant aux sites Web de prendre en charge le basculement entre les compétences en chinois simplifié et traditionnel_javascript

