
Maison >développement back-end >Tutoriel C#.Net >Explication graphique et textuelle détaillée de l'écriture de programmes de service Windows en C#
Explication graphique et textuelle détaillée de l'écriture de programmes de service Windows en C#

- 黄舟original
- 2017-10-05 15:32:214457parcourir
本文介绍了如何用C#创建、安装、启动、监控、卸载简单的Windows Service 的内容步骤和注意事项,需要的朋友可以参考下
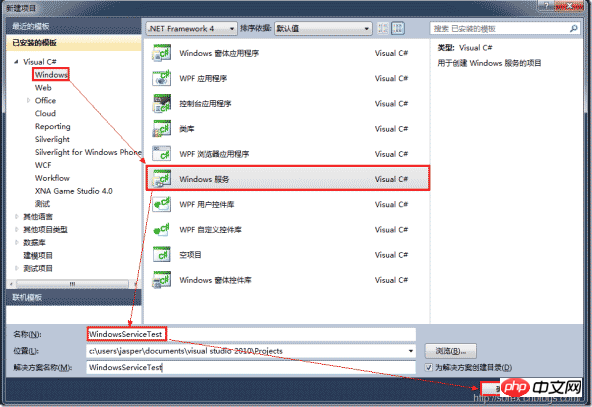
一、创建一个Windows Service
1)创建Windows Service项目
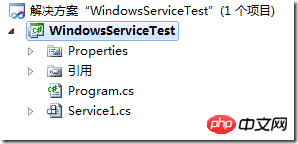
2)对Service重命名
将Service1重命名为你服务名称,这里我们命名为ServiceTest。
二、创建服务安装程序
1)添加安装程序
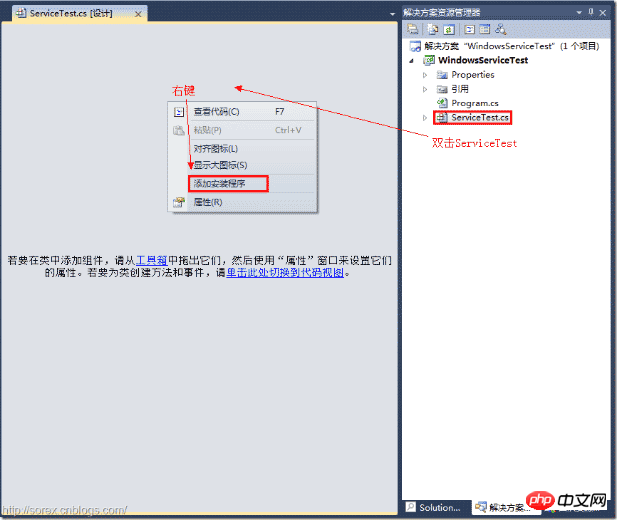
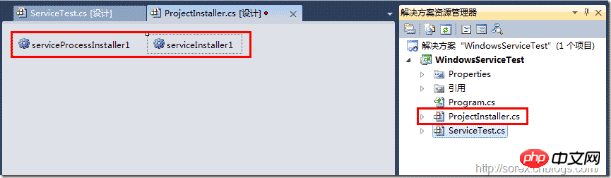
之后我们可以看到上图,自动为我们创建了ProjectInstaller.cs以及2个安装的组件。
2)修改安装服务名
右键serviceInsraller1,选择属性,将ServiceName的值改为ServiceTest。

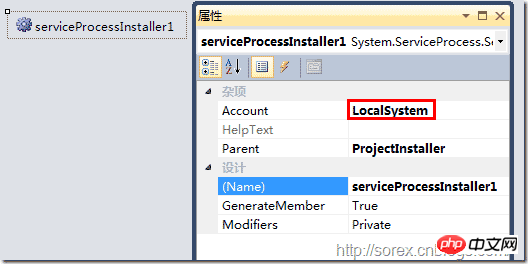
3)修改安装权限
右键serviceProcessInsraller1,选择属性,将Account的值改为LocalSystem。
三、写入服务代码
1)打开ServiceTest代码
右键ServiceTest,选择查看代码。
2)写入Service逻辑
添加如下代码:
using System;
using System.Collections.Generic;
using System.ComponentModel;
using System.Data;
using System.Diagnostics;
using System.Linq;
using System.ServiceProcess;
using System.Text;
namespace WindowsServiceTest
{
	public partial class ServiceTest : ServiceBase
	{
		public ServiceTest()
		{
			InitializeComponent();
		}
		protected override void OnStart(string[] args)
		{
			using (System.IO.StreamWriter sw = new System.IO.StreamWriter("C:\\log.txt", true))
			{
				sw.WriteLine(DateTime.Now.ToString("yyyy-MM-dd HH:mm:ss ") + "Start.");
			}
		}
		protected override void OnStop()
		{
			using (System.IO.StreamWriter sw = new System.IO.StreamWriter("C:\\log.txt", true))
			{
				sw.WriteLine(DateTime.Now.ToString("yyyy-MM-dd HH:mm:ss ") + "Stop.");
			}
		}
	}
}
这里我们的逻辑很简单,启动服务的时候写个日志,关闭的时候再写个日志。
四、创建安装脚本
在项目中添加2个文件如下(必须是ANSI或者UTF-8无BOM格式):
1)安装脚本Install.bat
%SystemRoot%\Microsoft.NET\Framework\v4.0.30319\installutil.exe WindowsServiceTest.exe
Net Start ServiceTest
sc config ServiceTest start= auto
2)卸载脚本Uninstall.bat
%SystemRoot%\Microsoft.NET\Framework\v4.0.30319\installutil.exe /u WindowsServiceTest.exe
3)安装脚本说明
第二行为启动服务。
第三行为设置服务为自动运行。
这2行视服务形式自行选择。
4)脚本调试
如果需要查看脚本运行状况,在脚本最后一行加入pause
五、在C#中对服务进行控制
0)配置目录结构
简历一个新WPF项目,叫WindowsServiceTestUI,添加对System.ServiceProcess的引用。
在WindowsServiceTestUI的bin\Debug目录下建立Service目录。
将WindowsServiceTest的生成目录设置为上面创建的Service目录。
生成后目录结构如下图

1)安装
安装时会产生目录问题,所以安装代码如下:
string CurrentDirectory = System.Environment.CurrentDirectory;
System.Environment.CurrentDirectory = CurrentDirectory + "\\Service";
Process process = new Process();
process.StartInfo.UseShellExecute = false;
process.StartInfo.FileName = "Install.bat";
process.StartInfo.CreateNoWindow = true;
process.Start();
System.Environment.CurrentDirectory = CurrentDirectory;
2)卸载
卸载时也会产生目录问题,所以卸载代码如下:
string CurrentDirectory = System.Environment.CurrentDirectory;

System.Environment.CurrentDirectory = CurrentDirectory + "\\Service";
Process process = new Process();
process.StartInfo.UseShellExecute = false;
process.StartInfo.FileName = "Uninstall.bat";
process.StartInfo.CreateNoWindow = true;
process.Start();
System.Environment.CurrentDirectory = CurrentDirectory;
3)启动
代码如下:
using System.ServiceProcess;
ServiceController serviceController = new ServiceController("ServiceTest");
serviceController.Start();
4)停止
ServiceController serviceController = new ServiceController("ServiceTest");
if (serviceController.CanStop)
serviceController.Stop();
5)暂停/继续
ServiceController serviceController = new ServiceController("ServiceTest");
if (serviceController.CanPauseAndContinue){
if (serviceController.Status == ServiceControllerStatus.Running)
serviceController.Pause();
else if (serviceController.Status == ServiceControllerStatus.Paused)
serviceController.Continue();
}
6)检查状态
ServiceController serviceController = new ServiceController("ServiceTest");
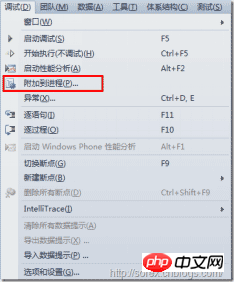
string Status = serviceController.Status.ToString();六、调试Windows Service
1)安装并运行服务
2)附加进程
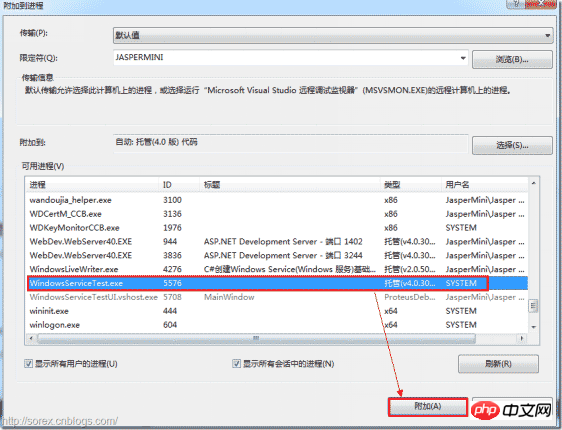
3)在代码中加入断点进行调试

七、总结
本文对Windows service的上述配置都未做详细解释,但是按上述步骤就可以制作可运行的Windows Service,从而达到了工作的需求。
Ce qui précède est le contenu détaillé de. pour plus d'informations, suivez d'autres articles connexes sur le site Web de PHP en chinois!