
Maison >Java >javaDidacticiel >Partager comment se connecter et appeler Rabbitmq à distance en Java ?
Partager comment se connecter et appeler Rabbitmq à distance en Java ?

- 黄舟original
- 2018-05-24 11:51:253219parcourir
Le test d'appel à distance RabbitMQ utilise RabbitMQ sur la machine externe 192.168.174.132. L'appel à distance doit être configuré avant utilisation. Pour le processus de fonctionnement, consultez l'article de blog « Résoudre le problème de l'incapacité d'accès à distance de RabbitMQ ».
SendTest :
package com.mq.rabbitmq.rabbitmqtest;
import java.util.Date;
import com.rabbitmq.client.ConnectionFactory;
import com.rabbitmq.client.Connection;
import com.rabbitmq.client.Channel;
import com.rabbitmq.client.QueueingConsumer;
public class ReceiveTest {
private final static String QUEUE_NAME = "ftpAgent";
private final static String userName = "admin";
private final static String password = "admin";
private final static String virtualHost = "/";
private final static int portNumber = 5672;
private final static String hostName = "master";
private final static String host = "192.168.174.132";
public static void main(String[] argv) throws java.io.IOException,
java.lang.InterruptedException {
ConnectionFactory factory = new ConnectionFactory();
// factory.setHost("192.168.174.160");
factory.setUsername(userName);
factory.setPassword(password);
// factory.setVirtualHost(virtualHost);
factory.setHost(host);
factory.setPort(portNumber);
Connection connection = factory.newConnection();
Channel channel = connection.createChannel();
// channel.queueDeclare(QUEUE_NAME, false, false, false, null);
System.out.println(" [*] Waiting for messages. To exit press CTRL+C");
QueueingConsumer consumer = new QueueingConsumer(channel);
channel.basicConsume(QUEUE_NAME, true, consumer);
Date nowTime = new Date();
while (true) {
QueueingConsumer.Delivery delivery = consumer.nextDelivery();
String message = new String(delivery.getBody());
System.out.println("RecieveTime: " + nowTime);
System.out.println(" [x] Received '" + message + "'");
}
}
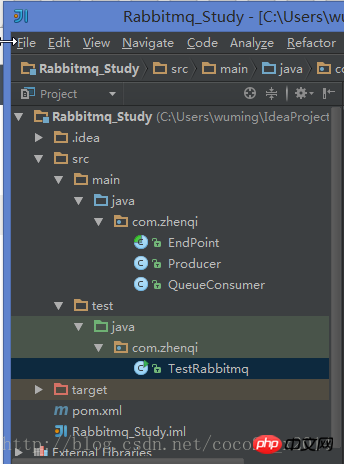
}Ouvrez IDEA pour créer un projet maven (Java fera l'affaire).
Le fichier pom.xml est le suivant
<project xmlns="http://maven.apache.org/POM/4.0.0" xmlns:xsi="http://www.w3.org/2001/XMLSchema-instance"
 xsi:schemaLocation="http://maven.apache.org/POM/4.0.0 http://maven.apache.org/xsd/maven-4.0.0.xsd">
 <modelVersion>4.0.0</modelVersion>

 <groupId>com.zhenqi</groupId>
 <artifactId>rabbitmq-study</artifactId>
 <version>1.0-SNAPSHOT</version>
 <packaging>jar</packaging>

 <name>rabbitmq-study</name>
 <url>http://maven.apache.org</url>

 <properties>
  <project.build.sourceEncoding>UTF-8</project.build.sourceEncoding>
 </properties>

 <dependencies>
  <dependency>
   <groupId>junit</groupId>
   <artifactId>junit</artifactId>
   <version>4.12</version>
   <scope>test</scope>
  </dependency>

  <!-- https://mvnrepository.com/artifact/com.rabbitmq/amqp-client -->
  <dependency>
   <groupId>com.rabbitmq</groupId>
   <artifactId>amqp-client</artifactId>
   <version>4.1.0</version>
   <exclusions>
    <exclusion>
     <groupId>org.slf4j</groupId>
     <artifactId>slf4j-api</artifactId>
    </exclusion>
   </exclusions>
  </dependency>

  <dependency>
   <groupId>org.slf4j</groupId>
   <artifactId>slf4j-log4j12</artifactId>
   <version>1.7.21</version>
  </dependency>

  <dependency>
   <groupId>commons-lang</groupId>
   <artifactId>commons-lang</artifactId>
   <version>2.6</version>
  </dependency>

 </dependencies>
</project>
Pour accéder à Rabbitmq à distance, vous devez éditer /etc /rabbitmq/rabbitmq .conf, ajoutez le contenu suivant.
[
  {rabbit, [{tcp_listeners, [5672]}, {loopback_users, ["asdf"]}]}
 ]
Ajouter un rôle d'administrateur
rabbitmqctl set_user_tags openstack administrator
Créer une file d'attente abstraite EndPoint.java
package com.zhenqi;
import com.rabbitmq.client.Channel;
import com.rabbitmq.client.Connection;
import com.rabbitmq.client.ConnectionFactory;
/**
 * Created by wuming on 2017/7/16.
 */
public abstract class EndPoint {

  protected Channel channel;
  protected Connection connection;
  protected String endPointName;

  public EndPoint(String endpointName) throws Exception {

    this.endPointName = endpointName;

    //创建一个连接工厂 connection factory
    ConnectionFactory factory = new ConnectionFactory();

    //设置rabbitmq-server服务IP地址
    factory.setHost("192.168.146.128");
    factory.setUsername("openstack");
    factory.setPassword("rabbitmq");
    factory.setPort(5672);
    factory.setVirtualHost("/");

    //得到 连接
    connection = factory.newConnection();

    //创建 channel实例
    channel = connection.createChannel();

    channel.queueDeclare(endpointName, false, false, false, null);
  }

  /**
   * 关闭channel和connection。并非必须,因为隐含是自动调用的。
   * @throws IOException
   */
  public void close() throws Exception{
    this.channel.close();
    this.connection.close();
  }
}
Producer Producer.java
La tâche de la classe producteur est d'écrire un message dans la file d'attente
package com.zhenqi;
import org.apache.commons.lang.SerializationUtils;
import java.io.Serializable;
/**
 * Created by wuming on 2017/7/16.
 */
public class Producer extends EndPoint {

  public Producer(String endpointName) throws Exception {
    super(endpointName);
  }

  public void sendMessage(Serializable object) throws Exception {
    channel.basicPublish("",endPointName, null, SerializationUtils.serialize(object));
  }
}
Consumer QueueConsumer.java
Les consommateurs peuvent fonctionner en mode thread et disposer de différentes fonctions de rappel pour différents événements, dont la plus importante est de gérer les événements lorsque de nouveaux messages arrivent.
package com.zhenqi;

import com.rabbitmq.client.AMQP;
import com.rabbitmq.client.Consumer;
import com.rabbitmq.client.Envelope;
import com.rabbitmq.client.ShutdownSignalException;
import org.apache.commons.lang.SerializationUtils;
import org.apache.log4j.Logger;
import java.io.IOException;
import java.util.HashMap;
import java.util.Map;
/**
 * Created by wuming on 2017/7/16.
 */
public class QueueConsumer extends EndPoint implements Runnable, Consumer {

  private Logger LOG=Logger.getLogger(QueueConsumer.class);

  public QueueConsumer(String endpointName) throws Exception {
    super(endpointName);
  }

  public void handleConsumeOk(String s) {

  }

  public void handleCancelOk(String s) {

  }

  public void handleCancel(String s) throws IOException {

  }

  public void handleShutdownSignal(String s, ShutdownSignalException e) {

  }

  public void handleRecoverOk(String s) {
    LOG.info("Consumer "+s +" registered");
  }

  public void handleDelivery(String s, Envelope envelope, AMQP.BasicProperties basicProperties, byte[] bytes) throws IOException {
    Map map = (HashMap) SerializationUtils.deserialize(bytes);
    LOG.info("Message Number "+ map.get("message number") + " received.");
  }

  public void run() {
    try{
      channel.basicConsume(endPointName, true,this);
    }catch(IOException e){
      e.printStackTrace();
    }
  }
}
Testez
Lancez un fil de discussion consommateur puis commencez à générer un grand nombre de messages, qui seront emportés par le consommateur
package com.zhenqi;

import java.util.HashMap;

/**
 * Created by wuming on 2017/7/16.
 */
public class TestRabbitmq {

  public static void main(String[] args){
    try{
      QueueConsumer consumer = new QueueConsumer("queue");
      Thread consumerThread = new Thread(consumer);
      consumerThread.start();

      Producer producer = new Producer("queue");

      for (int i = 0; i < 100000; i++){
        HashMap message = new HashMap();
        message.put("message number", i);
        producer.sendMessage(message);
        System.out.println("Message Number "+ i +" sent.");
      }
    }catch(Exception e){
      e.printStackTrace();
    }

  }
}
Ce qui précède est le contenu détaillé de. pour plus d'informations, suivez d'autres articles connexes sur le site Web de PHP en chinois!