
Maison >développement back-end >tutoriel php >authentification de connexion utilisateur orientée objet php
authentification de connexion utilisateur orientée objet php

- 陈政宽~original
- 2017-06-28 13:35:411741parcourir
Cet article présente principalement en détail la Connexion utilisateur orientée objet PHP . Les amis intéressés peuvent s'y référer
. L'exemple de cet article partage le code spécifique pour l'authentification de connexion utilisateur PHP pour votre référence. Le contenu spécifique est le suivant1 Code
<?php
$conn = new com("adodb.connection");
$connstr="driver={microsoft access driver (*.mdb)}; dbq=". realpath("data/db_database07_188.mdb");
$conn->open($connstr);
?>index.php<!DOCTYPE html PUBLIC "-//W3C//DTD XHTML 1.0 Transitional//EN" "http://www.w3.org/TR/xhtml1/DTD/xhtml1-transitional.dtd">
<html xmlns="http://www.w3.org/1999/xhtml">
<head>
<meta http-equiv="Content-Type" content="text/html; charset=gb2312" />
<title>用户身份验证</title>
<link rel="stylesheet" type="text/css" href="css/style.css" rel="external nofollow" >
<style type="text/css">
<!--
.STYLE1 {color: #FFFFFF}
-->
</style>
</head>
<body>
<table width="250" border="0" align="center" cellpadding="1" cellspacing="0">
<tr>
<td height="75" bgcolor="#0099CC"><table width="250" height="75" border="0" cellpadding="0" cellspacing="1">
<form name="form1" method="post" action="index.php">
<tr>
<td height="25" colspan="2" bgcolor="#0099CC"><p align="center" class="STYLE1">用户身份验证</p></td>
</tr>
<tr>
<td width="60" height="25" bgcolor="#FFFFFF"><p align="center">用户名:</p></td>
<td width="187" bgcolor="#FFFFFF"><p align="left"> <input type="text" name="username" size="22" class="inputcss"></p></td>
</tr>
<tr>
<td height="25" bgcolor="#FFFFFF"><p align="center">密码:</p></td>
<td height="25" bgcolor="#FFFFFF"><p align="left"> <input type="password" name="userpwd" size="22" class="inputcss"></p></td>
</tr>
<tr>
<td height="25" colspan="2" bgcolor="#FFFFFF"><p align="center"><input name="submit" type="submit" value="登录" class="buttoncss"></p></td>
</tr>
</form>
</table></td>
</tr>
</table>
<?php
if($_POST[submit]!="")
{
$username=$_POST[username]; //接收提交的用户名
$userpwd=$_POST[userpwd]; //接收提交的密码
if(trim($username)==""||trim($userpwd)=="")
{
echo "<script>alert('请输入用户名或用户密码!');history.back();</script>";
exit;
}
class chk //定义密码验证类
{
private $name; //定义用户名属性
private $pwd; //定义密码属性
public function construct($x,$y) //构造函数,对类的属性初始化
{
$this->name=$x;
$this->pwd=$y;
}
public function chkuser() //验证用户身份
{
include_once("conn.php");
$rs=new com("adodb.recordset"); //创建记录集对象
$rs->open("select * from tb_user where username='".$this->name."' and userpwd='".$this->pwd."'",$conn,3,1);
if($rs->eof || $rs->bof)
{
echo "<script>alert('对不起,密码或用户名错误!');history.back();</script>";
exit;
}
else
{
echo "<script>alert('恭喜您登录成功!');history.back();</script>";
exit;
}
}
}
$chk1=new chk($username,$userpwd); //对密码验证类进行实例化
$chk1->chkuser(); //调用chkuser()方法验证用户身份
}
?>
</body>
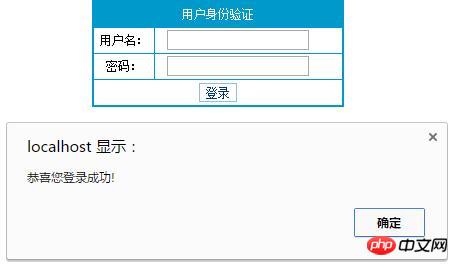
</html>2 Résultats en cours d'exécution
Ce qui précède est le contenu détaillé de. pour plus d'informations, suivez d'autres articles connexes sur le site Web de PHP en chinois!
Déclaration:
Le contenu de cet article est volontairement contribué par les internautes et les droits d'auteur appartiennent à l'auteur original. Ce site n'assume aucune responsabilité légale correspondante. Si vous trouvez un contenu suspecté de plagiat ou de contrefaçon, veuillez contacter admin@php.cn
Article précédent:Comment déterminer si des fonctions, des classes et des méthodes de classe existent en PHPArticle suivant:Comment déterminer si des fonctions, des classes et des méthodes de classe existent en PHP
Articles Liés
Voir plus- Comment utiliser cURL pour implémenter les requêtes Get et Post en PHP
- Comment utiliser cURL pour implémenter les requêtes Get et Post en PHP
- Comment utiliser cURL pour implémenter les requêtes Get et Post en PHP
- Comment utiliser cURL pour implémenter les requêtes Get et Post en PHP
- Tous les symboles d'expression dans les expressions régulières (résumé)