
Maison >interface Web >js tutoriel >Défilement infini sans effort : comment implémenter le chargement paresseux avec Intersection Observer
Défilement infini sans effort : comment implémenter le chargement paresseux avec Intersection Observer

- 王林original
- 2024-08-26 21:34:06862parcourir
Comment pouvons-nous détecter efficacement et facilement quand des éléments d'une page Web deviennent visibles ou masqués, sans ralentir la page ni écrire de code complexe pour gérer les événements de défilement et les calculs de visibilité, en particulier dans des cas tels que le chargement d'images uniquement lorsque cela est nécessaire (paresseux- chargement), créer des défilements infinis ou déclencher des animations lorsque du contenu apparaît ?
Introduction
En tant que développeurs, nous souhaitons souvent charger du contenu comme des images ou de nouveaux articles, uniquement lorsqu'il est visible sur l'écran de l'utilisateur afin d'économiser de la bande passante et d'améliorer les temps de chargement des pages. Cependant, cela peut être délicat car il est nécessaire de savoir exactement quand ces éléments apparaissent lorsque l'utilisateur fait défiler la page Web.
Méthode traditionnelle d'ajout d'EventListener sur les événements de défilement
Traditionnellement, cela nécessite la configuration d'écouteurs d'événements de défilement et le calcul manuel des positions des éléments, ce qui peut entraîner des performances lentes et maladroites, en particulier sur les pages avec beaucoup de contenu ou sur les appareils avec une puissance de traitement limitée.
// Function to fetch data from an API
function fetchData() {
  console.log('Fetching more data...');

  // Simulate an API request using fetch
  fetch('https://jsonplaceholder.typicode.com/posts?_limit=5&_page=1')
    .then(response => response.json())
    .then(data => {
      // Display the fetched data on the page
      })
    .catch(error => console.error('Error fetching data:', error));
}

// Function to check if the user is near the bottom of the page
function checkScrollPosition() {
  const scrollPosition = window.innerHeight + window.scrollY;
  const threshold = document.body.offsetHeight - 100;

  if (scrollPosition >= threshold) {
    fetchData();
  }
}

// Add the scroll event listener to the window object
window.addEventListener('scroll', checkScrollPosition);

// Initial call to load some data when the page first loads
fetchData();
L'écouteur d'événements ajouté peut sembler simple, mais vous remarquerez les problèmes qui l'accompagnent lorsque vous travaillez sur une page contenant beaucoup de données. L'écouteur d'événements est conçu pour se déclencher plusieurs fois par seconde afin d'écouter les événements. Bien que cela fonctionne, il affecte les performances de la page car JavaScript est un langage de programmation à thread unique. De plus, pour obtenir le même effet que l'observateur d'intersection peut produire, le développeur doit prendre note des dimensions de la fenêtre d'affichage et ajouter des calculs qui seront effectués régulièrement, affectant toujours les performances.
Le défi est de détecter les changements de visibilité sans écrire de code complexe ni provoquer de décalage de page. Pour résoudre ce problème, il faut un moyen plus efficace de surveiller la visibilité qui ne ralentisse pas le navigateur avec des vérifications et des calculs constants. C'est là qu'intervient l'API Intersection Observer, offrant une solution plus simple et plus performante à ces défis de détection de visibilité.
L'API Intersection Observer est un outil puissant de développement Web qui résout ce défi. Cet outil simplifie la détection lorsque des éléments d'une page Web entrent ou sortent de la zone visible (fenêtre d'affichage Windows) sans calculs complexes.
Au lieu de vérifications constantes des événements de défilement, qui peuvent affecter les performances de la fonctionnalité de thread CPU unique de JavaScript, l'API permet au navigateur de gérer automatiquement la détection de visibilité, permettant une implémentation plus fluide de fonctionnalités telles que le chargement paresseux des images, le défilement infini, les animations déclenchées par élément. visibilité et reporting de la visibilité des publicités Web pour calculer les revenus publicitaires. En déchargeant ces tâches sur le navigateur, l'API Intersection Observer permet de maintenir les pages rapides et efficaces, en particulier sur les sites complexes ou riches en contenu. De plus, l'API Intersection Observer est compatible avec tous les navigateurs, ce qui en fait une solution idéale pour suivre les événements de défilement sans aucun compromis.
Objectifs
À la fin de cet article, vous :
- Savoir comment utiliser l'API Intersection Observer pour vérifier quand un élément apparaît.
- Comprendre les termes et la syntaxe de l'API Intersection Observer.
- Découvrez comment récupérer des données à partir d'une API lorsque cet élément est visible.
- Être capable d'analyser les données JSON et de les ajouter à votre structure HTML.
Cet article vous montrera comment utiliser l'API Intersection Observer et la fonction fetch() de JavaScript pour obtenir des données et mettre à jour votre page avec celles-ci. Nous passerons en revue les étapes permettant de créer une expérience Web à la fois efficace et engageante. Commençons !
Comprendre l'API, les concepts et l'utilisation d'Intersection Observer
Observateur d'intersection
L'Intersection Observer garde généralement une trace du moment où une pièce particulière apparaît à l'écran. Il détermine si l'élément remplit la fenêtre ou la partie déroulante de l'écran. Vous devez définir l'option racine de l'observateur sur null pour voir les changements de visibilité sur l'ensemble de l'écran. Cela permet de garder une trace des éléments lorsqu'ils défilent.
Bien que le mot « racine » puisse vous sembler inconnu, vous comprendrez pourquoi en poursuivant votre lecture ?.
L'API fonctionne de la même manière, que vous utilisiez la fenêtre ou un autre élément comme racine ; il appelle une fonction de rappel que vous fournissez chaque fois que la visibilité de l'élément cible varie jusqu'au point où il passe le degré d'intersection approprié avec la racine.
Le degré d'intersection entre l'élément cible et sa racine est le rapport d'intersection. Il s'agit d'une représentation du pourcentage de l'élément cible qui est visible sous la forme d'une valeur comprise entre 0,0 et 1,0.
Creating an intersection observer
To create the intersection observer, you'll call its constructor and pass an option object for behaviour and a callback function to be invoked whenever a threshold is crossed in one direction or the other:
let options = {
  root: document.querySelector("#ObservableArea"),
  rootMargin: "0px",
  threshold: 1.0,
};

let observer = new IntersectionObserver(callback, options);

//A threshold of 1.0 means that when 100% of the target is visible within the element specified by the root option, the callback is invoked.
Intersection observer options object
The options object passed into the IntersectionObserver() constructor lets you control the trigger and behaviour of the observer's callback to be invoked. The Options object contains the following keys:
root:
The element that is used as the viewport for checking the visibility of the target. It must be a scrollable container or ancestor of the target. Intersection Observer defaults to the browser viewport if not specified or if null.
rootMargin:
Margin around the root. Can have values similar to the CSS margin property, e.g. "10px 20px 30px 40px" (top, right, bottom, left). The values can be percentages. This set of values serves to grow or shrink each side of the root element's bounding box before computing intersections. Defaults to all zeros.
threshold:
The observer's callback should be executed at a specific % of the target's visibility, indicated by a single or array of numbers. Use a value of 0.5 if you wish to detect only when visibility rises above 50%. To ensure that the callback is executed each time visibility increases by 25%, you can supply the array [0, 0.25, 0.5, 0.75, 1]. The default is 0, which means that the callback will be executed as soon as even a single pixel is displayed. If the value is 1.0, then all pixels must be visible for the threshold to be deemed passed.
Observing a target element
After creating the observer, you need a target element to be observed.
let target = document.querySelector("#target");
observer.observe(target);

// the callback we set up for the observer will be executed now for the first time
// it waits until we assign a target to our observer (even if the target is currently not visible)
Whenever the target meets a threshold specified for the IntersectionObserver, the callback is invoked. The callback receives a list of IntersectionObserverEntry objects and the observer:
let callback = (entries, observer) => {
  entries.forEach((entry) => {
    // Each entry describes an intersection change for one observed
    // target element:
    //   entry.boundingClientRect
    //   entry.intersectionRatio
    //   entry.intersectionRect
    //   entry.isIntersecting
    //   entry.rootBounds
    //   entry.target
    //   entry.time
  });
};
The list of entries received by the callback includes one entry for each target which reported a change in its intersection status. Check the value of the isIntersecting property to see if the entry represents an element that currently intersects with the root.
N/B!
Be aware that your callback is executed on the main thread. It should operate as quickly as possible; if anything time-consuming needs to be done, use Window.requestIdleCallback().
Also, note that if you specified the root option, the target must be a descendant of the root element.
Project Setup
Now you've got the full gist about intersection observer, I'm excited to get started with the project ?.
In setting up this project, Microsoft Visual Studio Code (VS Code) was used but if you have another text editor or IDE you love, feel free to use that, we won’t judge! ?
However, the steps and procedure to follow are easy, and setting up your project is as easy as taking candy from a baby; that challenge required almost no effort at all. By the end, you'll be able to track when elements appear or disappear on your screen.
You’ll just need three files to get started:
- index.html
- styles.css
- script.js
The simplicity of this setup is intentional, as it is designed for beginners. But don't worry—once you’re comfortable, you can use the Intersection Observer in more complex projects utilizing frameworks like React or Vue.
Create a Project Directory:
If you're using a Linux or Mac machine copy and paste the code below to your terminal/shell.
#create a directory and enter the
mkdir project && cd project

#create the files and open VS code
touch index.html script.js styles.css

#open the current directory on VS Code
code .
On Windows, just open VS code on your device, press Ctrl+Shift+N to create a new window, then click on open Folder at the start tab, when the File Explorer opens, create a new folder then click on the new folder and select it. If you don't see the explorer in VS code press Ctrl+Shift+E to open the explorer then click on Create a new file. Give the files any name you want but for the sake of the article I used index.html, style.css and script.js.
- index.html
After creating your index.html, make sure it looks like the file below
<!DOCTYPE html>
<html lang="en">
<head>
    <meta charset="UTF-8">
    <meta name="viewport" content="width=device-width, initial-scale=1.0">
    <title>Movie List with Infinite Scrolling</title>
   <link rel="stylesheet" href="style.css">
</head>
<body>
    <input type="text" value="" placeholder="enter movie title to search" id="searchInput">
    <button id="search">Search</button>
    <div class="movie-container" id="movieContainer"></div>
    <div id="loading">Loading...</div>

    <script src="script.js"></script>
</body>
</html>
- styles.css
Just follow along with the code below:
body {
    font-family: Arial, sans-serif;
    margin: 0;
    padding: 0;
    display: flex;
    justify-content: center;
    align-items: center;
    flex-direction: column;
}
.movie-container {
    width: 80%;
    max-width: 800px;
    margin-top: 20px;
}
.movie-item {
    display: flex;
    border: 1px solid #ddd;
    margin-bottom: 10px;
    padding: 10px;
    border-radius: 5px;
    background-color: #f9f9f9;
}
.movie-item img {
    max-width: 100px;
    margin-right: 20px;
}
.movie-info {
    display: flex;
    flex-direction: column;
}
.movie-info h3 {
    margin: 0;
    margin-bottom: 10px;
}
.movie-info p {
    margin: 0;
}
#loading {
    text-align: center;
    margin-top: 20px;
    display: none;
}
- script.js
const movieContainer = document.getElementById('movieContainer');
const loading = document.getElementById('loading');
const search = document.getElementById('search');
const searchInput = document.getElementById('searchInput');
let currentPage = 1;
let observer;

const API_KEY = '3676363636'; // Replace with a real API key

async function fetchMovies(query, page) {
    loading.style.display = 'block';

    const API_URL = `http://www.omdbapi.com/?s=${query}&apikey=${API_KEY}&page=${page}`;
    const response = await fetch(API_URL);
    const {Search} = await response.json();

    loading.style.display = 'none';

    displayMovies(Search); // Assuming the API returns an array of movies
}

function displayMovies(movies) {
    movies.forEach(movie => {
        const movieItem = document.createElement('div');
        movieItem.classList.add('movie-item');

        movieItem.innerHTML = `
            <img src="${movie.Poster}" alt="${movie.Title}">
            <div class="movie-info">
                <h3>${movie.Title}</h3>
                <p><strong>imdbID:</strong> ${movie.imdbID}</p>
                <p><strong>Year:</strong> ${movie.Year}</p>
            </div>
        `;

        movieContainer.appendChild(movieItem);
    });

    // Reattach the observer to the last movie item
    if (observer) observer.disconnect();
    const lastMovieItem = document.querySelector('.movie-item:last-child');
    if (lastMovieItem) observer.observe(lastMovieItem);
}

// Set up the Intersection Observer
observer = new IntersectionObserver(entries => {
    if (entries[0].isIntersecting) {
        currentPage++;
        const query = searchInput.value.trim();
        if (query) {
            fetchMovies(query, currentPage);
        }
    }
}, { threshold: 1 });

search.addEventListener('click', () => {
    currentPage = 1; // Reset to the first page on new search
    movieContainer.innerHTML = ''; // Clear previous results
    const query = searchInput.value.trim();
    if (query) {
        fetchMovies(query, currentPage);
    }
});
Code Explanation
The index.html is a simple HTML with a head, body, an input to get a query from the user, and a button that the user clicks to fire an action, this action is taken over by the script tag, which calls a function appending the users' query to be fetched by the OMDB API. I used OMDB just for simplicity and illustration, but like I said before, the project structure isn't rigid so readers can choose any method preferred by them.
The style.css contains simple classes for styling the fetched data after being parsed by the script tag. I would not go into details of the styles file as this is not the reason for the article, but developers can always check out w3schools for more tutorials on CSS.
The script.js file is the holy grail of the whole read, for beginners, I'll break the contents of this file into small explainable chunks.
Variable Definition and Elements Selection:
const movieContainer = document.getElementById('movieContainer');
const loading = document.getElementById('loading');
const search = document.getElementById('search');
const searchInput = document.getElementById('searchInput');
let currentPage = 1;
let observer;

const API_KEY = '3676363636'; // Replace with your real API key
The above code first selects the elements in the index.html and also creates some local variables that will be used in the script.
The currentPage variable is like a page state in the application, that increases as the observer detects an intersection, it is used for querying the OMDB API. The observer variable is defined using the let keyword to be assigned to the IntersectionObserver() constructor function in the later part of the script.
Fetching and Parsing Fetched Data:
async function fetchMovies(query, page) {
    loading.style.display = 'block';

    const API_URL = `http://www.omdbapi.com/?s=${query}&apikey=${API_KEY}&page=${page}`;
    const response = await fetch(API_URL);
    const {Search} = await response.json();

    loading.style.display = 'none';

    displayMovies(Search); // Assuming the API returns an array of movies
}

function displayMovies(movies) {
    movies.forEach(movie => {
        const movieItem = document.createElement('div');
        movieItem.classList.add('movie-item');

        movieItem.innerHTML = `
            <img src="${movie.Poster}" alt="${movie.Title}">
            <div class="movie-info">
                <h3>${movie.Title}</h3>
                <p><strong>imdbID:</strong> ${movie.imdbID}</p>
                <p><strong>Year:</strong> ${movie.Year}</p>
            </div>
        `;

        movieContainer.appendChild(movieItem);
    });

    //observer code here
}
In the code above, the fetchMovies() function contains the query and page parameters, first, the loading element in the HTML is made visible with the display=block, and then API_URL is a variable that holds the preferred API service in string format.
Depending on the API you want to use, some of them offer their services to registered users only. For services like OMDB you have to create an account with them where you'll be given a key upon completion of the registration. That key will be used in the API_URL string. OMDB API sends an array of movies containing 10 items only, the page variable is used to query the API to send the next 10 items after viewing the previous ones. If you noticed I interpolated the string using ${} where I added the query from the user input and also my key from the OMDB movie Service.
const API_URL = `http://www.omdbapi.com/?s=${query}&apikey=${API_KEY}&page=${page}`;
The response variable awaits the response after fetching the API_URL, the data variable parses the response to JSON format using the .json() method on the response variable.
Once the data is fetched the display of the loading element is set to none to hide the loading element.
After that, the displayMovies is called with the destructured Search from the returned JSON. The work of the display function is to accept an array of movies in JSON format and parse each movie to an HTML template containing the movie poster and details of each movie in the array.
// Reattach the observer to the last movie item
    if (observer) observer.disconnect();
    const lastMovieItem = document.querySelector('.movie-item:last-child');
    if (lastMovieItem) observer.observe(lastMovieItem);
This code is attached to the displayMovies() function, I'm explaining it separately for adept understanding. In the above code, the observer is disconnected from the last-item queried and attached to the current last-item. This is to ensure the observer is up-to-date at each instance of observing.
// Set up the Intersection Observer
observer = new IntersectionObserver(entries => {
    if (entries[0].isIntersecting) {
        currentPage++;
        const query = searchInput.value.trim();
        if (query) {
            fetchMovies(query, currentPage);
        }
    }
}, { threshold: 1 });
This is where the IntersectionObserver constructor function is defined. This function continues the query with the current page after the user initially fires the click event. This enables the application to fetch movie items when they need to be seen in the view-port rather than clogging the application with data, that the user may not even reach before finding the information they are looking for in this case a movie.
search.addEventListener('click', () => {
    currentPage = 1; // Reset to the first page on the new search
    movieContainer.innerHTML = ''; // Clear previous results
    const query = searchInput.value.trim();
    if (query) {
        fetchMovies(query, currentPage);
    }
});
This last code is a simple code that adds an event listener to listen for the click event on the search button element. This is like the entry point of the application, as the user enters input in the search box and clicks on the search button, the function attached to the event listener function is invoked. First, it resets the current page to 1, then clears the parsed data from the previous query. Lastly, it fetches the new query with its current page as 1. The intersection observer continues the fetching queries from the API_URL, after reaching the last-item of the parsed HTML from the Search data returned in the query.
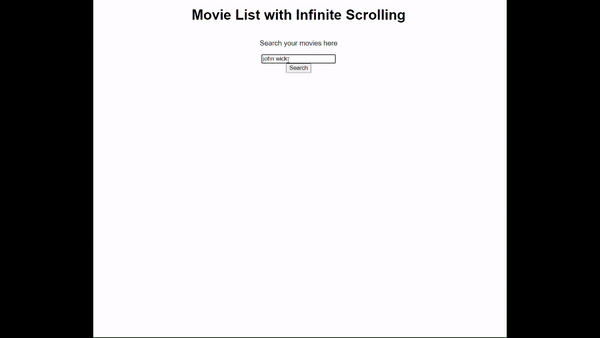
The GIF above shows how the application works, and how the data are fetched when the user scrolls to the last movie item, this is performed by the Intersection Observer calling the fetch function after the user has queried the API.
Conclusion
Le projet montre comment utiliser Intersection Observer pour observer l'élément enfant ou cible par l'élément parent. L'observateur est comme un œil placé sur une boîte avec une boîte plus petite, maintenant, lorsque la plus petite boîte apparaît (se croise), une fonction est invoquée. Dans cet article, la fonction invoquée continue de récupérer une requête par l'utilisateur en ajoutant la page actuelle jusqu'à la fin des données récupérées et analysées dans le tableau.
La raison pour laquelle l'observateur est d'observer le dernier élément avant de le récupérer à nouveau depuis l'API_URL, cette méthode de chargement paresseux des données et de l'image de l'affiche réduit le gaspillage de bande passante, augmente le temps de chargement de la page et, plus important encore, affiche le l'utilisateur uniquement ce qu'il souhaite demander. Par exemple, un utilisateur interroge "John Wick", mais l'idée est d'obtenir "John Wick Parabellum" avant que la page n'affiche tous les films de John Wick, l'utilisateur doit avoir découvert le film souhaité avant la recherche.
Par rapport à l'écouteur d'événements de défilement, l'API Intersection Observer est plus efficace et plus facile à utiliser. En effet, contrairement aux écouteurs d'événements de défilement, qui se déclenchent constamment lorsque vous faites défiler et peuvent ralentir votre page, Intersection Observer ne vérifie la visibilité des éléments que lorsque cela est nécessaire, améliorant ainsi les performances. Il gère automatiquement le moment où les éléments apparaissent, ce qui rend les tâches telles que le chargement paresseux d'images, le déclenchement d'animations et le défilement infini beaucoup plus simples et plus rapides à mettre en œuvre. Vous n'avez pas à vous soucier d'astuces de codage supplémentaires pour gérer les mises à jour fréquentes, et cela fonctionne de manière cohérente sur différents navigateurs.
Ce qui précède est le contenu détaillé de. pour plus d'informations, suivez d'autres articles connexes sur le site Web de PHP en chinois!
Articles Liés
Voir plus- Une analyse approfondie du composant de groupe de liste Bootstrap
- Explication détaillée du currying de la fonction JavaScript
- Exemple complet de génération de mot de passe JS et de détection de force (avec téléchargement du code source de démonstration)
- Angularjs intègre l'interface utilisateur WeChat (weui)
- Comment basculer rapidement entre le chinois traditionnel et le chinois simplifié avec JavaScript et l'astuce permettant aux sites Web de prendre en charge le basculement entre les compétences en chinois simplifié et traditionnel_javascript