This tutorial shows you how to install LEMP stack in Ubuntu 13.10. LEMP stands for Linux , Nginx (pronounced “engine x”), MySQL and PHP . The nginx project started with a strong focus on high concurrency, high performance and low memory
This tutorial shows you how to install LEMP stack in Ubuntu 13.10. LEMP stands for Linux, Nginx (pronounced “engine x”), MySQL and PHP. The nginx project started with a strong focus on high concurrency, high performance and low memory usage. So it’s a good alternative to Apache webserver for building websites on low memory hosts.
Tutorial Objectives:
- Install Nginx, Php5, MySQL (LEMP) in Ubuntu 13.10 Server
- Enjoy!
To get started, first login your Ubuntu Server and follow the steps below:
1. Intall MySQL
MySQL is a database management system which stores and organizes references to the information the webserver needs.
To install it, run command:
sudo apt-get install mysql-server mysql-client
While the installing process, you’ll be asked to type a password for MySQL root user.
2. Install Nginx
Nginx is available in Ubuntu’s repository, run command below to install it:
sudo apt-get install nginx
Or you can install the latest stable version from Nginx PPA:
sudo apt-get install python-software-properties

sudo add-apt-repository ppa:nginx/stable

sudo apt-get update

sudo apt-get install nginx
Once installed, start Nginx by:
sudo service nginx start
To check out if nginx is working, go to http://serverip:

nginx is working ubuntu 13.10
3. Install PHP5
PHP is a reflective programming language, which makes it possible for all these different parts to work together.
We can make PHP5 work in nginx through PHP-FPM, which is an alternative PHP FastCGI implementation with some additional features useful for sites of any size, especially busier sites.
Run command below to install php5-fpm:
sudo apt-get install php5-fpm
4. Setup Nginx
The nginx configuration is in /etc/nginx/nginx.conf, read this configuration example.
Now, let’s modify the default site example:
sudo vi /etc/nginx/sites-available/default
Here you can define root directory (to put WordPress files there), your site domain, as well as other settings. See the example below:
server {
	listen 80 default_server;
	listen [::]:80 default_server ipv6only=on;

	root /usr/share/nginx/html;
	index index.php index.html index.htm;

	# Make site accessible from http://localhost/
	server_name localhost;

	location / {

		try_files $uri $uri/ /index.php;

	}

	location /doc/ {
		alias /usr/share/doc/;
		autoindex on;
		allow 127.0.0.1;
		allow ::1;
		deny all;
	}

	#
	error_page 500 502 503 504 /50x.html;
	location = /50x.html {
		root /usr/share/nginx/html;
	}

	location ~ \.php$ {

		# With php5-fpm:
                try_files $uri =404;
		fastcgi_pass unix:/var/run/php5-fpm.sock;
		fastcgi_index index.php;
		include fastcgi_params;
	}

	# deny access to .htaccess files, if Apache's document root
	# concurs with nginx's one
	#
	location ~ /\.ht {
		deny all;
	}
}
After that, reload Nginx:
sudo service nginx reload
4. Check out if PHP is working
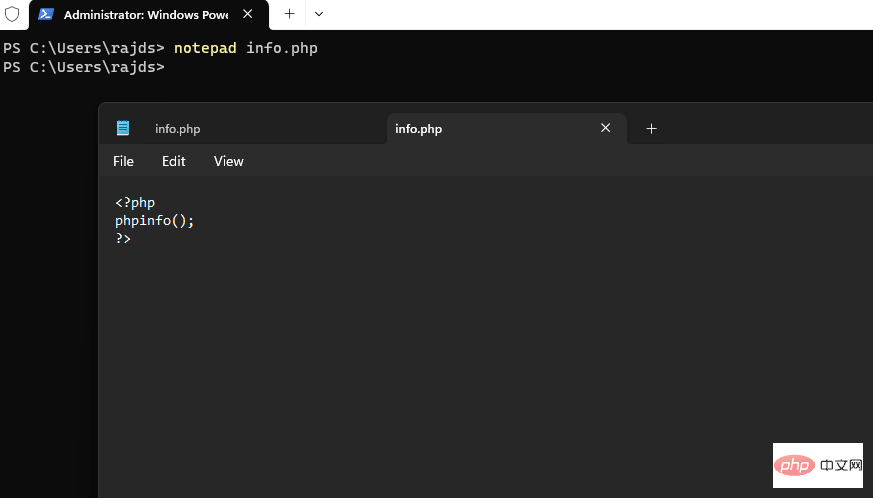
Create the test file:
sudo vi /usr/share/nginx/html/info.php
Add following lines and save the file:
<?php phpinfo();
?>
Go to http://serverip/info.php in client’s web browser and you’ll see:

php is working
5. Get MySQL working with PHP
Install Xcache, a free and open PHP opcode cacher for caching and optimizing PHP intermediate code, as well as other PHP modules:
sudo apt-get install php5-mysql php5-curl php5-gd php5-intl php-pear php5-imagick php5-imap php5-mcrypt php5-memcache php5-ming php5-ps php5-pspell php5-recode php5-snmp php5-sqlite php5-tidy php5-xmlrpc php5-xsl php5-xcache
Then restart php5:
sudo service php5-fpm restart
Now reload http://serverip/info.php page and scroll down to find out if there’s a div about MySQL:

mysql is working with php
Now your LEMP server is up and running, see how to install wordpress on Ubuntu 13.10
确实好文,感谢原作者。
 在 Mac 上创建 Windows 11 USB 安装程序的 3 种简单方法May 13, 2023 pm 09:43 PM
Windows11引入了丰富的新功能以及全面改进的外观,更加强调统一性和效率。因此,今天的主题是如何在Mac上创建Windows11USB安装程序。执行Windows11的全新安装而不是升级,是在获取操作系统时产生最佳结果的方法。使用可在Windows11中启动的驱动器,您可以执行此任务。如果您使用的是WindowsPC,则为Windows11制作可引导CD是一个非常简单的过程。另一方面,如果您使用的是Mac,则该过程会稍微复杂一些。这篇文章将描述如何在不使用基
 内存飙升!记一次nginx拦截爬虫Mar 30, 2023 pm 04:35 PM
本篇文章给大家带来了关于nginx的相关知识,其中主要介绍了nginx拦截爬虫相关的,感兴趣的朋友下面一起来看一下吧,希望对大家有帮助。
 nginx限流模块源码分析May 11, 2023 pm 06:16 PM
高并发系统有三把利器:缓存、降级和限流;限流的目的是通过对并发访问/请求进行限速来保护系统,一旦达到限制速率则可以拒绝服务(定向到错误页)、排队等待(秒杀)、降级(返回兜底数据或默认数据);高并发系统常见的限流有:限制总并发数(数据库连接池)、限制瞬时并发数(如nginx的limit_conn模块,用来限制瞬时并发连接数)、限制时间窗口内的平均速率(nginx的limit_req模块,用来限制每秒的平均速率);另外还可以根据网络连接数、网络流量、cpu或内存负载等来限流。1.限流算法最简单粗暴的
 如何在 Windows 10 上使用命令提示符安装 PHPMay 08, 2023 pm 05:13 PM
使用命令提示符或PowerShell在Windows上安装PHP安装ChocolateyChoco包管理器我尝试了Windows默认包管理器Winget,但无法通过它安装PHP。因此,剩下的另一个最佳选择是使用流行的Chocolatey包管理器。但与Winget不同的是,Choco默认情况下不存在于我们的Windows系统中,因此我们需要在我们的系统上手动安装它。转到您的Windows10或11搜索框并键入CMD,出现时选择“以管理员身份运行”将给定的命令复制
 nginx+rsync+inotify怎么配置实现负载均衡May 11, 2023 pm 03:37 PM
实验环境前端nginx:ip192.168.6.242,对后端的wordpress网站做反向代理实现复杂均衡后端nginx:ip192.168.6.36,192.168.6.205都部署wordpress,并使用相同的数据库1、在后端的两个wordpress上配置rsync+inotify,两服务器都开启rsync服务,并且通过inotify分别向对方同步数据下面配置192.168.6.205这台服务器vim/etc/rsyncd.confuid=nginxgid=nginxport=873ho
 nginx php403错误怎么解决Nov 23, 2022 am 09:59 AM
nginx php403错误的解决办法:1、修改文件权限或开启selinux;2、修改php-fpm.conf,加入需要的文件扩展名;3、修改php.ini内容为“cgi.fix_pathinfo = 0”;4、重启php-fpm即可。
 如何在新的 SSD 上安装 macOSApr 13, 2023 pm 04:01 PM
如何使用 macOS Recovery 在新的 SSD 上安装 macOS在 2009 年之后生产的任何 Mac 上,都有一个内置的恢复系统。这允许您将 Mac 启动到恢复模式。在此模式下,您可以修复内部磁盘、从 Time Machine 备份恢复文件、获取在线帮助或重新安装 macOS。您必须能够连接到互联网才能使用这些工具。您可以使用 macOS 安装工具在计算机中安装的新 SSD 上安装 macOS。要使用 Internet Recovery 在 SSD 上安装 macOS:按照制造商针对
 如何解决跨域?常见解决方案浅析Apr 25, 2023 pm 07:57 PM
跨域是开发中经常会遇到的一个场景,也是面试中经常会讨论的一个问题。掌握常见的跨域解决方案及其背后的原理,不仅可以提高我们的开发效率,还能在面试中表现的更加


Hot AI Tools

Undresser.AI Undress
AI-powered app for creating realistic nude photos

AI Clothes Remover
Online AI tool for removing clothes from photos.

Undress AI Tool
Undress images for free

Clothoff.io
AI clothes remover

AI Hentai Generator
Generate AI Hentai for free.

Hot Article

Hot Tools

SAP NetWeaver Server Adapter for Eclipse
Integrate Eclipse with SAP NetWeaver application server.

SublimeText3 Linux new version
SublimeText3 Linux latest version

MinGW - Minimalist GNU for Windows
This project is in the process of being migrated to osdn.net/projects/mingw, you can continue to follow us there. MinGW: A native Windows port of the GNU Compiler Collection (GCC), freely distributable import libraries and header files for building native Windows applications; includes extensions to the MSVC runtime to support C99 functionality. All MinGW software can run on 64-bit Windows platforms.

WebStorm Mac version
Useful JavaScript development tools

VSCode Windows 64-bit Download
A free and powerful IDE editor launched by Microsoft


