


本教程效果的制作大部分是用渐变色来完成。只要注意好光源的位置,把握好高光及暗调整。制作起来就很简单。虽然构成元素较多,部分制作的方法都是一样。
最终效果
1、新建一个600 * 600 像素文件,背景填充白色,新建一个图层,命名为
来源:PS联盟 作者:Sener
本教程效果的制作大部分是用渐变色来完成。只要注意好光源的位置,把握好高光及暗调整。制作起来就很简单。虽然构成元素较多,部分制作的方法都是一样。
最终效果 
1、新建一个600 * 600 像素文件,背景填充白色,新建一个图层,命名为“大圆”,用椭圆选框工具拉一个正圆如图1。 
<图1> 2、选择渐变工具颜色设置如图2,由左上至右下拉出图3所示线性渐变。 
<图2> 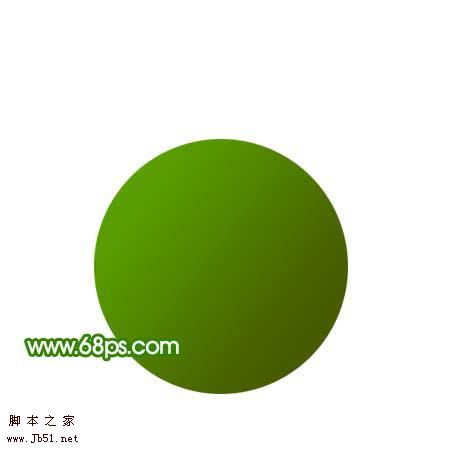
<图3>
3、新建一个图层,命名为“大圆2”,用椭圆选框工具画一个比大圆稍小的正圆,然后拉上图4所示的线性渐变,效果如图5。 
<图4> 
<图5> 4、按Ctrl 点图层面板“大圆”缩略图调出“大圆”选区,新建一个图层,填充颜色:#BBD466,效果如图6,填充后不要取消选区,选择菜单:选择 > 修改 > 收缩,数值为12,确定后再按Deleter 删除,取消选区后效果如图7。 
<图6> 
<图7>
5、加上图层蒙版,只保留左上角一部分,其它地方有黑色画笔擦掉,效果如图8。 
<图8> 6、在“大圆2”下面新建一个图层,选择椭圆选框工具拉出图9所示的正圆,按Ctrl + Alt + D 羽化3个像素,然后填充白色,取消选区后效果如图10。 
<图9> 
<图10>
7、选择白色画笔点一点高光,效果如图11。 
<图11>
8、在图层的最上面新建一个图层,用椭圆选框工具在右下角拉一个正圆,按Ctrl + Alt + D 羽化25个像素,然后填充颜色:#A8CA00,效果如图12。 
<图12> #p# 9、调出“大圆2”选区,如图13,然后添加图层蒙版,效果如图14。 
<图13> 
<图14>
10、新建一个图层,用椭圆选框工具拉一个正圆,选择渐变工具颜色设置如图15,拉出图16所示的线性渐变。 
<图15> 
<图16> 11、新建一个图层,画出时针和数字,方法跟之前的一样,效果如图17。 
<图17>
12、新建一个图层,用椭圆选框拉出一个正圆,选择渐变工具颜色设置为白色到透明渐变,然后由正圆中心拉出图19所示的径向渐变。 
<图18> 
<图19>
13、取消选区后,用钢笔工具勾出一点弧度,删除不需要的部分,效果如图20。 
<图20> 14、新建一个图层,用钢笔工具勾出高光部分,填充白色,如图21。 
<图21>
15、画出叮当部分,如图22,23。 
<图22> 
<图23> 16、新建一个图层,用钢笔勾出图24所示路径,转为选区后填充深灰色,取消选区后用减淡工具涂出高光部分,效果如图25。 
<图24> 
<图25>
17、最后加上阴影,修饰好细节,完成最终效果。
<图26>

 Photoshop's Value: Weighing the Cost Against Its FeaturesApr 11, 2025 am 12:02 AM
Photoshop is worth the investment because it provides powerful features and a wide range of application scenarios. 1) Core functions include image editing, layer management, special effects production and color adjustment. 2) Suitable for professional designers and photographers, but amateurs may consider alternatives such as GIMP. 3) Subscribe to AdobeCreativeCloud can be used as needed to avoid high one-time spending.
 The Core Purpose of Photoshop: Creative Image DesignApr 10, 2025 am 09:29 AM
Photoshop’s core use in creative image design is its powerful functionality and flexibility. 1) It allows designers to transform creativity into visual reality through layers, masks and filters. 2) Basic usages include cropping, resizing and color correction. 3) Advanced usages such as layer styles, blend modes and smart objects can create complex effects. 4) Common mistakes include improper layer management and excessive use of filters, which can be solved by organizing layers and using filters reasonably. 5) Performance optimization and best practices include rational use of layers, regular saving of files, and using shortcut keys.
 Photoshop for Web Design: Advanced Techniques for UI/UXApr 08, 2025 am 12:19 AM
Photoshop can be used in web design to create high-fidelity prototypes, design UI elements, and simulate user interactions. 1. Use layers, masks and smart objects for basic design. 2. Simulate user interaction through animation and timeline functions. 3. Use scripts to automate the design process and improve efficiency.
 Newbie's article: Use the ps brush to add crack effects to the font (share)Apr 07, 2025 am 06:21 AM
In the previous article "Teaching you step by step to add printing effects to plate images using ps (Favorites)", I introduced a small trick to use ps to add printing effects to plate images using ps. The following article will introduce to you how to use the ps brush to add crack effects to the font. Let’s take a look at how to do it.
 Photoshop Advanced Typography: Creating Stunning Text EffectsApr 07, 2025 am 12:15 AM
In Photoshop, you can create text effects through layer styles and filters. 1. Create a new document and add text. 2. Apply layer styles such as shadows and outer glow. 3. Use filters such as wave effects and add bevel and relief effects. 4. Use masks to adjust the effect range and intensity to optimize the visual impact of the text effect.
 How to cut picturesApr 06, 2025 pm 10:27 PM
Cutting is the process of removing the background part in the image and leaving the subject behind. Common cutout methods include: manual cutout: use image editing software to manually outline the edge of the subject. Automatic cutout: Use software to automatically identify the subject and separate it from the background. Use third-party cutout tools: use special tools to cut out images. Channel cutout: Use the channel of the image to segment and select channels with obvious differences from the subject color for operation.
 How to get watermarks from PSApr 06, 2025 pm 10:24 PM
You can use online tools, image editing software, video editing software, and watermark removal applications. Specific methods include: using online tools, using cloning stamp tools, copying stamp tools and repairing brush tools, using blur tools, cropping tools and content-aware fill tools, and using watermark removal applications. Make sure you have the right to do so before removing the watermark.
 How to merge layers in psApr 06, 2025 pm 10:21 PM
How to merge layers? You can merge layers by selecting the layer to merge in the Layers panel. Use Layers > Merge Layers in the menu bar or press Ctrl E (Windows) or Cmd E (Mac) to perform the merge operation. Creates elements that contain the original layer.


Hot AI Tools

Undresser.AI Undress
AI-powered app for creating realistic nude photos

AI Clothes Remover
Online AI tool for removing clothes from photos.

Undress AI Tool
Undress images for free

Clothoff.io
AI clothes remover

AI Hentai Generator
Generate AI Hentai for free.

Hot Article
Hot Tools

SublimeText3 Linux new version
SublimeText3 Linux latest version

Zend Studio 13.0.1
Powerful PHP integrated development environment

SublimeText3 Chinese version
Chinese version, very easy to use

VSCode Windows 64-bit Download
A free and powerful IDE editor launched by Microsoft

mPDF
mPDF is a PHP library that can generate PDF files from UTF-8 encoded HTML. The original author, Ian Back, wrote mPDF to output PDF files "on the fly" from his website and handle different languages. It is slower than original scripts like HTML2FPDF and produces larger files when using Unicode fonts, but supports CSS styles etc. and has a lot of enhancements. Supports almost all languages, including RTL (Arabic and Hebrew) and CJK (Chinese, Japanese and Korean). Supports nested block-level elements (such as P, DIV),

