Home >Software Tutorial >Computer Software >How to resize the partition using the partition tool diskgenius How to resize the partition using the partition tool diskgenius
How to resize the partition using the partition tool diskgenius How to resize the partition using the partition tool diskgenius
- WBOYWBOYWBOYWBOYWBOYWBOYWBOYWBOYWBOYWBOYWBOYWBOYWBforward
- 2024-05-08 16:00:351014browse
Partition resizing trouble bothers you? don’t worry! PHP editor Apple brings you a detailed guide to the DiskGenius partitioning tool. This guide will introduce step by step how to use DiskGenius to easily resize partitions, allowing you to easily solve storage space management problems. Read on for practical tips on partition sizing!
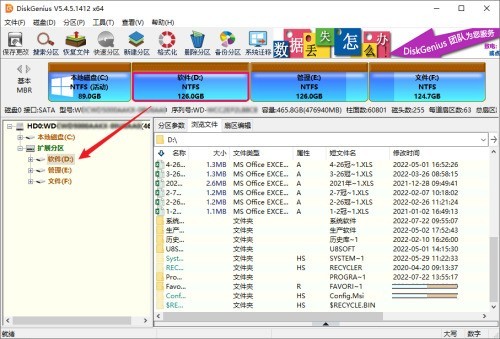
Step one: Open the DiskGenius software and select the partition you want to adjust.

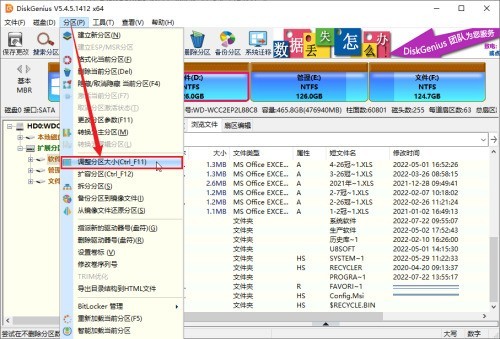
Step 2: Click the [Partition] menu, and then select the [Resize Partition] option.

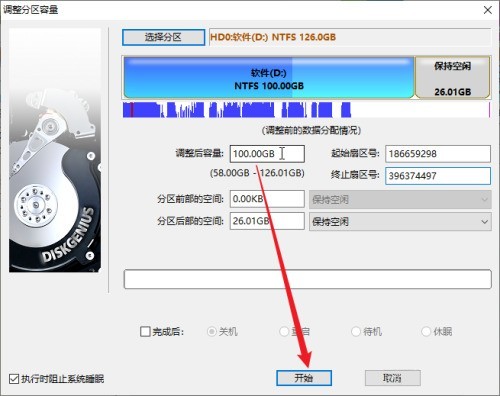
Step 3: In the pop-up [Adjust Partition Capacity] window, enter [Adjusted Capacity], and then click the [Start] button.

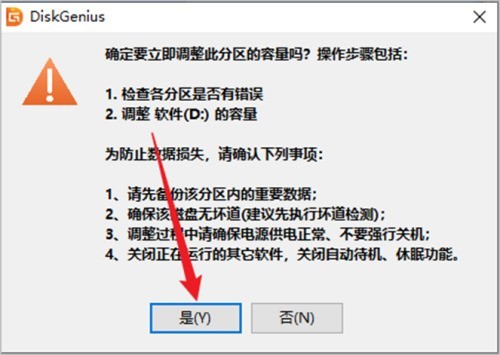
Step 4: Click the [Yes] button in the prompt box to start the non-destructive resizing operation of the partition.

The above is the detailed content of How to resize the partition using the partition tool diskgenius How to resize the partition using the partition tool diskgenius. For more information, please follow other related articles on the PHP Chinese website!
Related articles
See more- Detailed operation method of constructing function image of polar coordinate system in Geometry Sketchpad
- What should I do if the USB flash drive is recognized but the disk cannot be displayed? The USB flash drive is recognized but the drive letter is not displayed.
- How to turn off panorama mode on Bilibili Tutorial on turning off panorama mode on Bilibili
- How to restore the original system of Drive Life How to restore the original system of Drive Life
- How to set the frame rate display in MuMu simulator MuMu simulator display frame rate setting tutorial

