Home >System Tutorial >Windows Series >How to change the system sound effects to Microsoft Win11_How to change the system sound effects to Microsoft Win11
How to change the system sound effects to Microsoft Win11_How to change the system sound effects to Microsoft Win11
- WBOYWBOYWBOYWBOYWBOYWBOYWBOYWBOYWBOYWBOYWBOYWBOYWBforward
- 2024-05-08 12:58:16637browse
How to change system sound effects in Windows 11? PHP editor Baicao noticed that many users want to change the system sound effects after upgrading to Windows 11. If you have also encountered this problem, please continue reading this guide and we will introduce the detailed steps to replace the sound effects in Windows 11 system.
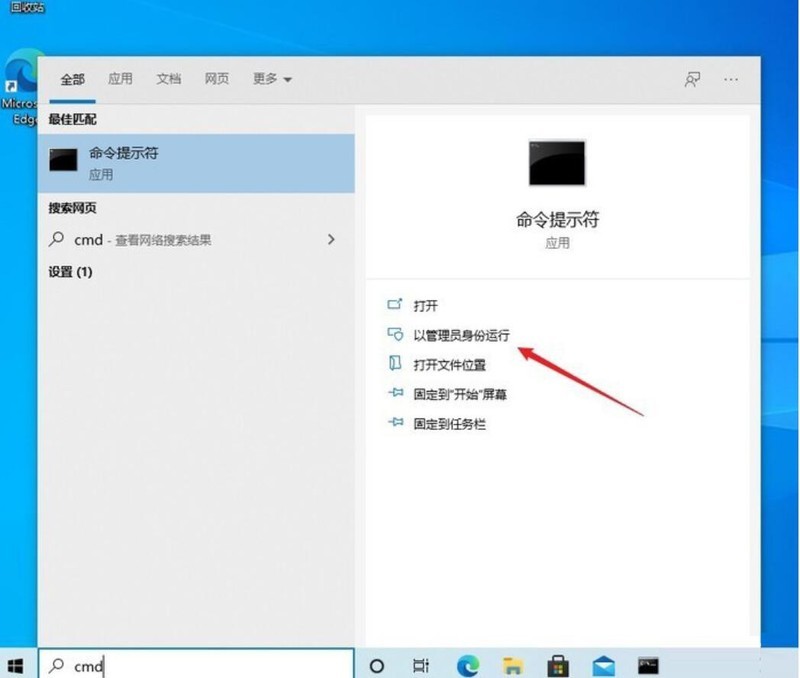
1. Click the start menu, enter [cmd], and then select [Run as administrator] in the pop-up menu.
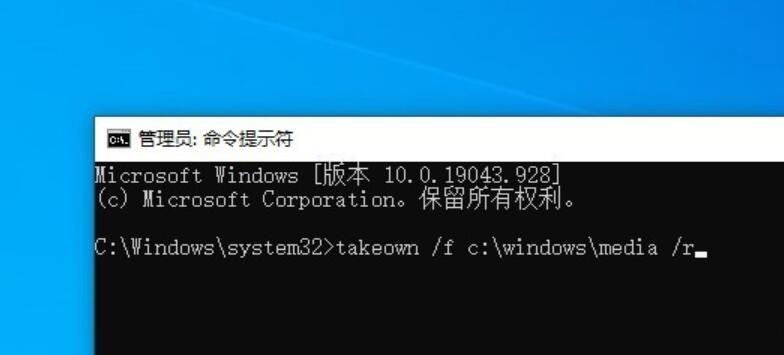
2. Enter the command [takeown /f c:windowsmedia /r] to obtain ownership of the sound effects folder.
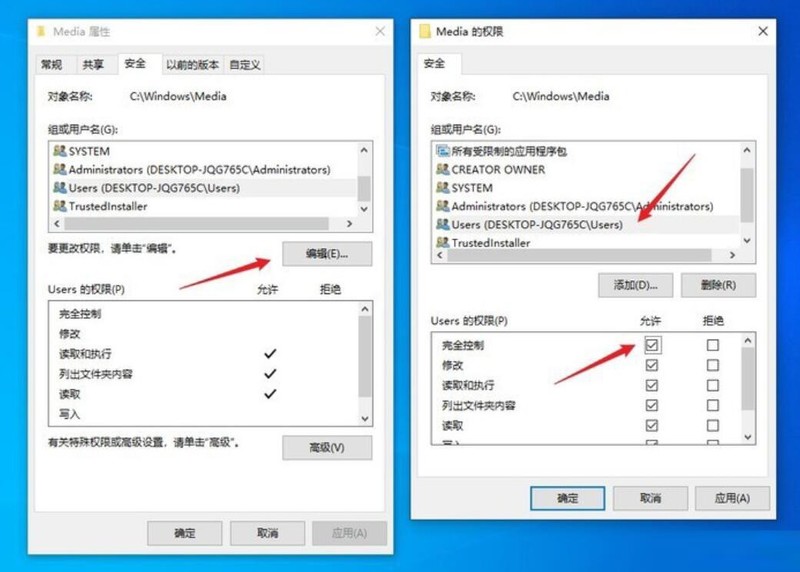
3. Open Explorer and find C:WINDOWSMEDIA. Right-click the folder-Properties-Security, click the [Edit] button, and give full control to the [User] group.
4. Copy the downloaded Win11 sound effect file to C:WINDOWSMEDIA, overwriting the original file.
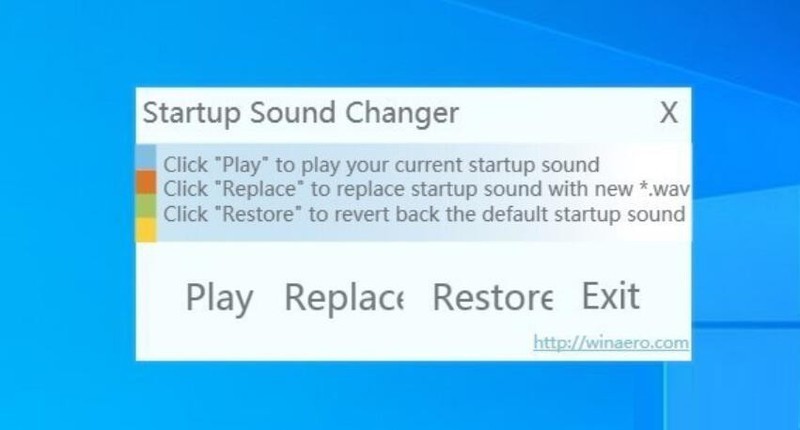
5. Double-click to start the StartupSoundChanger software, click [Replace], and select the startup sound effect you want to use (must be in wav format). If the sound can be heard normally, the replacement is successful. If there is no sound, you need to change it again. sound effect. For example, the one I chose here is [Windows Logon.wav. If everything is correct, click [Exit] to exit the software.
6. Open [Settings-System-Sound], click [Sound Control Panel] on the right side of the panel, and then check the [Play Windows startup sound] checkbox, and the entire operation is Completed.
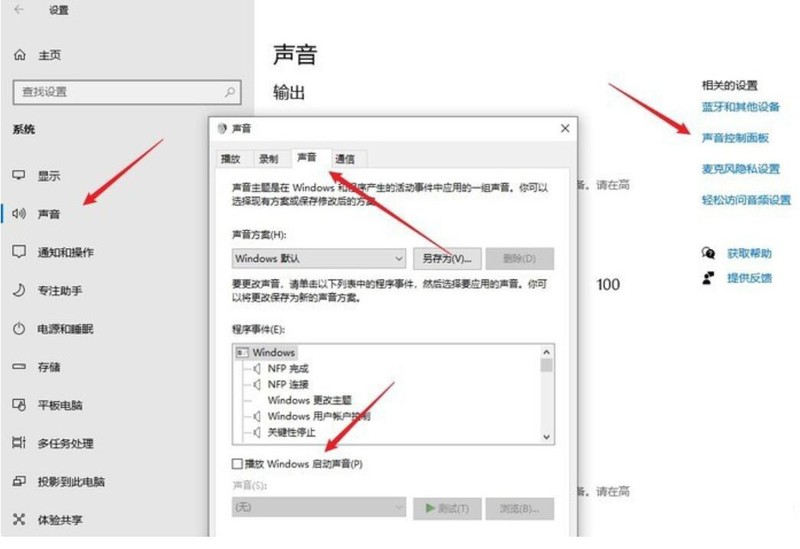
Restart the system. At this time, all the sound effects have been changed to the Win11 style, and there is sound when booting!
The above is the detailed content of How to change the system sound effects to Microsoft Win11_How to change the system sound effects to Microsoft Win11. For more information, please follow other related articles on the PHP Chinese website!

