

Native js and jquery implement image carousel effects_jquery

(1)首先是页面的结构部分
对于我这种左右切换式
1.首先是个外围部分(其实也就是最外边的整体wrapper)
2.接着就是你设置图片轮播的地方(也就是一个banner吧)
3.然后是一个图片组(可以用新的div 也可以直接使用 ul-->li形式)
4.然后是图片两端的左箭头和右箭头
5.然后是一个透明背景层,放在图片底部
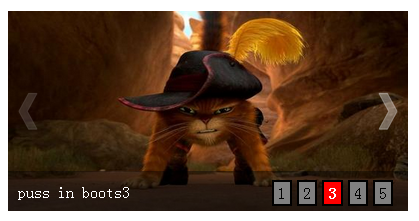
6.然后是一个图片描述info层,放在透明背景层的左下角(div 或 ul-->li)
7.然后是一个按钮层,用来定位图片组的index吧,放在透明背景层的右下角(div 或 ul-->li)
由此,可以先构造出html结构
<div id="wrapper"><!-- 最外层部分 -->
    <div id="banner"><!-- 轮播部分 -->
      <ul class="imgList"><!-- 图片部分 -->
      <li><a href="#"><img src="/static/imghwm/default1.png"  data-src="./img/test1.jpg"  class="lazy"    style="max-width:90%" height="200px" alt="puss in boots1"></a></li>
      <li><a href="#"><img src="/static/imghwm/default1.png"  data-src="./img/test2.jpg"  class="lazy"    style="max-width:90%" height="200px" alt="puss in boots2"></a></li>
      <li><a href="#"><img src="/static/imghwm/default1.png"  data-src="./img/test3.jpg"  class="lazy"    style="max-width:90%" height="200px" alt="puss in boots3"></a></li>
      <li><a href="#"><img src="/static/imghwm/default1.png"  data-src="./img/test4.jpg"  class="lazy"    style="max-width:90%" height="200px" alt="puss in boots4"></a></li>
      <li><a href="#"><img src="/static/imghwm/default1.png"  data-src="./img/test5.jpg"  class="lazy"    style="max-width:90%" height="200px" alt="puss in boots5"></a></li>
      </ul>
      <img  src="/static/imghwm/default1.png"  data-src="./img/prev.png"  class="lazy"    style="max-width:90%" height="40px" id="prev" alt="Native js and jquery implement image carousel effects_jquery" >
      <img  src="/static/imghwm/default1.png"  data-src="./img/next.png"  class="lazy"    style="max-width:90%" height="40px" id="next" alt="Native js and jquery implement image carousel effects_jquery" >
      <div class="bg"></div> <!-- 图片底部背景层部分-->
      <ul class="infoList"><!-- 图片左下角文字信息部分 -->
        <li class="infoOn">puss in boots1</li>
        <li>puss in boots2</li>
        <li>puss in boots3</li>
        <li>puss in boots4</li>
        <li>puss in boots5</li>
      </ul>
      <ul class="indexList"><!-- 图片右下角序号部分 -->
        <li class="indexOn">1</li>
        <li>2</li>
        <li>3</li>
        <li>4</li>
        <li>5</li>
      </ul>
    </div>
  </div>
相对于之前,知识增多了两个箭头img标签
(2)CSS样式部分(图片组的处理)跟淡入淡出式就不一样了
淡入淡出只需要显示或者隐藏对应序号的图片就行了,直接通过display来设定
左右切换式则是采用图片li 浮动,父层元素ul 总宽为总图片宽,并设定为有限banner宽度下隐藏超出宽度的部分
然后当想切换到某序号的图片时,则采用其ul 定位 left样式设定相应属性值实现
比如显示第一张图片初始定位left为0px, 要想显示第二张图片则需要left:-400px 处理
<style type="text/css">
  body,div,ul,li,a,img{margin: 0;padding: 0;}
  ul,li{list-style: none;}
  a{text-decoration: none;}

  #wrapper{position: relative;margin: 30px auto;width: 400px;height: 200px;}
  #banner{position:relative;width: 400px;height: 200px;overflow: hidden;}
  .imgList{position:relative;width:2000px;height:200px;z-index: 10;overflow: hidden;}
  .imgList li{float:left;display: inline;}
  #prev,
  #next{position: absolute;top:80px;z-index: 20;cursor: pointer;opacity: 0.2;filter:alpha(opacity=20);}
  #prev{left: 10px;}
  #next{right: 10px;}
  #prev:hover,
  #next:hover{opacity: 0.5;filter:alpha(opacity=50);}
  .bg{position: absolute;bottom: 0;width: 400px;height: 40px;z-index:20;opacity: 0.4;filter:alpha(opacity=40);background: black;}
  .infoList{position: absolute;left: 10px;bottom: 10px;z-index: 30;}
  .infoList li{display: none;}
  .infoList .infoOn{display: inline;color: white;}
  .indexList{position: absolute;right: 10px;bottom: 5px;z-index: 30;}
  .indexList li{float: left;margin-right: 5px;padding: 2px 4px;border: 2px solid black;background: grey;cursor: pointer;}
  .indexList .indexOn{background: red;font-weight: bold;color: white;}
</style>
(3)页面基本已经构建好久可以进行js的处理了
一、jQuery方式
照常先说jq处理
1.全局变量等
 var curIndex = 0, //当前index
      imgLen = $(".imgList li").length; //图片总数
2.自动切换定时器处理
   // 定时器自动变换2.5秒每次
  var autoChange = setInterval(function(){
    if(curIndex < imgLen-1){
      curIndex ++;
    }else{
      curIndex = 0;
    }
    //调用变换处理函数
    changeTo(curIndex);
  },2500);
3.为左右箭头添加事件处理
左箭头
  //左箭头滑入滑出事件处理
  $("#prev").hover(function(){
    //滑入清除定时器
    clearInterval(autoChange);
  },function(){
    //滑出则重置定时器
    autoChangeAgain();
  });
  //左箭头点击处理
  $("#prev").click(function(){
    //根据curIndex进行上一个图片处理
    curIndex = (curIndex > 0) ? (--curIndex) : (imgLen - 1);
    changeTo(curIndex);
  });
右箭头
//右箭头滑入滑出事件处理
$("#next").hover(function(){
//滑入清除定时器
clearInterval(autoChange);
},function(){
//滑出则重置定时器
autoChangeAgain();
});
//右箭头点击处理
$("#next").click(function(){
curIndex = (curIndex < imgLen - 1) ? (++curIndex) : 0;
changeTo(curIndex);
});
其中autoChangeAgain()就是一个重置定时器函数
//清除定时器时候的重置定时器--封装
  function autoChangeAgain(){
      autoChange = setInterval(function(){
      if(curIndex < imgLen-1){
        curIndex ++;
      }else{
        curIndex = 0;
      }
    //调用变换处理函数
      changeTo(curIndex);
    },2500);
    }
其中changeTo()就是一个图片切换的处理函数
function changeTo(num){
    var goLeft = num * 400;
    $(".imgList").animate({left: "-" + goLeft + "px"},500);
    $(".infoList").find("li").removeClass("infoOn").eq(num).addClass("infoOn");
    $(".indexList").find("li").removeClass("indexOn").eq(num).addClass("indexOn");
  }
每传入一个图片序号,则按理进行goLeft
4.为右下角的那几个li 按钮绑定事件处理
//对右下角按钮index进行事件绑定处理等
  $(".indexList").find("li").each(function(item){
    $(this).hover(function(){
      clearInterval(autoChange);
      changeTo(item);
      curIndex = item;
    },function(){
      autoChangeAgain();
    });
  });
jq就是这样,简便,原生代码量就有些多了
完整代码
<!DOCTYPE html PUBLIC "-//W3C//DTD XHTML 1.0 Transitional//EN" "http://www.w3.org/TR/xhtml1/DTD/xhtml1-transitional.dtd">
<html xmlns="http://www.w3.org/1999/xhtml">
<head>
<meta http-equiv="Content-Type" content="text/html; charset=utf-8" />
<title>图片轮播 jq(左右切换)</title>
<style type="text/css">
body,div,ul,li,a,img{margin: 0;padding: 0;}
ul,li{list-style: none;}
a{text-decoration: none;}
#wrapper{position: relative;margin: 30px auto;width: 400px;height: 200px;}
#banner{position:relative;width: 400px;height: 200px;overflow: hidden;}
.imgList{position:relative;width:2000px;height:200px;z-index: 10;overflow: hidden;}
.imgList li{float:left;display: inline;}
#prev,
#next{position: absolute;top:80px;z-index: 20;cursor: pointer;opacity: 0.2;filter:alpha(opacity=20);}
#prev{left: 10px;}
#next{right: 10px;}
#prev:hover,
#next:hover{opacity: 0.5;filter:alpha(opacity=50);}
.bg{position: absolute;bottom: 0;width: 400px;height: 40px;z-index:20;opacity: 0.4;filter:alpha(opacity=40);background: black;}
.infoList{position: absolute;left: 10px;bottom: 10px;z-index: 30;}
.infoList li{display: none;}
.infoList .infoOn{display: inline;color: white;}
.indexList{position: absolute;right: 10px;bottom: 5px;z-index: 30;}
.indexList li{float: left;margin-right: 5px;padding: 2px 4px;border: 2px solid black;background: grey;cursor: pointer;}
.indexList .indexOn{background: red;font-weight: bold;color: white;}
</style>
</head>
<body>
<div id="wrapper"><!-- 最外层部分 -->
<div id="banner"><!-- 轮播部分 -->
<ul class="imgList"><!-- 图片部分 -->
<li><a href="#"><img src="/static/imghwm/default1.png" data-src="./img/test1.jpg" class="lazy" style="max-width:90%" height="200px" alt="puss in boots1"></a></li>
<li><a href="#"><img src="/static/imghwm/default1.png" data-src="./img/test2.jpg" class="lazy" style="max-width:90%" height="200px" alt="puss in boots2"></a></li>
<li><a href="#"><img src="/static/imghwm/default1.png" data-src="./img/test3.jpg" class="lazy" style="max-width:90%" height="200px" alt="puss in boots3"></a></li>
<li><a href="#"><img src="/static/imghwm/default1.png" data-src="./img/test4.jpg" class="lazy" style="max-width:90%" height="200px" alt="puss in boots4"></a></li>
<li><a href="#"><img src="/static/imghwm/default1.png" data-src="./img/test5.jpg" class="lazy" style="max-width:90%" height="200px" alt="puss in boots5"></a></li>
</ul>
<img src="/static/imghwm/default1.png" data-src="./img/prev.png" class="lazy" style="max-width:90%" height="40px" id="prev" alt="Native js and jquery implement image carousel effects_jquery" >
<img src="/static/imghwm/default1.png" data-src="./img/next.png" class="lazy" style="max-width:90%" height="40px" id="next" alt="Native js and jquery implement image carousel effects_jquery" >
<div class="bg"></div> <!-- 图片底部背景层部分-->
<ul class="infoList"><!-- 图片左下角文字信息部分 -->
<li class="infoOn">puss in boots1</li>
<li>puss in boots2</li>
<li>puss in boots3</li>
<li>puss in boots4</li>
<li>puss in boots5</li>
</ul>
<ul class="indexList"><!-- 图片右下角序号部分 -->
<li class="indexOn">1</li>
<li>2</li>
<li>3</li>
<li>4</li>
<li>5</li>
</ul>
</div>
</div>
<script type="text/javascript" src="./js/jquery.min.js"></script>
<script type="text/javascript">
var curIndex = 0, //当前index
imgLen = $(".imgList li").length; //图片总数
// 定时器自动变换2.5秒每次
var autoChange = setInterval(function(){
if(curIndex < imgLen-1){
curIndex ++;
}else{
curIndex = 0;
}
//调用变换处理函数
changeTo(curIndex);
},2500);
//左箭头滑入滑出事件处理
$("#prev").hover(function(){
//滑入清除定时器
clearInterval(autoChange);
},function(){
//滑出则重置定时器
autoChangeAgain();
});
//左箭头点击处理
$("#prev").click(function(){
//根据curIndex进行上一个图片处理
curIndex = (curIndex > 0) ? (--curIndex) : (imgLen - 1);
changeTo(curIndex);
});
//右箭头滑入滑出事件处理
$("#next").hover(function(){
//滑入清除定时器
clearInterval(autoChange);
},function(){
//滑出则重置定时器
autoChangeAgain();
});
//右箭头点击处理
$("#next").click(function(){
curIndex = (curIndex < imgLen - 1) ? (++curIndex) : 0;
changeTo(curIndex);
});
//对右下角按钮index进行事件绑定处理等
$(".indexList").find("li").each(function(item){
$(this).hover(function(){
clearInterval(autoChange);
changeTo(item);
curIndex = item;
},function(){
autoChangeAgain();
});
});
//清除定时器时候的重置定时器--封装
function autoChangeAgain(){
autoChange = setInterval(function(){
if(curIndex < imgLen-1){
curIndex ++;
}else{
curIndex = 0;
}
//调用变换处理函数
changeTo(curIndex);
},2500);
}
function changeTo(num){
var goLeft = num * 400;
$(".imgList").animate({left: "-" + goLeft + "px"},500);
$(".infoList").find("li").removeClass("infoOn").eq(num).addClass("infoOn");
$(".indexList").find("li").removeClass("indexOn").eq(num).addClass("indexOn");
}
</script>
</body>
</html>
二、js 原生实现
js原生大概也就是模拟jq的实现思路
1.全局变量等
var curIndex = 0, //当前index
      imgArr = getElementsByClassName("imgList")[0].getElementsByTagName("li"), //获取图片组
      imgLen = imgArr.length,
      infoArr = getElementsByClassName("infoList")[0].getElementsByTagName("li"), //获取图片info组
      indexArr = getElementsByClassName("indexList")[0].getElementsByTagName("li"); //获取控制index组
2.自动切换定时器处理
    // 定时器自动变换2.5秒每次
  var autoChange = setInterval(function(){
    if(curIndex < imgLen -1){
      curIndex ++;
    }else{
      curIndex = 0;
    }
    //调用变换处理函数
    changeTo(curIndex);
  },2500);
同样的,有一个重置定时器的函数
 //清除定时器时候的重置定时器--封装
  function autoChangeAgain(){
      autoChange = setInterval(function(){
      if(curIndex < imgLen -1){
        curIndex ++;
      }else{
        curIndex = 0;
      }
    //调用变换处理函数
      changeTo(curIndex);
    },2500);
    }
3.因为有一些class呀,所以来几个class函数的模拟也是需要的
 //通过class获取节点
  function getElementsByClassName(className){
    var classArr = [];
    var tags = document.getElementsByTagName('*');
    for(var item in tags){
      if(tags[item].nodeType == 1){
        if(tags[item].getAttribute('class') == className){
          classArr.push(tags[item]);
        }
      }
    }
    return classArr; //返回
  }

  // 判断obj是否有此class
  function hasClass(obj,cls){  //class位于单词边界
    return obj.className.match(new RegExp('(\\s|^)' + cls + '(\\s|$)'));
   }
   //给 obj添加class
  function addClass(obj,cls){
    if(!this.hasClass(obj,cls)){
       obj.className += cls;
    }
  }
  //移除obj对应的class
  function removeClass(obj,cls){
    if(hasClass(obj,cls)){
      var reg = new RegExp('(\\s|^)' + cls + '(\\s|$)');
         obj.className = obj.className.replace(reg,'');
    }
  }
4.要左右切换,就得模拟jq的animate-->left .
我的思路就是动态地设置element.style.left 进行定位。因为要有一个渐进的过程,所以加上的一点点阶段处理。
定位的时候left的设置也是有点复杂的..要考虑方向等情况
//图片组相对原始左移dist px距离
function goLeft(elem,dist){
if(dist == 400){ //第一次时设置left为0px 或者直接使用内嵌法 style="left:0;"
elem.style.left = "0px";
}
var toLeft; //判断图片移动方向是否为左
dist = dist + parseInt(elem.style.left); //图片组相对当前移动距离
if(dist<0){
toLeft = false;
dist = Math.abs(dist);
}else{
toLeft = true;
}
for(var i=0;i<= dist/20;i++){ //这里设定缓慢移动,10阶每阶40px
(function(_i){
var pos = parseInt(elem.style.left); //获取当前left
setTimeout(function(){
pos += (toLeft)? -(_i * 20) : (_i * 20); //根据toLeft值指定图片组位置改变
//console.log(pos);
elem.style.left = pos + "px";
},_i * 25); //每阶间隔50毫秒
})(i);
}
}
上头也看到了,我初始了left的值为0px
我试过了,如果不初始或者把初始的left值写在行内css样式表里边,就总会报错取不到
所以直接在js中初始化或者在html中内嵌初始化也可。
5.接下来就是切换的函数实现了,比如要切换到序号为num的图片
//左右切换处理函数
  function changeTo(num){
    //设置image
    var imgList = getElementsByClassName("imgList")[0];
    goLeft(imgList,num*400); //左移一定距离
    //设置image 的 info
    var curInfo = getElementsByClassName("infoOn")[0];
    removeClass(curInfo,"infoOn");
    addClass(infoArr[num],"infoOn");
    //设置image的控制下标 index
    var _curIndex = getElementsByClassName("indexOn")[0];
    removeClass(_curIndex,"indexOn");
    addClass(indexArr[num],"indexOn");
  }
6.然后再给左右箭头还有右下角那堆index绑定事件处理
//给左右箭头和右下角的图片index添加事件处理
function addEvent(){
for(var i=0;i<imgLen;i++){
//闭包防止作用域内活动对象item的影响
(function(_i){
//鼠标滑过则清除定时器,并作变换处理
indexArr[_i].onmouseover = function(){
clearTimeout(autoChange);
changeTo(_i);
curIndex = _i;
};
//鼠标滑出则重置定时器处理
indexArr[_i].onmouseout = function(){
autoChangeAgain();
};
})(i);
}
//给左箭头prev添加上一个事件
var prev = document.getElementById("prev");
prev.onmouseover = function(){
//滑入清除定时器
clearInterval(autoChange);
};
prev.onclick = function(){
//根据curIndex进行上一个图片处理
curIndex = (curIndex > 0) ? (--curIndex) : (imgLen - 1);
changeTo(curIndex);
};
prev.onmouseout = function(){
//滑出则重置定时器
autoChangeAgain();
};
//给右箭头next添加下一个事件
var next = document.getElementById("next");
next.onmouseover = function(){
clearInterval(autoChange);
};
next.onclick = function(){
curIndex = (curIndex < imgLen - 1) ? (++curIndex) : 0;
changeTo(curIndex);
};
next.onmouseout = function(){
autoChangeAgain();
};
}
7.最后的最后,没啥了. 噢好像还要调用一下下那个 addEvent() ..
完整代码 代码量有些冗杂..
<!DOCTYPE html PUBLIC "-//W3C//DTD XHTML 1.0 Transitional//EN" "http://www.w3.org/TR/xhtml1/DTD/xhtml1-transitional.dtd">
<html xmlns="http://www.w3.org/1999/xhtml">
<head>
<meta http-equiv="Content-Type" content="text/html; charset=utf-8" />
<title>图片轮播 js原生(左右切换)</title>
<style type="text/css">
body,div,ul,li,a,img{margin: 0;padding: 0;}
ul,li{list-style: none;}
a{text-decoration: none;}
#wrapper{position: relative;margin: 30px auto;width: 400px;height: 200px;}
#banner{position:relative;width: 400px;height: 200px;overflow: hidden;}
.imgList{position:relative;width:2000px;height:200px;z-index: 10;overflow: hidden;}
.imgList li{float:left;display: inline;}
#prev,
#next{position: absolute;top:80px;z-index: 20;cursor: pointer;opacity: 0.2;filter:alpha(opacity=20);}
#prev{left: 10px;}
#next{right: 10px;}
#prev:hover,
#next:hover{opacity: 0.5;filter:alpha(opacity=50);}
.bg{position: absolute;bottom: 0;width: 400px;height: 40px;z-index:20;opacity: 0.4;filter:alpha(opacity=40);background: black;}
.infoList{position: absolute;left: 10px;bottom: 10px;z-index: 30;}
.infoList li{display: none;}
.infoList .infoOn{display: inline;color: white;}
.indexList{position: absolute;right: 10px;bottom: 5px;z-index: 30;}
.indexList li{float: left;margin-right: 5px;padding: 2px 4px;border: 2px solid black;background: grey;cursor: pointer;}
.indexList .indexOn{background: red;font-weight: bold;color: white;}
</style>
</head>
<body>
<div id="wrapper"><!-- 最外层部分 -->
<div id="banner"><!-- 轮播部分 -->
<ul class="imgList"><!-- 图片部分 -->
<li><a href="#"><img src="/static/imghwm/default1.png" data-src="./img/test1.jpg" class="lazy" style="max-width:90%" height="200px" alt="puss in boots1"></a></li>
<li><a href="#"><img src="/static/imghwm/default1.png" data-src="./img/test2.jpg" class="lazy" style="max-width:90%" height="200px" alt="puss in boots2"></a></li>
<li><a href="#"><img src="/static/imghwm/default1.png" data-src="./img/test3.jpg" class="lazy" style="max-width:90%" height="200px" alt="puss in boots3"></a></li>
<li><a href="#"><img src="/static/imghwm/default1.png" data-src="./img/test4.jpg" class="lazy" style="max-width:90%" height="200px" alt="puss in boots4"></a></li>
<li><a href="#"><img src="/static/imghwm/default1.png" data-src="./img/test5.jpg" class="lazy" style="max-width:90%" height="200px" alt="puss in boots5"></a></li>
</ul>
<img src="/static/imghwm/default1.png" data-src="./img/prev.png" class="lazy" style="max-width:90%" height="40px" id="prev" alt="Native js and jquery implement image carousel effects_jquery" >
<img src="/static/imghwm/default1.png" data-src="./img/next.png" class="lazy" style="max-width:90%" height="40px" id="next" alt="Native js and jquery implement image carousel effects_jquery" >
<div class="bg"></div> <!-- 图片底部背景层部分-->
<ul class="infoList"><!-- 图片左下角文字信息部分 -->
<li class="infoOn">puss in boots1</li>
<li>puss in boots2</li>
<li>puss in boots3</li>
<li>puss in boots4</li>
<li>puss in boots5</li>
</ul>
<ul class="indexList"><!-- 图片右下角序号部分 -->
<li class="indexOn">1</li>
<li>2</li>
<li>3</li>
<li>4</li>
<li>5</li>
</ul>
</div>
</div>
<script type="text/javascript">
var curIndex = 0, //当前index
imgArr = getElementsByClassName("imgList")[0].getElementsByTagName("li"), //获取图片组
imgLen = imgArr.length,
infoArr = getElementsByClassName("infoList")[0].getElementsByTagName("li"), //获取图片info组
indexArr = getElementsByClassName("indexList")[0].getElementsByTagName("li"); //获取控制index组
// 定时器自动变换2.5秒每次
var autoChange = setInterval(function(){
if(curIndex < imgLen -1){
curIndex ++;
}else{
curIndex = 0;
}
//调用变换处理函数
changeTo(curIndex);
},2500);
//清除定时器时候的重置定时器--封装
function autoChangeAgain(){
autoChange = setInterval(function(){
if(curIndex < imgLen -1){
curIndex ++;
}else{
curIndex = 0;
}
//调用变换处理函数
changeTo(curIndex);
},2500);
}
//调用添加事件处理
addEvent();
//给左右箭头和右下角的图片index添加事件处理
function addEvent(){
for(var i=0;i<imgLen;i++){
//闭包防止作用域内活动对象item的影响
(function(_i){
//鼠标滑过则清除定时器,并作变换处理
indexArr[_i].onmouseover = function(){
clearTimeout(autoChange);
changeTo(_i);
curIndex = _i;
};
//鼠标滑出则重置定时器处理
indexArr[_i].onmouseout = function(){
autoChangeAgain();
};
})(i);
}
//给左箭头prev添加上一个事件
var prev = document.getElementById("prev");
prev.onmouseover = function(){
//滑入清除定时器
clearInterval(autoChange);
};
prev.onclick = function(){
//根据curIndex进行上一个图片处理
curIndex = (curIndex > 0) ? (--curIndex) : (imgLen - 1);
changeTo(curIndex);
};
prev.onmouseout = function(){
//滑出则重置定时器
autoChangeAgain();
};
//给右箭头next添加下一个事件
var next = document.getElementById("next");
next.onmouseover = function(){
clearInterval(autoChange);
};
next.onclick = function(){
curIndex = (curIndex < imgLen - 1) ? (++curIndex) : 0;
changeTo(curIndex);
};
next.onmouseout = function(){
autoChangeAgain();
};
}
//左右切换处理函数
function changeTo(num){
//设置image
var imgList = getElementsByClassName("imgList")[0];
goLeft(imgList,num*400); //左移一定距离
//设置image 的 info
var curInfo = getElementsByClassName("infoOn")[0];
removeClass(curInfo,"infoOn");
addClass(infoArr[num],"infoOn");
//设置image的控制下标 index
var _curIndex = getElementsByClassName("indexOn")[0];
removeClass(_curIndex,"indexOn");
addClass(indexArr[num],"indexOn");
}
//图片组相对原始左移dist px距离
function goLeft(elem,dist){
if(dist == 400){ //第一次时设置left为0px 或者直接使用内嵌法 style="left:0;"
elem.style.left = "0px";
}
var toLeft; //判断图片移动方向是否为左
dist = dist + parseInt(elem.style.left); //图片组相对当前移动距离
if(dist<0){
toLeft = false;
dist = Math.abs(dist);
}else{
toLeft = true;
}
for(var i=0;i<= dist/20;i++){ //这里设定缓慢移动,10阶每阶40px
(function(_i){
var pos = parseInt(elem.style.left); //获取当前left
setTimeout(function(){
pos += (toLeft)? -(_i * 20) : (_i * 20); //根据toLeft值指定图片组位置改变
//console.log(pos);
elem.style.left = pos + "px";
},_i * 25); //每阶间隔50毫秒
})(i);
}
}
//通过class获取节点
function getElementsByClassName(className){
var classArr = [];
var tags = document.getElementsByTagName('*');
for(var item in tags){
if(tags[item].nodeType == 1){
if(tags[item].getAttribute('class') == className){
classArr.push(tags[item]);
}
}
}
return classArr; //返回
}
// 判断obj是否有此class
function hasClass(obj,cls){ //class位于单词边界
return obj.className.match(new RegExp('(\\s|^)' + cls + '(\\s|$)'));
}
//给 obj添加class
function addClass(obj,cls){
if(!this.hasClass(obj,cls)){
obj.className += cls;
}
}
//移除obj对应的class
function removeClass(obj,cls){
if(hasClass(obj,cls)){
var reg = new RegExp('(\\s|^)' + cls + '(\\s|$)');
obj.className = obj.className.replace(reg,'');
}
}
</script>
</body>
</html>
以上所述就是本文的全部内容了,希望大家能够喜欢。

 Python vs. JavaScript: A Comparative Analysis for DevelopersMay 09, 2025 am 12:22 AM
The main difference between Python and JavaScript is the type system and application scenarios. 1. Python uses dynamic types, suitable for scientific computing and data analysis. 2. JavaScript adopts weak types and is widely used in front-end and full-stack development. The two have their own advantages in asynchronous programming and performance optimization, and should be decided according to project requirements when choosing.
 Python vs. JavaScript: Choosing the Right Tool for the JobMay 08, 2025 am 12:10 AM
Whether to choose Python or JavaScript depends on the project type: 1) Choose Python for data science and automation tasks; 2) Choose JavaScript for front-end and full-stack development. Python is favored for its powerful library in data processing and automation, while JavaScript is indispensable for its advantages in web interaction and full-stack development.
 Python and JavaScript: Understanding the Strengths of EachMay 06, 2025 am 12:15 AM
Python and JavaScript each have their own advantages, and the choice depends on project needs and personal preferences. 1. Python is easy to learn, with concise syntax, suitable for data science and back-end development, but has a slow execution speed. 2. JavaScript is everywhere in front-end development and has strong asynchronous programming capabilities. Node.js makes it suitable for full-stack development, but the syntax may be complex and error-prone.
 JavaScript's Core: Is It Built on C or C ?May 05, 2025 am 12:07 AM
JavaScriptisnotbuiltonCorC ;it'saninterpretedlanguagethatrunsonenginesoftenwritteninC .1)JavaScriptwasdesignedasalightweight,interpretedlanguageforwebbrowsers.2)EnginesevolvedfromsimpleinterpreterstoJITcompilers,typicallyinC ,improvingperformance.
 JavaScript Applications: From Front-End to Back-EndMay 04, 2025 am 12:12 AM
JavaScript can be used for front-end and back-end development. The front-end enhances the user experience through DOM operations, and the back-end handles server tasks through Node.js. 1. Front-end example: Change the content of the web page text. 2. Backend example: Create a Node.js server.
 Python vs. JavaScript: Which Language Should You Learn?May 03, 2025 am 12:10 AM
Choosing Python or JavaScript should be based on career development, learning curve and ecosystem: 1) Career development: Python is suitable for data science and back-end development, while JavaScript is suitable for front-end and full-stack development. 2) Learning curve: Python syntax is concise and suitable for beginners; JavaScript syntax is flexible. 3) Ecosystem: Python has rich scientific computing libraries, and JavaScript has a powerful front-end framework.
 JavaScript Frameworks: Powering Modern Web DevelopmentMay 02, 2025 am 12:04 AM
The power of the JavaScript framework lies in simplifying development, improving user experience and application performance. When choosing a framework, consider: 1. Project size and complexity, 2. Team experience, 3. Ecosystem and community support.
 The Relationship Between JavaScript, C , and BrowsersMay 01, 2025 am 12:06 AM
Introduction I know you may find it strange, what exactly does JavaScript, C and browser have to do? They seem to be unrelated, but in fact, they play a very important role in modern web development. Today we will discuss the close connection between these three. Through this article, you will learn how JavaScript runs in the browser, the role of C in the browser engine, and how they work together to drive rendering and interaction of web pages. We all know the relationship between JavaScript and browser. JavaScript is the core language of front-end development. It runs directly in the browser, making web pages vivid and interesting. Have you ever wondered why JavaScr


Hot AI Tools

Undresser.AI Undress
AI-powered app for creating realistic nude photos

AI Clothes Remover
Online AI tool for removing clothes from photos.

Undress AI Tool
Undress images for free

Clothoff.io
AI clothes remover

Video Face Swap
Swap faces in any video effortlessly with our completely free AI face swap tool!

Hot Article
Hot Tools

SublimeText3 English version
Recommended: Win version, supports code prompts!

EditPlus Chinese cracked version
Small size, syntax highlighting, does not support code prompt function

ZendStudio 13.5.1 Mac
Powerful PHP integrated development environment

Safe Exam Browser
Safe Exam Browser is a secure browser environment for taking online exams securely. This software turns any computer into a secure workstation. It controls access to any utility and prevents students from using unauthorized resources.

VSCode Windows 64-bit Download
A free and powerful IDE editor launched by Microsoft

