

 Computer TutorialsTroubleshootingHow to install the computer station? How to assemble a multifunctional modular computer desk?
How to install the computer station? How to assemble a multifunctional modular computer desk?

Is it difficult to install a computer desk? Can’t assemble a multifunctional computer desk by yourself? PHP editor Yuzai reveals how to easily install a computer desk. This article will provide a step-by-step guide for the installation of a computer desk, detailing how to assemble a multifunctional modular computer desk. From unboxing to complete assembly, we'll take you step-by-step, making it easy to create a comfortable and functional workspace.

How to install the computer station?
Brand-branded machines all have systems pre-installed in advance.
As long as you connect various lines, you can start it and use it directly.
If your host is equipped with an independent graphics card, the monitor’s data cable needs to be plugged into the horizontal interface at the bottom of the chassis.
How to assemble a multifunctional modular computer desk?
The assembly of the combined water tank is to use small molded pieces and assemble them into a large water tank at the construction site. The outside needs to be fixed with angle steel. Use the angle steel to build a water tank model, lay a glass fiber reinforced plastic flat plate on it, and paste a few more layers of checkered cloth or felt on the joints to eliminate the gaps.
How to assemble a lighter? How to assemble it?
The first step: Install the gasket and put the gasket into the lighter; The second step: Put in the sparker and install the regulator on the spiral valve that adjusts the air outlet size; The third step: This step is particularly necessary Paying attention is the key step to success or failure. Commonly known as the "lever", the position and direction, front and back should be placed accurately, and the correct judgment of the front and back, the gap between the connection with the sparker should be relatively small; Step 4: Cover the plastic back cover and metal front cover , if the metal front cover is not easy to cover, you can pull it out a little to make the middle larger. After covering it, press it inward with your hands to ensure that it does not fall off; Step 5: Verify whether it can be opened. If it fails, , repeatedly follow the process to find the problem. Solved and finally successful.
The height of the computer table?
According to normal human physiological calculations in my country, the height of the computer desk should be 750-80mm, taking into account the activity area of the legs under the table; the net height under the table is required to be at least 580mm. The seat should be matched with the desk, soft and comfortable, of moderate height. If possible, it is best to purchase a swivel chair. The general height of the seat should be 380-450mm to facilitate people's activity needs.
The single-person computer desk can use a 600mm×ll00mm table top and a table height of 710-750mm. The distance from the countertop to the bottom of the cabinet should not exceed 125mm, otherwise your feet will hit when you stand up. For desks against the wall, a 100mm light trough can be set up 450mm away from the tabletop, with a bookcase or shelf above it. In this way, when writing, the light tube cannot be seen, but the tabletop has sufficient light.
How to assemble a computer?
1. First connect the VGA cable to the monitor, and then fix the two screws at the back. The main reason for fixing is to worry about the connecting wire falling off when moving.
2. Then connect the other end of the VGA cable to the computer host.
3. Next, connect the power cord to the monitor. (Note that you only want to connect it to the monitor. Do not connect the other end of the power cord to the socket. Wait until all connections are completed before turning on the power.)
4. Next, connect the mouse to the host.
5. Connect the keyboard as well. (The green one is the mouse, and the purple one is the keyboard. Also note that the internal pins of the mouse and keyboard plugs must be aligned with the pinholes in the interface before they can be inserted.) Connect one end of the network cable to the RJ45 interface of the computer host, and then connect the other end to the switch or router or modem.
6. Next, connect the power cord of the host.
7. Next, you can connect the power plugs of the host and monitor to the sockets to power on the host and monitor. You can start and use it normally.
How to assemble the Rubik's Cube?
1, we take out a Rubik's Cube, put the yellow center point upward, and then rotate the middle white edge block to the top surface. (When the yellow center point is upward and the white edge is in the middle, we rotate the middle white edge to the top)
2, then put the yellow center point upward, when the white edge is When it is on the upper and lower layers, we need to transfer the white edges of the upper and lower layers to the middle layer and then rotate them to the top surface again.
3, the yellow center point is still upward, but when there is no white block in the middle of the side, if the white middle block is on the bottom surface, we rotate the white edge block on the bottom surface 180 degrees to the top surface.
How to assemble a fishing rod?
Fishing rod assembly is divided into main line assembly, fishing rod assembly and sub-line assembly.
Main line: Cut the fishing line according to the length of the rod, and then string the small pieces in the following quantity and order: two space beans, one floating seat, three space beans, one lead seat, one space bean, Finally, tie a figure-eight ring at the end of the line. Fold a piece of double-stranded thread about 15 centimeters at the other end of the thread, and knot both ends, leaving a distance of about 7-8 centimeters between the two knots. When hanging the rod, use two fingers to pass through the double-stranded thread between the two knots. Wrap it back from the outside so that the double-stranded line forms a live buckle, and it can be used after buckling it behind the dead knot on the nylon rope at the bottom of the fishing rod. After use, pull the top knot to unbuckle.
Fishing rod: Tie a knot at the top of the nylon rope at the end of the rod to fix the fishing line. Sub-line: After tying two fishhooks, tie a knot in the middle. The requirement is that the length of the fishing lines at both ends of the knot differs by 1-1.5 cm. When using it, just pass it through the figure-eight loop of the main line and tie it with a dead buckle.
How to assemble the recliner?
The first step to install the recliner is to assemble the armrests: No matter what kind of office furniture is installed, the spare parts must be assembled into large pieces first. The first step is to combine the armrests and tripods classified by everyone, and lay the armrests flat on the ground. (Of course, you can pad it with newspapers to prevent scratches.) Because it is a double-legged recliner, the feet are installed on the two armrests, so just fix the legs and armrests with four screws on the sides respectively. The semi-finished product looks like it is easy to install. Tripod armrest.
2. The second step of installation of the recliner is to install the base: lay the armrest with the tripod on its side on the ground, and connect one side of the base to one armrest. The connection is made by inserting one end of the connecting rod into the hole in the armrest. Just put it in place, the connecting rod can bear the weight of the base, and then connect the other armrest (the semi-finished product looks like a chair without a backrest).
3. The third step of installation of the recliner is to install the backrest: still lie on the side of the armrest on the ground in its original state (the seat cushion is upright at this time). Install the two sleeves on the armrest and match the convex shape of the backrest. Insert the screws into the sleeve, and then place the computer chair normally. There is a connection between the seat cushion and the backrest of the computer chair. Connect and fix the two screws with large nuts to complete the computer chair installation.
How to assemble a mosquito net?
1. Flatten the mosquito net, fold the poles into two long strips, and insert the pipes into the upper cloth sleeve of the mosquito net in sequence;
2. Insert the two poles into the holes. How to install palace mosquito nets: 1. Prepare tools such as a pneumatic drill and tape measure; 2. Position the drill hole, measure the installation height and mark it; 3. Drill holes vertically at 90 degrees at the wall mark, place explosive screws, and fix the base of the mosquito net bracket. , tighten the screws; 4. Hang the mosquito net in a certain order
How to assemble the pen sharpener?
It consists of a body, a rocker, a spiral pencil sharpener and a pen holder. One side of the body is fixed with a connecting end and a rocker, and the other side is a transmission ring with internal teeth; the pen holder The front end is a fixed pen barrel type piece, which is coaxially connected to the connecting end of the cradle through a connecting frame. The lower end of the fixed pen barrel type piece has an inclined slot; the spiral pencil sharpener passes through the fixed frame and is tilted with the lower end of the fixed pen barrel type piece. The empty grooves are at the same angle, and are installed axially in the body of the connecting frame at the connecting end of the connecting frame; the cutting part of the spiral pencil sharpener is a spiral blade, and the transmission teeth meshing with the inner teeth of the ring table are oblique The inclination angle of the gear is the same as the inclination angle of the hollow groove.
The above is the detailed content of How to install the computer station? How to assemble a multifunctional modular computer desk?. For more information, please follow other related articles on the PHP Chinese website!

 Fix VMWare Slow System Performance in Windows 11Apr 30, 2025 pm 08:14 PM
VMware Workstation on Windows 11: Troubleshooting Slow Performance Experiencing sluggish system performance after installing VMware Workstation on your Windows 11 desktop? This guide offers practical solutions to resolve this common issue. Quick Nav
 Community Tips for Oblivion Remastered Low FPS/Stuttering PCApr 30, 2025 pm 08:13 PM
Many players have encountered frustrating low FPS, stuttering, and lagging issues in Oblivion Remastered. This MiniTool guide offers several effective solutions to boost your gameplay performance. Quick Navigation: Oblivion Remastered Performance Pr
 Proven Fixes and Tips for Unarc.dll Error Code 11 on WindowsApr 30, 2025 pm 08:12 PM
Troubleshooting the Unarc.dll Error Code 11 in Windows Many gamers encounter the frustrating unarc.dll error code 11 during game installations. This error arises because the unarc.dll file, responsible for unpacking compressed installation files, is
 Windows 11 KB5055629 Download & Quick Fixes for Not InstallingApr 30, 2025 pm 08:07 PM
Windows 11 KB5055629: A Comprehensive Guide to Installation and Troubleshooting This guide provides a complete overview of Windows 11 KB5055629, including its new features, installation methods, and troubleshooting steps for installation failures. Wh
 Last Epoch Unity Error on PC: Fix with Community SolutionsApr 30, 2025 pm 08:05 PM
Last Epoch Unity Error Solutions: A Comprehensive Guide Many Last Epoch players encounter frustrating Unity errors preventing gameplay. This guide provides effective solutions to resolve these crashes, ranging from simple troubleshooting to more adva
 Proven Ways to Fix Resetting This PC Stuck at 37% on WindowsApr 30, 2025 pm 08:03 PM
This guide offers solutions for resolving the frustrating "Resetting this PC" process stuck at 37%. Several effective methods are detailed below to help you overcome this issue. Originally posted on answers.microsoft.com: "Hello, I
 Windows 11 KB5056579 Released: Download & Fix Update IssuesApr 30, 2025 pm 06:01 PM
The Windows 11 KB5056579 update is now available, bringing many improvements to the 24H2 version. This article will guide you on how to download and install the KB5056579 update and provide practical solutions to installation failures. Windows 11 KB5056579 Update Overview On April 25, 2025, Microsoft released the KB5056579 update for Windows 11 24H2 version, a cumulative update for the .NET Framework versions 3.5 and 4.8.1. This update is designed to improve the reliability of .NET Framework components and resolve specific technical issues. this
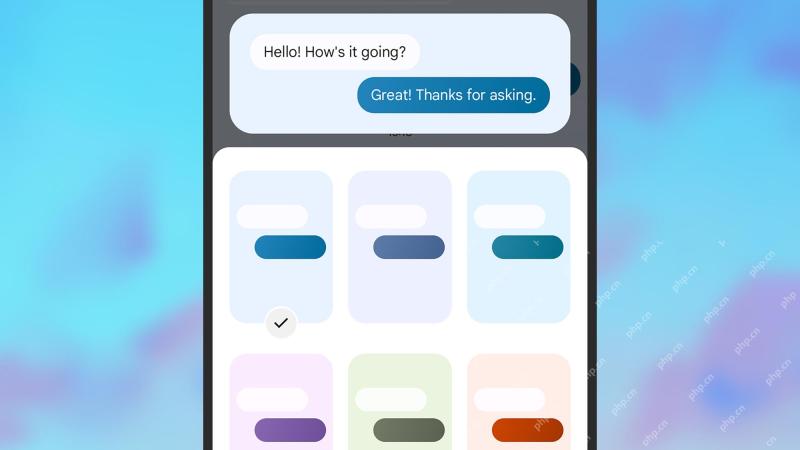 7 helpful Google Messages tips you need to knowApr 30, 2025 am 09:55 AM
Master Google Messages: Seven Essential Tips and Tricks for Android Google Messages is the default texting app on most Android phones, handling SMS, MMS, and the advanced RCS (Rich Communication Services). RCS is now so prevalent it even works with


Hot AI Tools

Undresser.AI Undress
AI-powered app for creating realistic nude photos

AI Clothes Remover
Online AI tool for removing clothes from photos.

Undress AI Tool
Undress images for free

Clothoff.io
AI clothes remover

Video Face Swap
Swap faces in any video effortlessly with our completely free AI face swap tool!

Hot Article
Hot Tools

SublimeText3 Linux new version
SublimeText3 Linux latest version

VSCode Windows 64-bit Download
A free and powerful IDE editor launched by Microsoft

Dreamweaver CS6
Visual web development tools

Dreamweaver Mac version
Visual web development tools

WebStorm Mac version
Useful JavaScript development tools

