
 System TutorialWindows SeriesHow to scan files to computer in win11_Simple steps to scan files to computer in win11
How to scan files to computer in win11_Simple steps to scan files to computer in win11

Have you ever encountered the problem of scanning files in Windows 11 system? Maybe you are confused about the steps to scan files and don’t know how to do it. Now, PHP editor Banana is here to bring you a clear and easy-to-understand guide, teaching you step by step to easily implement file scanning. Read on as we dive into the easy ways to scan files in Windows 11 and solve your scanning woes!
1. First, we double-click directly on the desktop to open the [Control Panel].

2. After opening, change the viewing mode in the upper right corner to [Category], and then select [Hardware and Sound]
3. In Hardware and Sound, we can Find and click [Devices and Printers]
4. Right-click to select the printer we want to use and click [Start Scan]
5. Then a new scan window will pop up. After confirmation, click on the lower right corner [Scan]
6. After the scan is completed, a result dialog box will pop up. Click [OK] and then [Next].

The above is the detailed content of How to scan files to computer in win11_Simple steps to scan files to computer in win11. For more information, please follow other related articles on the PHP Chinese website!

 Excel Data Source Reference Not ValidMay 14, 2025 pm 04:38 PM
Are you facing the annoying "Excel data source reference not valid" error? Don't fret, we're here to assist you in resolving this issue and getting your spreadsheets functioning smoothly again. Microsoft Excel, with its vast array of tools
 Excel Found Unreadable Content - How to Fix the IssueMay 14, 2025 pm 04:37 PM
Learn about the most effective solutions to tackle the "Excel found unreadable content" error in XLSX files. We recognize the challenges you might encounter when facing this error, which can make it difficult to access your essential data.D
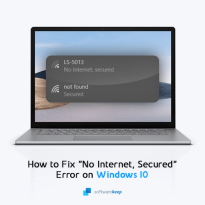 Fix the 'No Internet, Secured' Problem in Windows 10May 14, 2025 pm 04:35 PM
Many users who upgrade to Windows 10 encounter WiFi connectivity issues, experiencing slow internet or complete inability to connect. If you're facing the latter, you'll notice the "No Internet, secured" message next to your WiFi network in
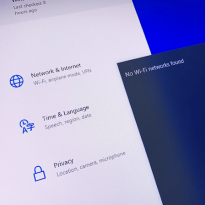 Solved: No Internet Connection Windows 10May 14, 2025 pm 04:33 PM
Windows 10 updates can occasionally introduce new issues to your system, including the No Internet Connection error, which can prevent your computer from accessing the internet. Fortunately, this frustrating problem can be resolved using our outlined
 How to Improve Game Data Loading Times in Windows - Make Tech EasierMay 14, 2025 pm 04:32 PM
To enhance gaming performance, many games load assets on-the-fly, making an SSD highly beneficial for reducing load times. If your SSD is slow or you're still using an HDD, you might experience extended loading times, stuttering, and fluctuating FPS.
 Microsoft Word Keeps Freezing in Windows 10 - 10 ways to fix ItMay 14, 2025 pm 04:31 PM
Are you facing issues with Microsoft Word freezing on your Windows 10 system? This can be highly frustrating, especially when you're in the middle of important work.When Microsoft Word keeps freezing on Windows 10 during your tasks, it indicates an u
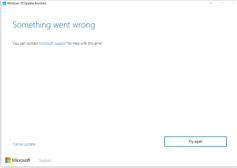 What to Do When Windows Update Keeps Failing on Windows 10May 14, 2025 pm 04:30 PM
Windows 10, a widely used operating system around the world, often faces various issues despite its widespread adoption. One common problem is the recurring failure of the Windows Update feature, which prevents users from updating their systems.If yo
 Spotify Web Player Not Working? What To Do?May 14, 2025 pm 04:28 PM
If you're struggling with the Spotify web player not functioning properly, you're not alone. Many users face similar issues when trying to enjoy their favorite music on this popular streaming platform. Fortunately, there are several troubleshooting s


Hot AI Tools

Undresser.AI Undress
AI-powered app for creating realistic nude photos

AI Clothes Remover
Online AI tool for removing clothes from photos.

Undress AI Tool
Undress images for free

Clothoff.io
AI clothes remover

Video Face Swap
Swap faces in any video effortlessly with our completely free AI face swap tool!

Hot Article
Hot Tools

Safe Exam Browser
Safe Exam Browser is a secure browser environment for taking online exams securely. This software turns any computer into a secure workstation. It controls access to any utility and prevents students from using unauthorized resources.

VSCode Windows 64-bit Download
A free and powerful IDE editor launched by Microsoft

MantisBT
Mantis is an easy-to-deploy web-based defect tracking tool designed to aid in product defect tracking. It requires PHP, MySQL and a web server. Check out our demo and hosting services.

SAP NetWeaver Server Adapter for Eclipse
Integrate Eclipse with SAP NetWeaver application server.

SecLists
SecLists is the ultimate security tester's companion. It is a collection of various types of lists that are frequently used during security assessments, all in one place. SecLists helps make security testing more efficient and productive by conveniently providing all the lists a security tester might need. List types include usernames, passwords, URLs, fuzzing payloads, sensitive data patterns, web shells, and more. The tester can simply pull this repository onto a new test machine and he will have access to every type of list he needs.

