

Rsync file synchronization learning

First understand the general principle of rsync synchronization: Rsync synchronization uses the so-called "Rsync algorithm" to synchronize files between the local and remote hosts. This algorithm only transmits different parts of the two files, and Not the whole portion every time
Transmission, so the transmission speed is quite fast. The Rsync server will open a service channel (port) 873 and wait for the client Rsync connection. When connecting, the Rsync server will check whether the password (passwd) matches. If it passes the password check,
You can start file transfer. When the first connection is completed, the entire file will be transferred once, and the next time only the difference between the two files will be transferred.
Next we will do the preliminary setup and complete the task requirements first.
Install rsync tool
yum -y install rsync
(By default, an rsync configuration file will be generated in the etc directory)
Edit the configuration file rsyncd.conf (comments cannot be added to the configuration file, otherwise an error will be reported)
uid = root
gid = root
use chroot = no
max connections = 4
#pid file = /var/run/rsyncd.pid
lock file = /var/run/rsyncd.lock
log file = /var/log/rsyncd.log
exclude = lost+found/
transfer logging = yes
timeout = 600
ignore nonreadable = yes
dont compress   = *.gz *.tgz *.zip *.z *.Z *.rpm *.deb *.bz2
[test]
path = /home/rsynctest
ignore errors = yes
read only = yes
write only = no
hosts allow = 192.168.177.131
hosts deny = *
list = false
uid = root
gid = root
auth users = root
secrets file = /etc/rsyncd.passwd
Configuration details
uid = root                 #设置运行rsync 进程的用户
gid = root
use chroot = no            #使用默认根目录
max connections = 4        #最大连接数
#pid file = /var/run/rsyncd.pid        #CentOS7中yum安装 不需指定pid file 否则报错
lock file = /var/run/rsyncd.lock       #指定支持 max connections 参数的锁文件
log file = /var/log/rsyncd.log         #此文件定义完成后 系统会自动创建
exclude = lost+found/
transfer logging = yes             #使rsync服务器使用ftp格式的文件来记录下载和上载操作在自己单独的日志中
timeout = 600   #通过该选项可以覆盖客户指定的IP超时时间。通过该选项可以确保rsync服务器不会永远等待一个崩溃的客户。超时单位为秒钟,0表示没有超时定义,这也是默认值。对于匿名rsync服务器来说,一个理想的数字是600。
ignore nonreadable = yes           #同步时跳过没有权限的目录
dont compress   = *.gz *.tgz *.zip *.z *.Z *.rpm *.deb *.bz2          #传输时不压缩的文件
[test]                          #此名字即客户端使用rsync来同步的路径
path = /home/rsynctest                 #实际需要同步的路径
ignore errors = yes     #指定rsyncd在判断是否运行传输时的删除操作时忽略server上的IP错误,一般来说rsync在出现IO错误时将将跳过--delete操作,以防止因为暂时的资源不足或其它IO错误导致的严重问题
read only = yes         #表示可以pull
write only = no         #表示不可以push
hosts allow = 192.168.177.131        #客户端同步的地址
hosts deny = *   #指定不允许连接rsync服务器的机器,可以使用hosts allow的定义方式来进行定义。默认是没有hosts deny定义。
list = false     #该选项设定当客户请求可以使用的模块列表时,该模块是否应该被列出。如果设置该选项为false,可以创建隐藏的模块。默认值是true。
uid = root       #获取文件的身份
gid = root
auth users = root  #客户端获取文件的身份 此用户并不是本机中确实存在的用户
secrets file = /etc/rsyncd.passwd   #用来认证客户端的秘钥文件 格式 USERNAME:PASSWD 此文件权限一定需要改为600,且属主必须与运行rsync的用户一致。(需自行创建)
Create the corresponding password file
vim /etc/rsyncd.passwd
格式如下:root:123456(前用户名后密码)
修改文件权限:chmon 600 /etc/rsyncd.passwd
启动rsync服务端:sudo rsync --daemon(客户端不用启动)
Install rsync tool
yum -y install rsync (默认会在etc目录下生成一个rsync的配置文件)
Configure authentication password file
echo passwd(只需要密码就行) >> /etc/rsyncd.passwd
Modify permissions
chmon 600 /etc/rsyncd.passwd
Test file synchronization:
rsync -avz --progress --password-file=/etc/rsyncd.passwd root@192.168.177.130::rsynctest /tmp/rsynctest/

Finished test!
Detailed explanation of command parameters:
  -v, –verbose 详细模式输出

  -z, –compress 对备份的文件在传输时进行压缩处理

  -r, –recursive 对子目录以递归模式处理

  -t, –times 保持文件时间信息

  -o, –owner 保持文件属主信息

  -p, –perms 保持文件权限

  -g, –group 保持文件属组信息

  –-progress 显示传输进度

  --delete 删除客户端多余文件
The summary is not complete yet, I hope you can point out any problems!
Just Do It
The above is the detailed content of Rsync file synchronization learning. For more information, please follow other related articles on the PHP Chinese website!

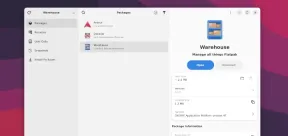 Warehouse: A GUI for Effortlessly Handling Flatpak AppsMay 09, 2025 am 11:30 AM
A GUI for Effortless Flatpak Management: Introducing Warehouse Managing a growing collection of Flatpak applications can be cumbersome using only the command line. Enter Warehouse, a user-friendly graphical interface designed to streamline Flatpak a
 8 Powerful Linux Commands to Identify Hard Drive BottlenecksMay 09, 2025 am 11:03 AM
This article provides a comprehensive guide to identifying and resolving hard drive bottlenecks in Linux systems. Experienced server administrators will find this particularly useful. Slow disk operations can severely impact application performance,
 4 Best QR Code Generators for Linux UsersMay 09, 2025 am 10:27 AM
Efficient QR code generation tool under Linux system In today's digital world, QR codes have become a way to quickly and conveniently share information, simplifying data access from URLs, texts, contacts, Wi-Fi credentials, and even payment information. Linux users can use a variety of tools to create QR codes efficiently. Let's take a look at some popular QR code generators that can be used directly on Linux systems. QRencode QRencode is a lightweight command line tool for generating QR codes on Linux. It is well-received for its simplicity and efficiency and is popular with Linux users who prefer direct methods. Using QRencode, you can use the URL,
 elementary OS 8: A User-Friendly Linux for macOS and WindowsMay 09, 2025 am 10:19 AM
Elementary OS 8 Circe: A Smooth and Stylish Linux Experience Elementary OS, a Ubuntu-based Linux distribution, has evolved from a simple theme pack into a fully-fledged, independent operating system. Known for its user-friendly interface, elegant de
 40 Linux Commands for Every Machine Learning EngineerMay 09, 2025 am 10:06 AM
Mastering Linux is crucial for any machine learning (ML) engineer. Its command-line interface offers unparalleled flexibility and control, streamlining workflows and boosting productivity. This article outlines essential Linux commands, explained fo
 Arch Linux Cheat Sheet: Essential Commands for BeginnersMay 09, 2025 am 09:54 AM
Arch Linux: A Beginner's Command-Line Cheat Sheet Arch Linux offers unparalleled control but can feel daunting for newcomers. This cheat sheet provides essential commands to confidently manage your system. System Information & Updates These com
 How to Install Scikit-learn for Machine Learning on LinuxMay 09, 2025 am 09:53 AM
This guide provides a comprehensive walkthrough of installing and using the Scikit-learn machine learning library on Linux systems. Scikit-learn (sklearn) is a powerful, open-source Python library offering a wide array of tools for various machine l
 How to Install Kali Linux Tools in UbuntuMay 09, 2025 am 09:46 AM
This guide explains how to leverage Docker for accessing Kali Linux tools, a safer and more efficient alternative to outdated methods like Katoolin. Katoolin is no longer actively maintained and may cause compatibility problems on modern systems. Do


Hot AI Tools

Undresser.AI Undress
AI-powered app for creating realistic nude photos

AI Clothes Remover
Online AI tool for removing clothes from photos.

Undress AI Tool
Undress images for free

Clothoff.io
AI clothes remover

Video Face Swap
Swap faces in any video effortlessly with our completely free AI face swap tool!

Hot Article
Hot Tools

VSCode Windows 64-bit Download
A free and powerful IDE editor launched by Microsoft

DVWA
Damn Vulnerable Web App (DVWA) is a PHP/MySQL web application that is very vulnerable. Its main goals are to be an aid for security professionals to test their skills and tools in a legal environment, to help web developers better understand the process of securing web applications, and to help teachers/students teach/learn in a classroom environment Web application security. The goal of DVWA is to practice some of the most common web vulnerabilities through a simple and straightforward interface, with varying degrees of difficulty. Please note that this software

Atom editor mac version download
The most popular open source editor

SublimeText3 English version
Recommended: Win version, supports code prompts!

Notepad++7.3.1
Easy-to-use and free code editor

