

 Computer TutorialsTroubleshootingHow to insert the wires behind the computer host assembly? Do you need a diagram?
How to insert the wires behind the computer host assembly? Do you need a diagram?

When assembling a computer, wiring connections behind the host is an essential but often confusing step. In order to help you solve this problem easily, PHP editor Banana has carefully prepared a detailed graphic tutorial to lead you step by step to understand the connection method of each cable. Come and read the text to get detailed instructions, allowing you to easily assemble a neat and beautiful computer host!

How to insert the wires behind the assembled computer host? Do you need a picture?
1. There are USB interfaces on the left and right sides, the pink in the middle is the microphone, and the green is the headphones (audio output).
2. The top is the power supply: connect the power plug, it feels the same as the previous radio, and many home appliances also have such interfaces.
3. Looking down is the motherboard area. The plugs for the mouse and keyboard are plugged in according to the color. , 4. The following is the display wiring port, please be sure to twist the screws to fix it after plugging it in. 5. After completing the above steps, continue to look down to see the USB interface. 6. Next is the network cable interface. If a computer is directly connected to the network cable, there is no problem.
How to plug in the computer assembly?
1. First insert the 24PIN in the power supply into the 24PIN slot on the motherboard. This item is the mainboard power supply line: after the motherboard power supply connection number.
2. Then there is the CPU power supply. Look at the motherboard. If it is 8PIN, just combine it and insert it. Generally, the CPU power supply is 4PIN. Insert the 4PIN interface in the power supply into the 4PIN slot near the CPU.
3. Then pay attention to whether your graphics card has a 4PIN interface. Generally, low-end graphics cards do not have it.
How to assemble and plug in the computer?
1.
The front panel connections of the chassis generally include front audio, front USB, power indicator light, hard disk indicator light, power on, and restart.
The wiring diagrams for these connections are generally explained in the motherboard manual.
If not, check that it is written on the motherboard. Pay attention to the position of the pins.
They are basically connected in this way. The HD-LED on the motherboard is the hard disk working indicator light, so just write the thread. There are: H..D.D.LED is plugged in. The SP-LED on the mainboard is the power working indicator light. Just plug in the positive and negative ends of the wire with "P" written on it. If the two indicator lights are plugged in reverse, the positive and negative ends are plugged in. Level, the light will not light up after power on. For the one that does not light up, just change the positive and negative directions.
2.
The RST on the motherboard is the reset button. Write RESET on the wire. Plug in the SW. PW-BN on the motherboard is the power-on button. Plug in the one with POWER SW written on the wire.
3.
SPEAKER is the front buzzer, divided into """-" phase; it can happen with ordinary speakers no matter how they are connected, but it is special here. Since the voltage value of 5V is provided on the " " phase, we must install it correctly to ensure that the buzzer sounds.
4.
The following is the front audio. The F-AUDIO on the motherboard is the location of the front audio interface. It is different from the USB. USB has one less pin on the side. There is one less pin on the 4th pin for audio, just plug it into the corresponding position
5.
The front panel connection is complete, and finally connect the power supply and hard disk. The SATA data cable is in the shape of an inverted 7-digit line. Don't worry about plugging it in wrongly. If you plug it in wrongly, it won't go in. The hard drive movie cable is wider than the data cable and has a similar shape. Connect it to the hard drive
6 .
Just align it and insert it. The other end of the SATA data cable is plugged into the SATA interface of the motherboard. That's it, now connect the power supply to the motherboard.
7.
The motherboard is powered by 24P. The old motherboard used to be 20P, so I took it out and there are 4 active ones on the side.
8.
The CPU has 8P power supply, and there are also 4P power supply. Both the motherboard and CPU power supply are designed to be fool-proof. Don’t worry about plugging it in wrongly. If you plug it in the wrong direction, you won’t be able to plug it in.
9.
Connect to the corresponding interface. Look at the motherboard interface diagram above. The graphics card power supply is 6P, and there are also 8P. It can be disassembled, and the graphics card power interface is plugged in. That's it.
10.
The installation is complete. If your case is side-transparent, you can install a strip of polarizing light, which will look much better. If it is not side-transparent, there is no need to install it. You are good to go. For a chassis with back-line cables, put the cables at the back so it looks nice. After installation, untie the cables and tie up the ones that need to be tied up with zip ties to make it look more comfortable.
How to plug in the cables in the computer host? How to plug in the cables in the computer host?
The cables in the computer host are roughly divided into the following categories: power cables, data cables and audio cables. The following are the general steps for plugging in:
Power cord plugging: The power cord needs to connect the host and the power supply. Usually, a 20-pin or 24-pin motherboard power interface is used. Find the correct socket according to the shape and number of the interfaces. and insert it.
Data cable plug-in: Data cables include SATA data cables, IDE data cables, USB data cables, etc. SATA data cables are usually used to connect hard drives and optical drives, while IDE data cables are used to connect old hard drives and optical drives. USB data cables are used to connect external devices such as mice and keyboards. Find the corresponding interface and insert it according to the direction of the socket.
Audio cable plug-in: Audio cables include microphone cables, speaker cables, etc. According to the shape of the interface, just find the correct socket and insert it.
Before plugging in the cord, you need to make sure that the computer is turned off and the power plug is unplugged. After plugging in the cord, make sure that the socket is firmly inserted and not loose. If you're not sure how to plug in the cord, it's recommended to check the instructions for your motherboard or other device or seek professional help.
Computer assembly--How to connect the motherboard and the front panel cable of the host?
1 USB is a set of 8-wire 10-hole plugs. The side with the black wire should be inserted in the direction of one less pin on the motherboard. 2 RST pins are connected to the panel reset button. PO-ON pins. Connect the panel power-on button (no requirement if plugged in)
3 HD-LED is the hard disk read and write indicator light (note that if the positive and negative poles are plugged in, if they don’t light up, just reverse them)
4 PWR-LED is the host power indicator light. (Note that if the positive and negative poles are plugged in, if they don’t light up, just reverse them.) 5 SPEAKER is the buzzer pin. The black wire is negative and the red wire is positive. 6 Panel The headset's motherboard pins are a row of 10-pin double-row pins. The second pin in one row is missing one pin. It is actually 9 pins. Its panel connection plug is one or two of a set of 5-wire or 7-wire 10-hole plugs. One is empty (no wires), just insert it in the direction that corresponds to one less pin on the motherboard.
How to assemble a computer host tutorial?
Preparation before installation
Before assembling the computer, you should first learn the basic knowledge of the computer, including hardware structure, daily maintenance knowledge, common troubleshooting, operating system and commonly used software installation wait.
Preparation of accessories before installation
You must have your own plans for installation, do not blindly compare, and purchase accessories according to actual needs.
When purchasing a chassis, you should pay attention to rationalizing the internal structure to facilitate installation. Second, pay attention to the appearance and matching the color with other accessories. Generally, you should choose a vertical chassis instead of the obsolete horizontal chassis, especially the power supply inside the chassis, which is related to the stable operation of the entire computer. Its output power should not be less than 250 W. Some processors also require 300 W. The power supply should be selected according to needs.
In addition to the chassis power supply, other required accessories generally include motherboard, CPU, memory, graphics card, sound card (some sound cards come with the motherboard), hard disk, optical drive (including VCD optical drive and DVD optical drive), and floppy drive , data lines, signal lines, etc.
How to plug in the computer host?
Plugging is the process of connecting various hardware components inside the computer host to the motherboard. Here are some common connection methods:
Power connection: Plug the power connector into the power socket on the motherboard. There are usually two power connectors that need to be plugged in: a 20- or 24-pin main power connector, and a 4- or 8-pin CPU power connector.
Hard disk connection: Connect the data cable and power cable of the hard disk to the motherboard and power supply. Hard drives with SATA interface only need to be connected with data cables, while hard drives with IDE interface need to be connected with data cables and power cables.
Optical drive connection: The connection method of the optical drive is similar to that of the hard disk. It also needs to connect the data cable and power cable.
Video card connection: Insert the graphics card into the PCI-Express slot on the motherboard and connect the power supply cable of the graphics card.
Memory connection: Insert the memory into the memory slot on the motherboard. Different types of memory have different slot types and need to be inserted according to the instructions on the motherboard manual.
Front panel connection: Connect the USB, audio, power button and other cables on the front panel of the main chassis to the corresponding sockets on the motherboard.
Before plugging in the cord, you need to turn off the power and unplug the power cord. Be careful during the plug-in process and do not use excessive force to insert the plug to avoid damage to the plug or damage to the socket. Also, double check all connections to make sure they are correct.
How to plug in the computer host cable?
How to connect various wires inside the computer case:
1. Arrange all the wires together. According to the above labels, first clarify the definition of each wire:
a. Power switch: POWER SW, possible names: POWER, POWER SWITCH, ON/OFF, POWER SETUP, PWR, etc. Function definition: reset button on the front of the chassis.
b. Reset/restart switch: RESETSW, possible names: RESET, Reset Swicth, Reset Setup, RST, etc. Function definition: power-on button on the front of the chassis.
c. Power indicator: /- Possible names: POWER LED, PLED, PWRLED, SYS LED, etc.
d. Hard drive status indicator: HDD LED, Possible names: HD LED
e. Built-in small speaker (or alarm): SPEAKER, possible name: SPK, function definition: alarm for abnormal motherboard operation.
f. Audio connection cable: AUDIO, possible name: FP AUDIO, function definition: chassis front audio, generally a whole.
g, USB connection to the front interface is generally a whole.
2. Find the location of each pin on the motherboard.
3. After all connecting cables are plugged in, check whether all hardware is installed correctly and is solid. Also check that all connections are correct and secure.
4. After the inspection is completed, press the power button on the chassis and check whether all the indicators are normal.
5. After the indicator light is normal, use a USB flash drive and headphones to check whether the front USB and front audio are normal.
6. Check that everything is normal and then close the chassis. The cable connection work is completed.
Tips: Please perform all operations after the power is turned off.
How to insert the wiring harness inside the computer host?
The wiring harness insertion method in the computer host is that this type of equipment requires two types of connections for normal operation: one is an 80-pin data cable (the optical drive can be 40-pin), and the other is a 4-core power cable.
When connecting, first plug one end of the blue plug of the data cable into the IDE interface on the motherboard, and then plug the other end into the hard disk or optical drive interface; then plug the power cord connector into the power interface of the IDE device.
How to plug in headphones when assembling a computer?
To plug the headphones into the assembled computer, you need to find the audio interface on the front or rear panel of the computer host. The following are common steps for plugging in headphones:
1. Find the audio interface: On the computer host, there is usually a front panel and a rear panel. Look for the jack with the audio logo on it. On the front panel, the audio connector is usually located near the audio input/output jacks. On the back panel, the audio connector is usually located between the expansion slot and the USB port.
2. Confirm the interface type: Headphones usually use a standard 3.5 mm (or 1/8 inch) stereo plug. Make sure your headphone plug is compatible with your computer audio interface.
3. Insert the headphone plug: Gently insert the headphone plug into the audio interface. Typically, the green jack is for headphone output (audio output).
4. Confirm the connection: After plugging in the headphones, you should hear the computer's sound output through the headphones. If there is no sound, make sure the headphone plug is plugged in correctly and check your computer's audio settings.
Please note that specific insertion steps may vary depending on your computer model and manufacturer. If you encounter difficulty, it is recommended to consult your computer's user manual or contact the manufacturer for detailed instructions and guidance.
The above is the detailed content of How to insert the wires behind the computer host assembly? Do you need a diagram?. For more information, please follow other related articles on the PHP Chinese website!

 Windows 10 KB5055612: New Features & What if It Failed to InstallMay 02, 2025 pm 08:01 PM
This non-security update, KB5055612 for Windows 10 version 22H2 and related versions, released April 22, 2025, offers several quality improvements. This guide details installation and troubleshooting steps. KB5055612: Key Improvements This update enh
 Unlock Helpful Methods to Fix KB5055642 Not InstallingMay 02, 2025 pm 06:01 PM
Troubleshooting KB5055642 Installation Problems on Windows 11 This guide offers solutions for users encountering issues installing Windows 11 Insider Preview Build 26200.5562 (KB5055642), released April 21, 2025. This update introduces enhanced featu
 How to fix Windows update error 0xca00a000?May 02, 2025 pm 06:00 PM
Updates are vital to ensure that a Windows system runs well and is protected from potential outside threats, such as software vulnerabilities. Unfortunately, Wi
 Learn How to Resolve Steam Invalid Platform Error on WindowsMay 01, 2025 pm 06:01 PM
Encountering the Steam "Invalid Platform" error? This MiniTool guide offers several solutions to get you back in the game. This frustrating error typically means your game is incompatible with your operating system. Understanding the Error
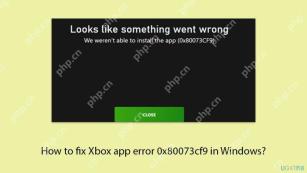 How to fix Xbox app error 0x80073cf9 in Windows?May 01, 2025 am 02:00 AM
The Windows Xbox app lets you manage your Game Pass library, view friends, and launch PC games from one place. Its a hub of Microsofts gaming experience, especi
 Fix VMWare Slow System Performance in Windows 11Apr 30, 2025 pm 08:14 PM
VMware Workstation on Windows 11: Troubleshooting Slow Performance Experiencing sluggish system performance after installing VMware Workstation on your Windows 11 desktop? This guide offers practical solutions to resolve this common issue. Quick Nav
 Community Tips for Oblivion Remastered Low FPS/Stuttering PCApr 30, 2025 pm 08:13 PM
Many players have encountered frustrating low FPS, stuttering, and lagging issues in Oblivion Remastered. This MiniTool guide offers several effective solutions to boost your gameplay performance. Quick Navigation: Oblivion Remastered Performance Pr
 Proven Fixes and Tips for Unarc.dll Error Code 11 on WindowsApr 30, 2025 pm 08:12 PM
Troubleshooting the Unarc.dll Error Code 11 in Windows Many gamers encounter the frustrating unarc.dll error code 11 during game installations. This error arises because the unarc.dll file, responsible for unpacking compressed installation files, is


Hot AI Tools

Undresser.AI Undress
AI-powered app for creating realistic nude photos

AI Clothes Remover
Online AI tool for removing clothes from photos.

Undress AI Tool
Undress images for free

Clothoff.io
AI clothes remover

Video Face Swap
Swap faces in any video effortlessly with our completely free AI face swap tool!

Hot Article
Hot Tools

SublimeText3 Chinese version
Chinese version, very easy to use

SAP NetWeaver Server Adapter for Eclipse
Integrate Eclipse with SAP NetWeaver application server.

SublimeText3 English version
Recommended: Win version, supports code prompts!

mPDF
mPDF is a PHP library that can generate PDF files from UTF-8 encoded HTML. The original author, Ian Back, wrote mPDF to output PDF files "on the fly" from his website and handle different languages. It is slower than original scripts like HTML2FPDF and produces larger files when using Unicode fonts, but supports CSS styles etc. and has a lot of enhancements. Supports almost all languages, including RTL (Arabic and Hebrew) and CJK (Chinese, Japanese and Korean). Supports nested block-level elements (such as P, DIV),

SecLists
SecLists is the ultimate security tester's companion. It is a collection of various types of lists that are frequently used during security assessments, all in one place. SecLists helps make security testing more efficient and productive by conveniently providing all the lists a security tester might need. List types include usernames, passwords, URLs, fuzzing payloads, sensitive data patterns, web shells, and more. The tester can simply pull this repository onto a new test machine and he will have access to every type of list he needs.

