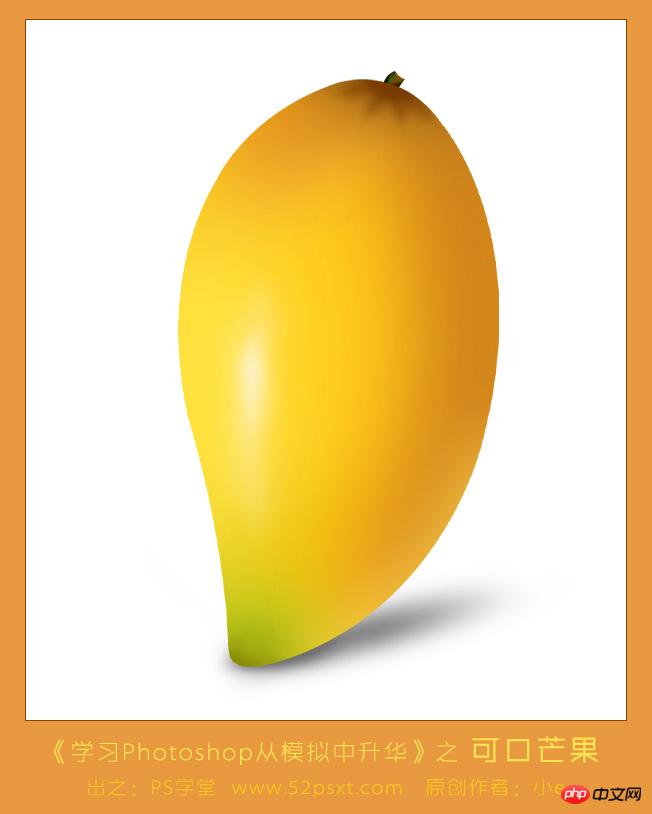
Photoshop鼠绘逼真的可口金色芒果教程,其实在绘制这样的效果时最重要的是颜色和高光把握,需要多实践多尝试才能做出更好的效果。
效果:
教程:
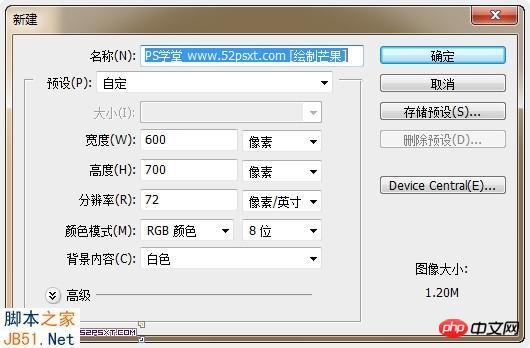
1、新建600*700像素的文件,背景白色,新建图层。
2、首先要绘制出芒果的形状和底色,用钢笔工具勾出芒果的形状,如果不太确定芒果形状是什么样,可以用本教程效果用钢笔沿着边缘先练习勾出一样的路径来。
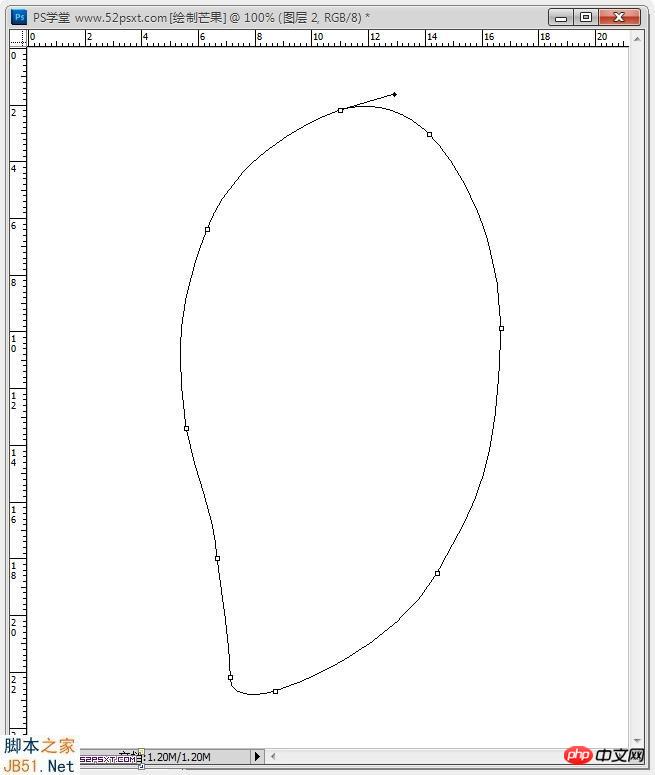
填充颜色:#ffcd19

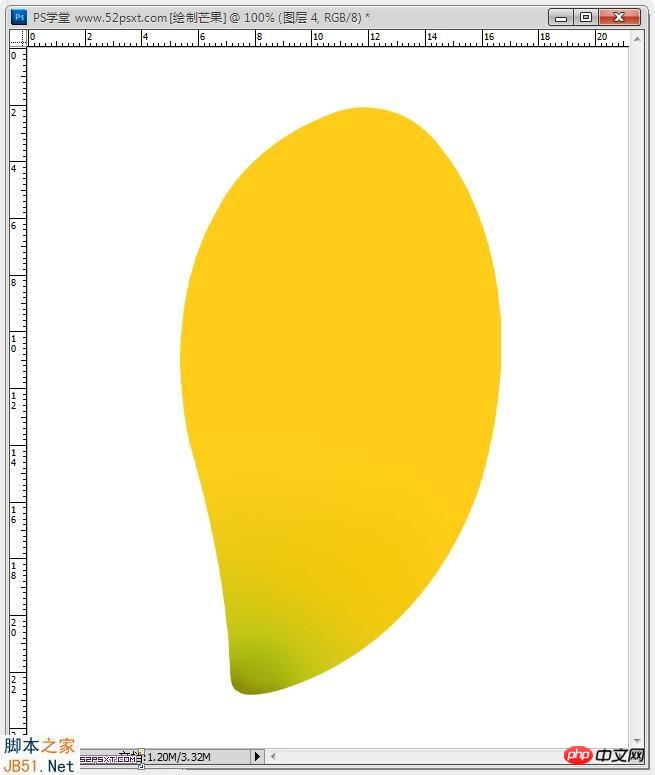
3、新建图层,用由绿#abc415到半透明的径向渐变在芒果的头部拉出渐变。

右键渐变图层-创建剪贴蒙版。
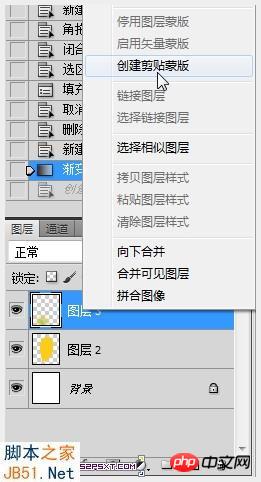
用更深一点的绿#979f0b到半透明径向渐变,继续在头部拉出小部分渐变,做为辅色。


用画笔工具,流量:50%,更深一点的绿#848c03,在头部画出暗光。

4、现在开始画芒果的颜色和高光,主要是画出颜色块,再用高斯模糊,调整不透明度就差不多。
新建图层,创建剪贴蒙版,用黄色#f6c604画笔在绿色上画几下,执行高斯模糊:30像素,调整好位置,图层不透明度:70%。

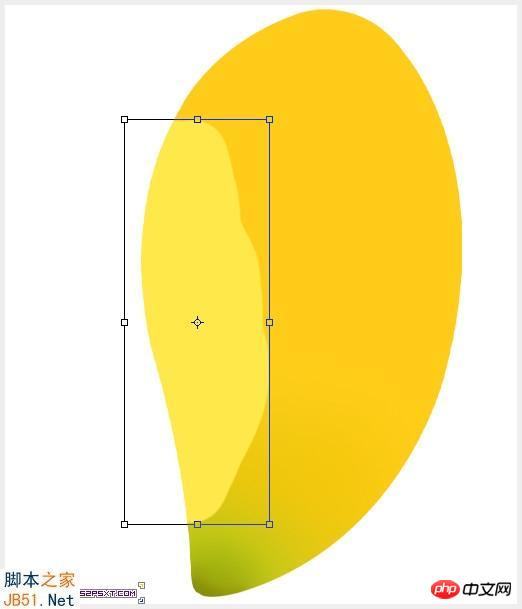
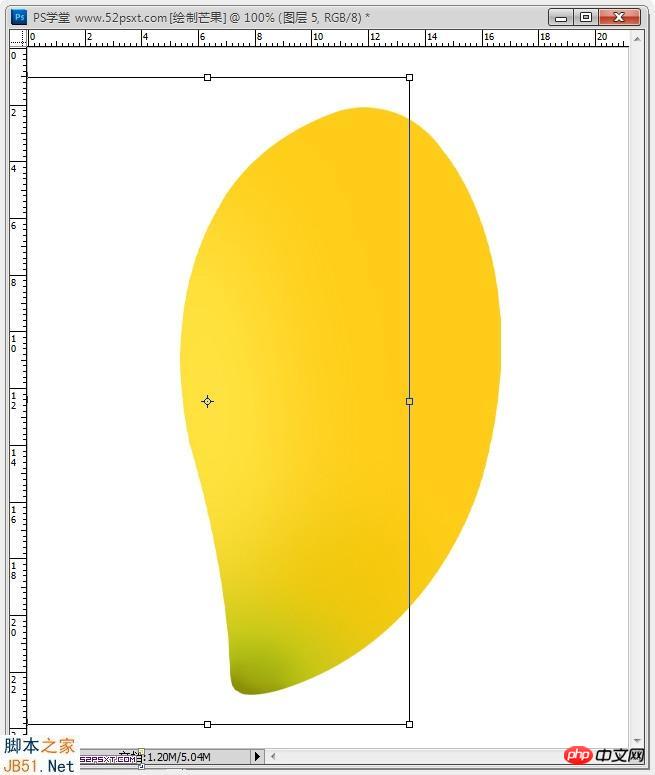
5、画芒果右面高光,算是正面,新建图层,创建剪贴蒙版,用淡黄色#ffe84a画笔画一大部分,执行高斯模糊:50像素,调整好位置。
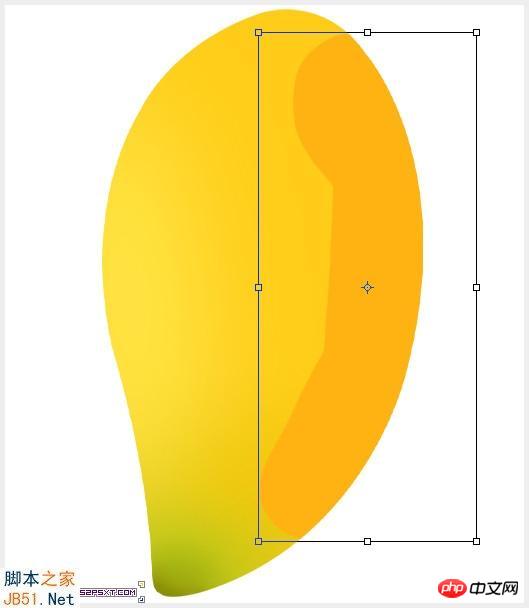
6、画芒果左面的暗光,算是背面,步骤如上,颜色#feb313。

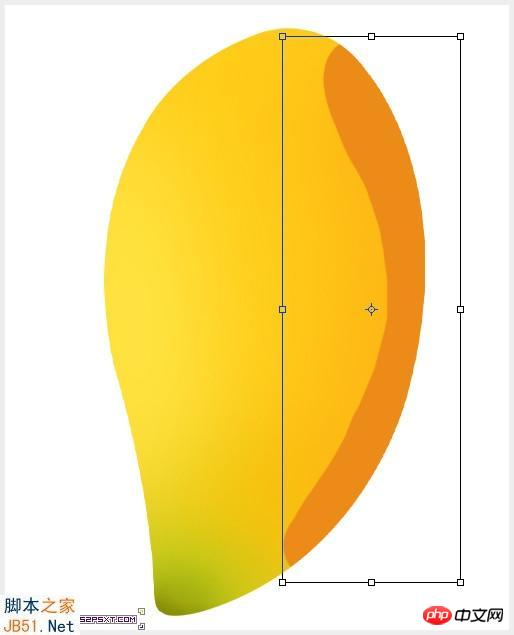
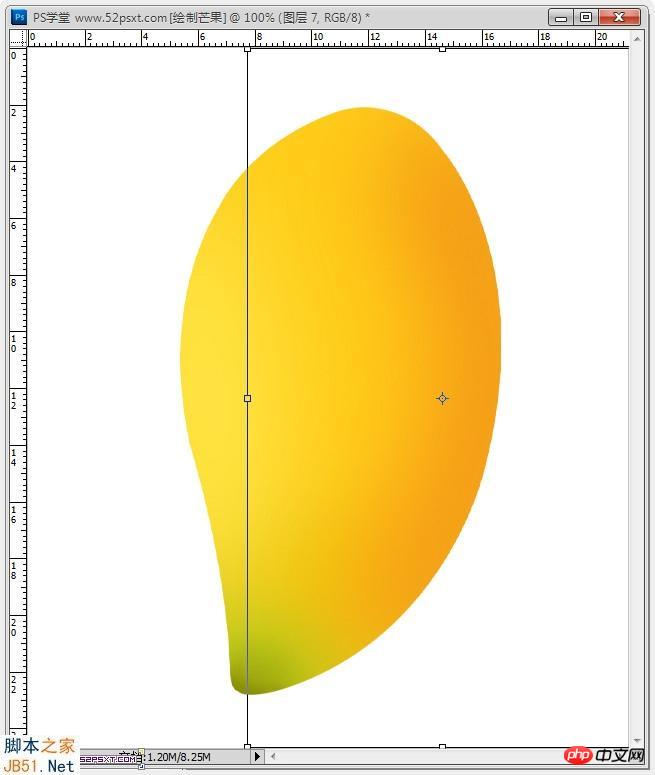
7、继续给背面增加暗光,更有质感些,步骤如上,颜色#ed8b19。
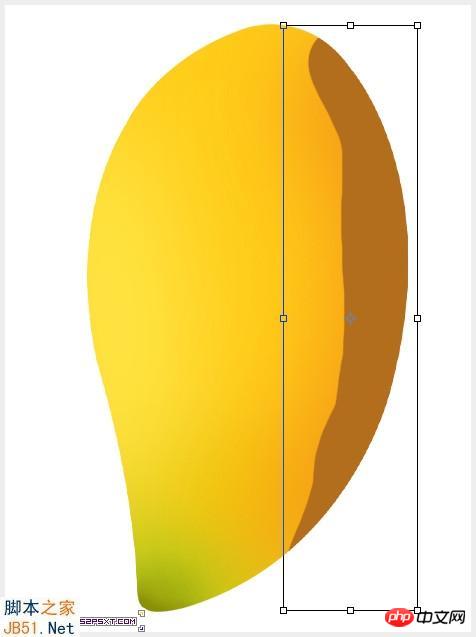
8、再继续加深,步骤如上,颜色#b26d1d。

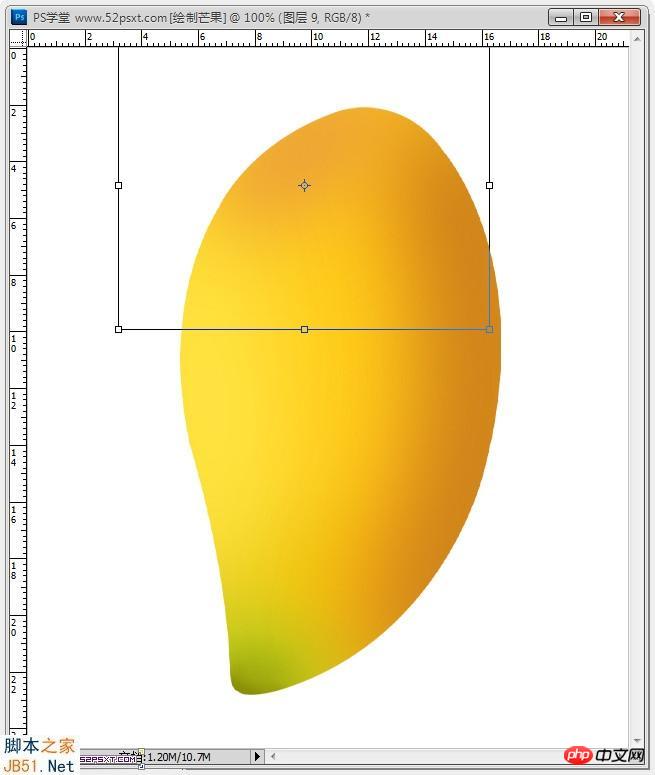
9、画芒果正面的暗光,颜色#e8993f,高斯模糊:40像素。

10、画芒果最亮的高光,这儿需要多去尝试,多用涂抹工具和橡皮擦工具修饰。
先画底层的高光,新建图层,创建剪贴蒙版,用白色画布画一长条,执行高斯模糊:15像素,用涂抹工具将两头涂抹,图层不透明度50%。


继续增加高光,新建图层,创建剪贴蒙版,用白色画布画一短条,高斯模糊:10像素,用涂抹工具将两头涂抹,图层不透明度80%,觉得超出可以用柔角橡皮擦除。


继续增加高光,新建图层,创建剪贴蒙版,用白色画布画一短条,高斯模糊:8像素,用涂抹工具将两头涂抹,图层不透明度90%。


完成高光!
11、画芒果底部暗光,新建图层,创建剪贴蒙版,用暗黄色#a76920画笔画一大部分,执行高斯模糊:40像素,调整好位置。
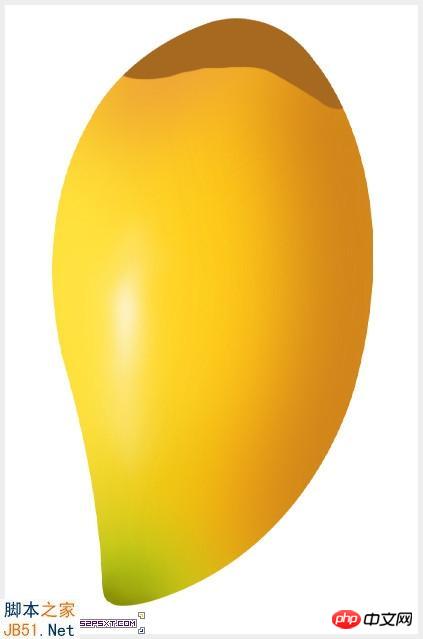
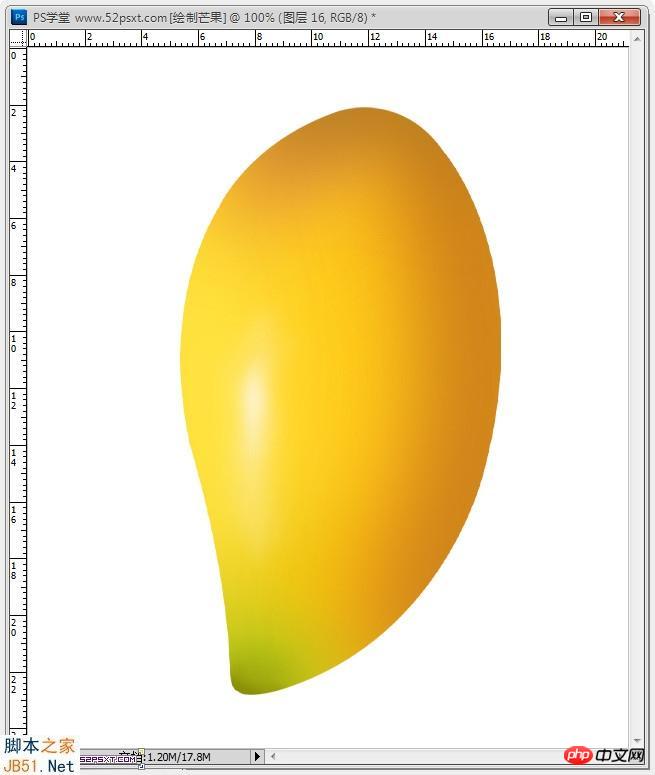
12、继续给底部增加小暗光,步骤如上,颜色#7f4601。

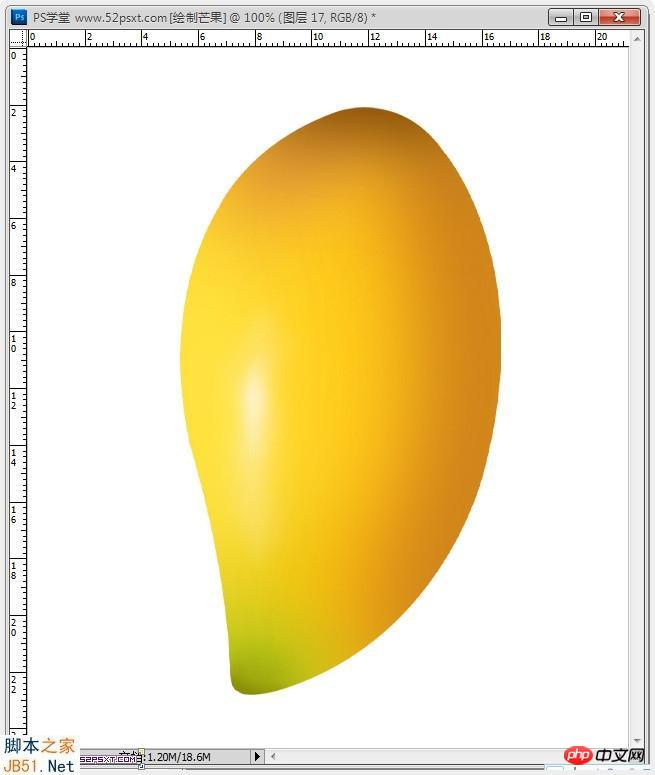
13、给底部左边增加小高光,新建图层,创建剪贴蒙版,用淡黄色#f9c41e画笔画小部分,执行高斯模糊:40像素,调整好位置。
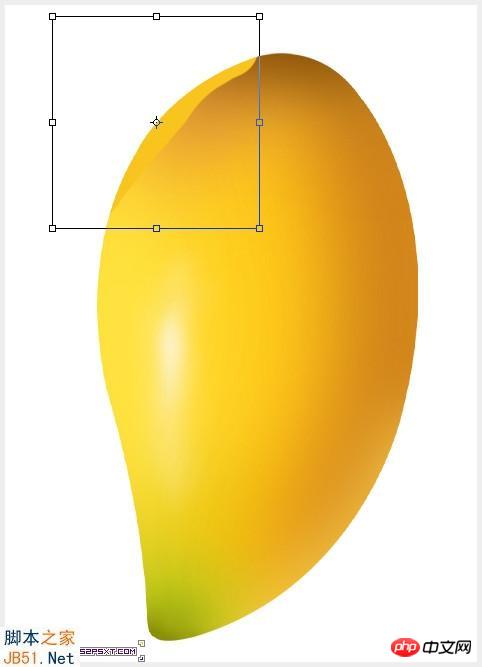

接近底部增加小高光,步骤如下,颜色#e88413
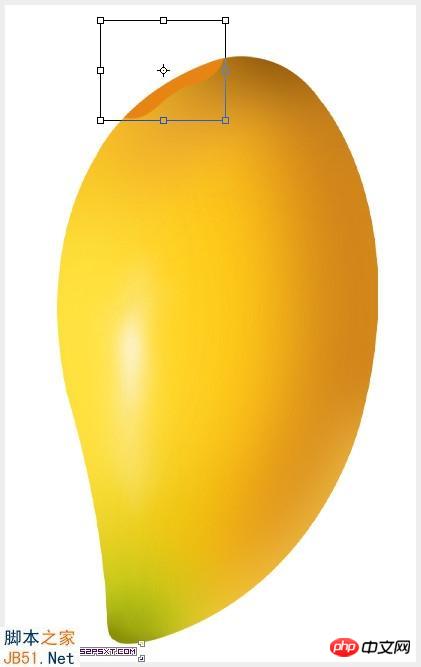
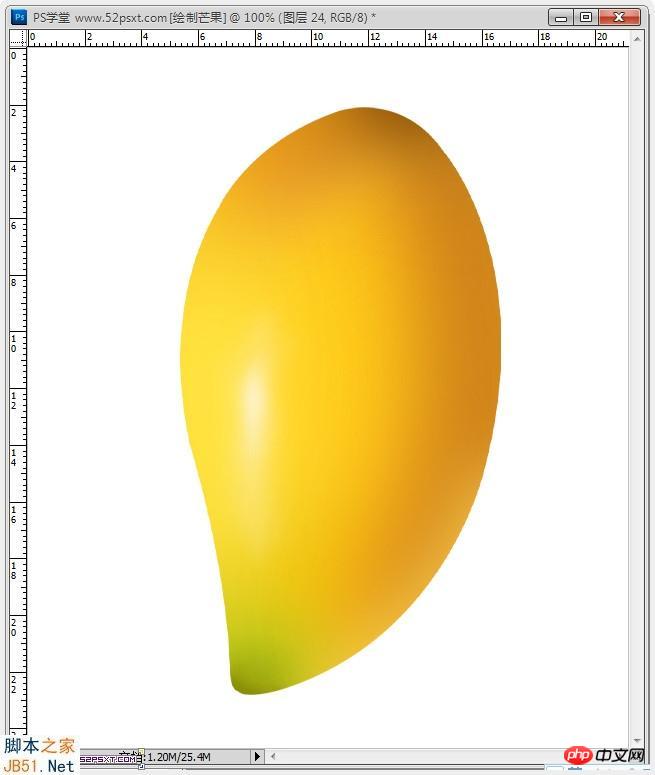
14、给右下方添加少许高光,新建图层,创建剪贴蒙版,用淡黄色#ffd858画笔画一长部分,执行高斯模糊:30像素,调整好位置,图层不透明度:80%。


15、芒果算是完成了,最后要给芒果底部画桔梗,新建图层,创建剪贴蒙版,用暗黄色#753801画笔画小部分,执行高斯模糊:20像素,调整好位置。

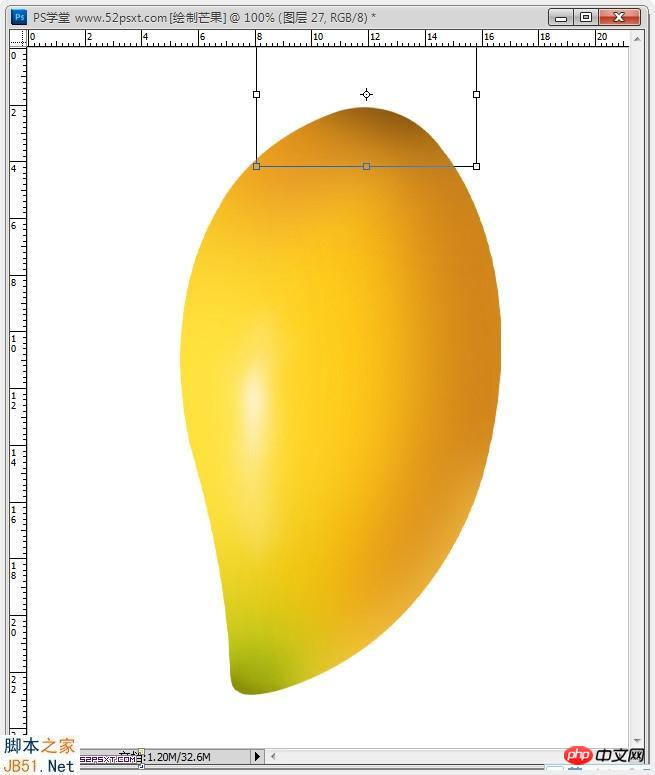
继续加暗光,如上步骤,颜色#793a01,高斯模糊:4像素。

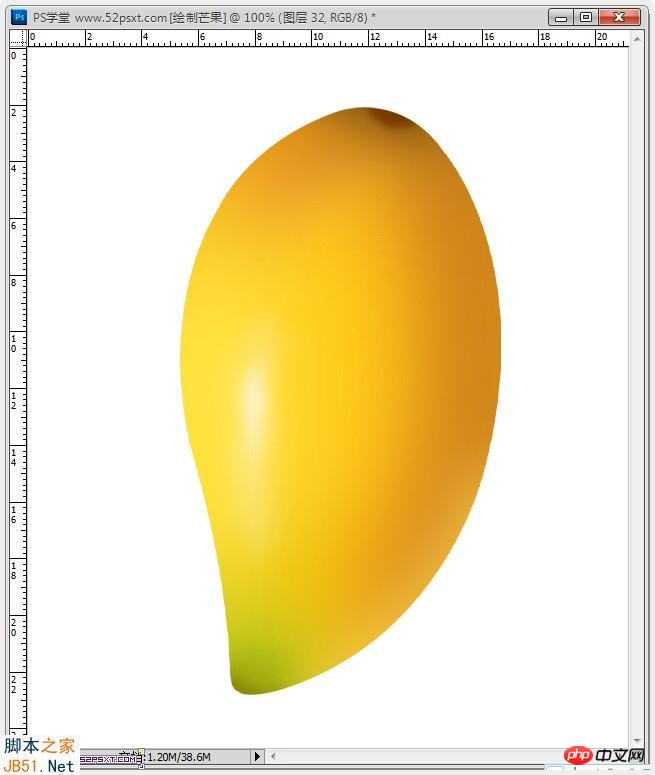
16、画桔梗处的纹路,新建图层,创建剪贴蒙版,用暗黄色#793a01画一短部分,执行高斯模糊:7像素,用涂抹工具往下抹长一点点,再用不透明度10%的柔角橡皮擦工具擦修饰一下,摆放在底部。


将此图层复制出3个图层,创建剪贴蒙版,旋转并摆上好位置。

17、在白色背景图层上新建图层,用钢笔勾出如下形状路径,建立选区后填充颜色#396811;

用加深工具提暗上部分,用减淡工具提亮下部分;
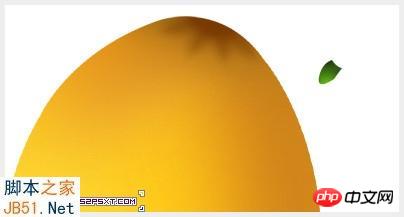
新建图层,创建剪贴蒙版,用暗黄色#765205画一下;

新建图层,创建剪贴蒙版,再用黑黄色#331f00画一下;

新建图层,创建剪贴蒙版,再用墨绿色#0e1a03画一下;

18、桔梗画完了,将其移到芒果的底部,摆好位置,再添加一下倒影,至此,这个芒果教程终于完成了!


Photoshop详解鼠绘可口的芒果经典教程 到此结束!
 Photoshop's Key Features: A Deep DiveApr 19, 2025 am 12:08 AM
Key features of Photoshop include layers and masks, adjustment tools, filters and effects. 1. Layers and masks allow independent editing of image parts. 2. Adjust tools such as brightness/contrast can modify image tone and brightness. 3. Filters and effects can quickly add visual effects. Mastering these features can help creative professionals achieve their creative vision.
 Photoshop and Digital Art: Painting, Illustration, and CompositingApr 18, 2025 am 12:01 AM
Photoshop's applications in digital art include painting, illustration and image synthesis. 1) Painting: Using brushes, pencils and mixing tools, the artist can create realistic effects. 2) Illustration: With vector and shape tools, artists can accurately draw complex graphics and add effects. 3) Synthesis: Using mask and layer blending mode, artists can seamlessly blend different image elements.
 Advanced Photoshop Tutorial: Master Retouching & CompositingApr 17, 2025 am 12:10 AM
Photoshop's advanced photo editing and synthesis technologies include: 1. Use layers, masks and adjustment layers for basic operations; 2. Use image pixel values to achieve photo editing effects; 3. Use multiple layers and masks for complex synthesis; 4. Use "liquefaction" tools to adjust facial features; 5. Use "frequency separation" technology to perform delicate photo editing, these technologies can improve image processing level and achieve professional-level effects.
 Using Photoshop for Graphic Design: Branding and MoreApr 16, 2025 am 12:02 AM
The steps to using Photoshop for brand design include: 1. Use the Pen tool to draw basic shapes, 2. Add shadows and highlights through layer styles, 3. Adjust colors and details, 4. Use smart objects and actions to automatically generate different versions of the design. Photoshop helps designers create and optimize brand elements with the flexibility of layers and masks, ensuring consistency and professionalism of designs, from simple logos to complex branding guides.
 Photoshop's Subscription Model: What You Get for Your MoneyApr 15, 2025 am 12:17 AM
Photoshop's subscription model is worth buying. 1) Users can access the latest version and use across devices at any time. 2) The subscription fee is low, and continuous updates and technical support are provided. 3) Advanced functions such as neural filters can be used for complex image processing. Despite the high long-term costs, its convenience and feature updates are valuable to professional users.
 Photoshop: Investigating Free Trials and Discount OptionsApr 14, 2025 am 12:06 AM
You can get the access to Photoshop in the most economical way: 1. Experience the software features with a 7-day free trial; 2. Find student or teacher discounts, as well as seasonal promotions; 3. Use coupons on third-party websites; 4. Subscribe to Adobe CreativeCloud's monthly or annual plan.
 Photoshop for Designers: Creating Visual ConceptsApr 13, 2025 am 12:09 AM
Creating visual concepts in Photoshop can be achieved through the following steps: 1. Create a new document, 2. Add a background layer, 3. Use the brush tool to draw basic shapes, 4. Adjust colors and brightness, 5. Add text and graphics, 6. Use masks for local editing, 7. Apply filter effects, these steps help designers build a complete visual work from scratch.
 Is Photoshop Free? Understanding Subscription PlansApr 12, 2025 am 12:11 AM
Photoshop is not free, but there are several ways to use it at low cost or free: 1. The free trial period is 7 days, and you can experience all functions during this period; 2. Student and teacher discounts can cut costs by half, and school proof is required; 3. The CreativeCloud package is suitable for professional users and includes a variety of Adobe tools; 4. PhotoshopElements and Lightroom are low-cost alternatives, with fewer functions but lower prices.


Hot AI Tools

Undresser.AI Undress
AI-powered app for creating realistic nude photos

AI Clothes Remover
Online AI tool for removing clothes from photos.

Undress AI Tool
Undress images for free

Clothoff.io
AI clothes remover

AI Hentai Generator
Generate AI Hentai for free.

Hot Article

Hot Tools

Atom editor mac version download
The most popular open source editor

SublimeText3 Linux new version
SublimeText3 Linux latest version

SublimeText3 Mac version
God-level code editing software (SublimeText3)

SublimeText3 English version
Recommended: Win version, supports code prompts!

SAP NetWeaver Server Adapter for Eclipse
Integrate Eclipse with SAP NetWeaver application server.


