最终效果 1、借鉴和素描 (1)看看《霍比特人》这部电影,观察电影中是如何营造中土世界的环境和气氛,比如岩石、山脉以及树 最终效果 1、借鉴和素描 (1)看看《霍比特人》这部电影,观察电影中是如何营造中土世界的环境和气氛,比如岩石、山脉以及树木都是怎样的 最终效果 1、借鉴和素描 (1)看看《霍比特人》这部电影,观察电影中是如何营造中土世界的环境和气氛,比如岩石、山脉以及树
最终效果
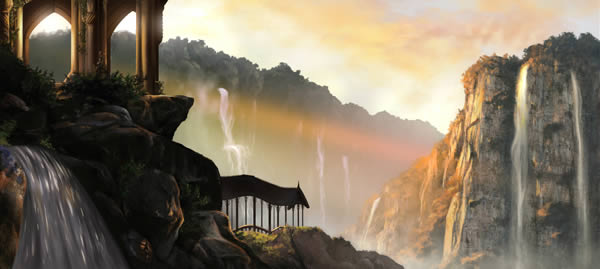
1、借鉴和素描
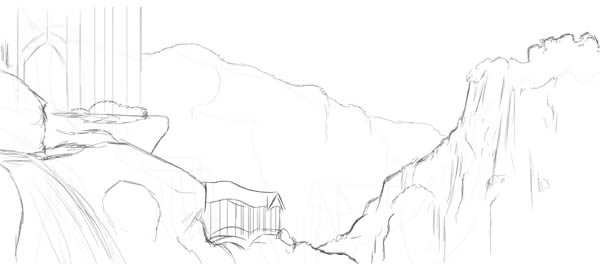
(1)看看《霍比特人》这部电影,观察电影中是如何营造中土世界的环境和气氛,比如岩石、山脉以及树木都是怎样的,还有它里面的用光又是怎样的。借鉴学习完毕后,脑子里有了想法后,就可以开始绘制草图了。新建Photoshop文件7000×3138像素,分辨率为300,用画笔工具勾勒出脑中的草图

(2)新建图层,继续细化场景,使草图的层次感更加明显
2、分层上色
(1)使用画笔工具,设置圆形硬喷笔,参数设置如下:
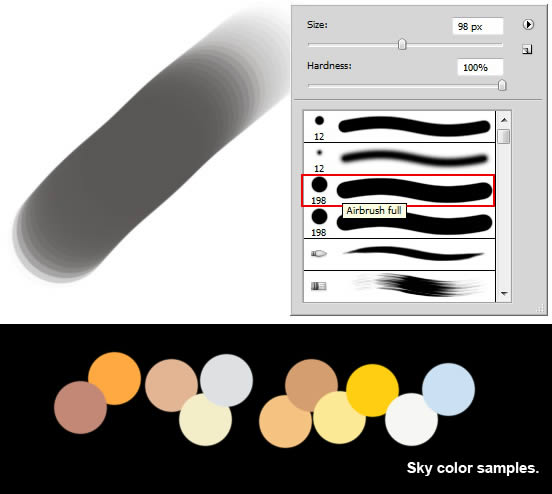
粗略涂抹出天空和云的颜色
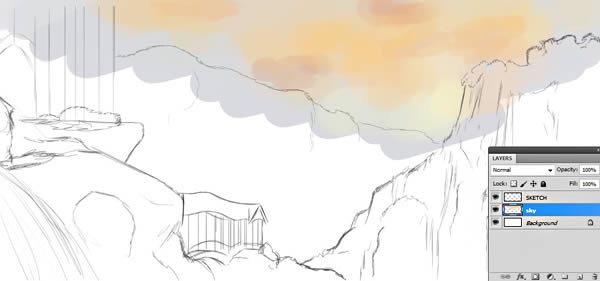
大致确定的主光源方向
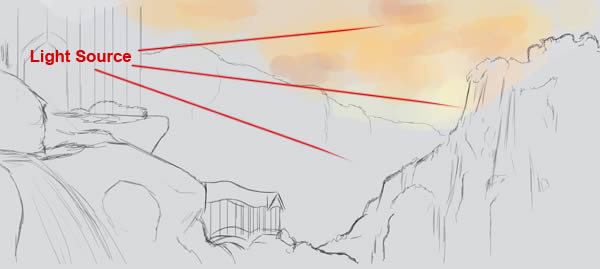
(2)新建图层,涂抹出山的大致颜色
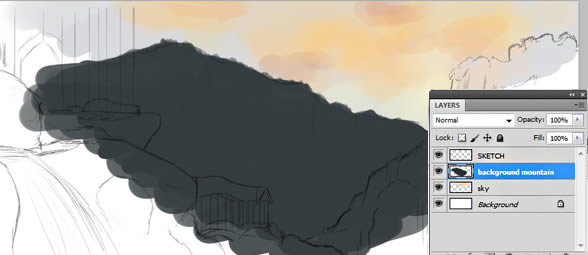
(3)不用画的很光滑,让它有高低起伏变化
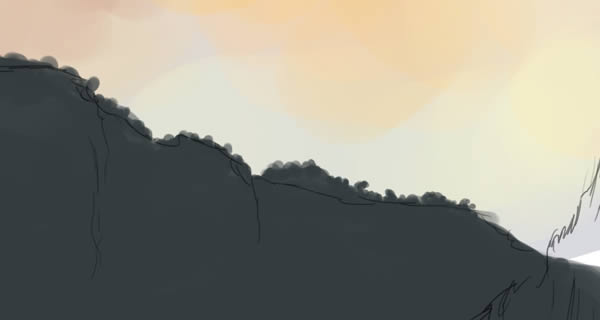
(4)新建图层,颜色设置的较暗一点(#1d1e20),涂抹出中间的山峰层
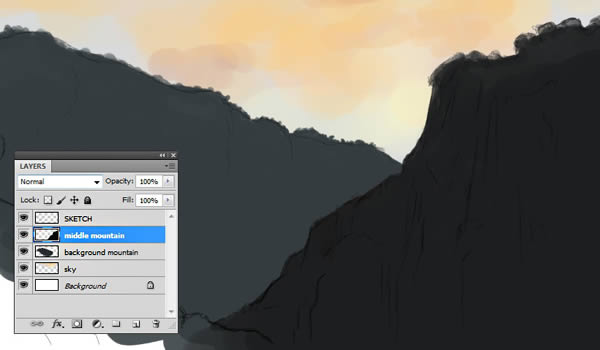
(5)继续新建图层,涂抹出前景山峰层,这一层也是最暗的
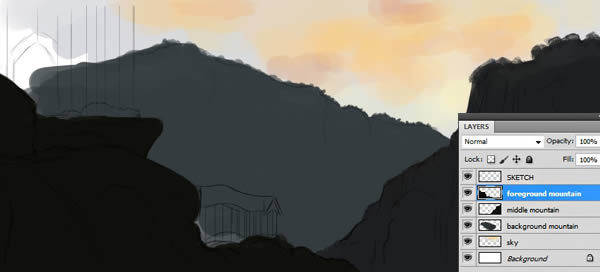
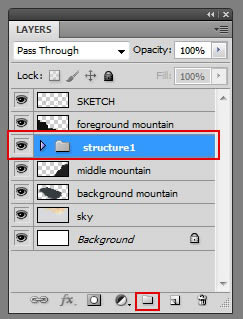
(6)在中间地面层上面新建组,命名为“structure1”
(7)用硬边笔刷,给柱子上色
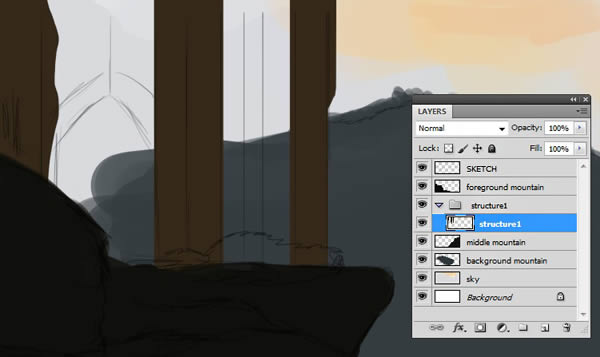
(8)在柱子层的后方继续给其他部分上色,颜色适当浅一点
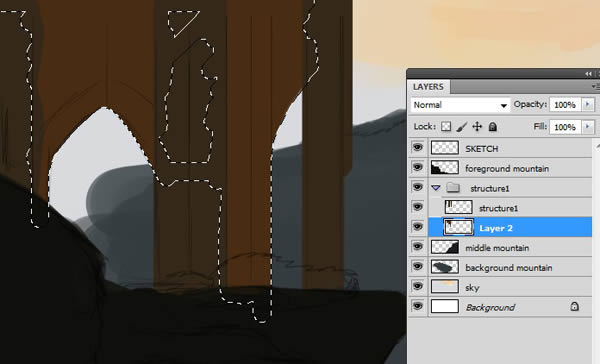
(9)将建筑背后也涂抹上山的颜色
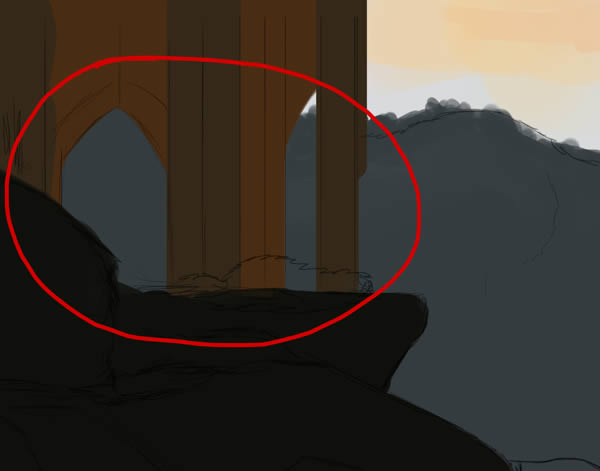
(10)在前景层上面涂抹出瀑布的大体轮廓
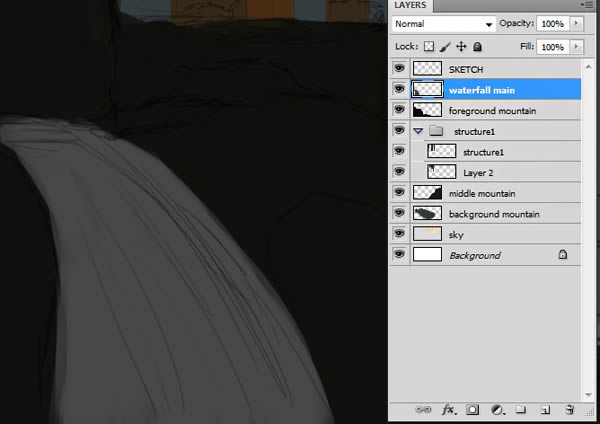
3、绘制最初的明暗关系
(1)给瀑布增加一些明暗变化,让它更加真实立体
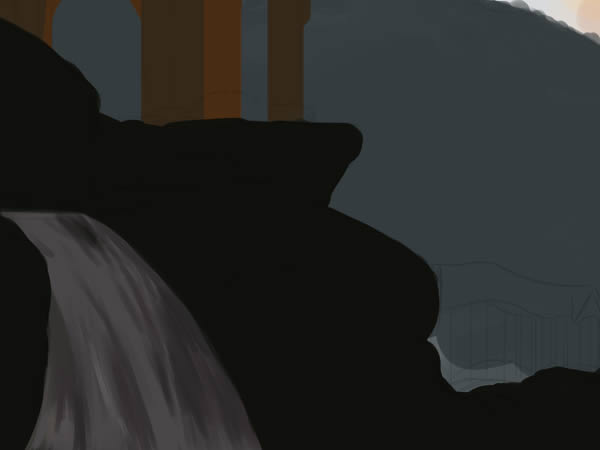
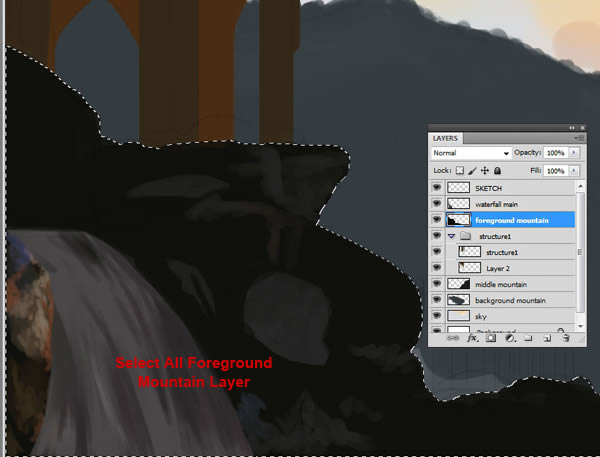
(3)继续丰富细节,让亮的部分更亮,暗的部分更暗
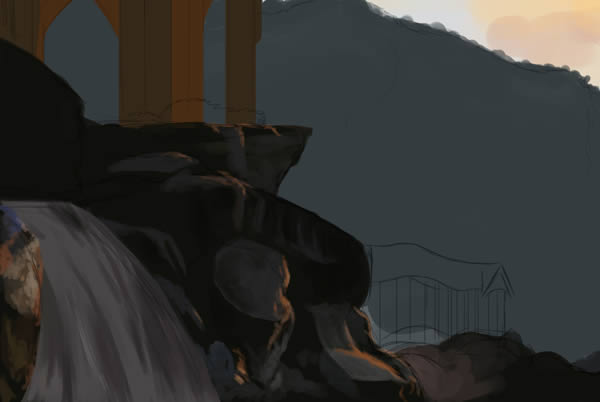
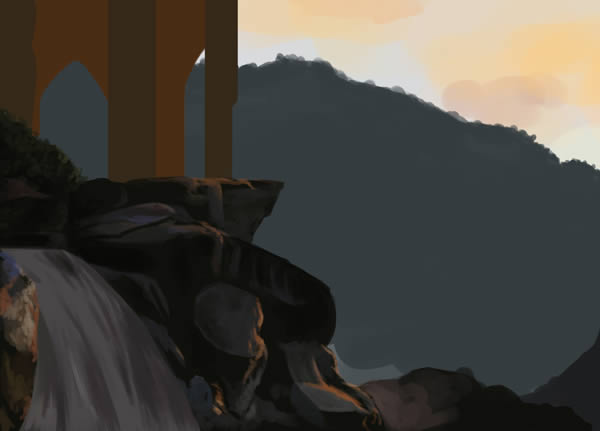
(4)在岩石中绘制一些灌木(#20261a)
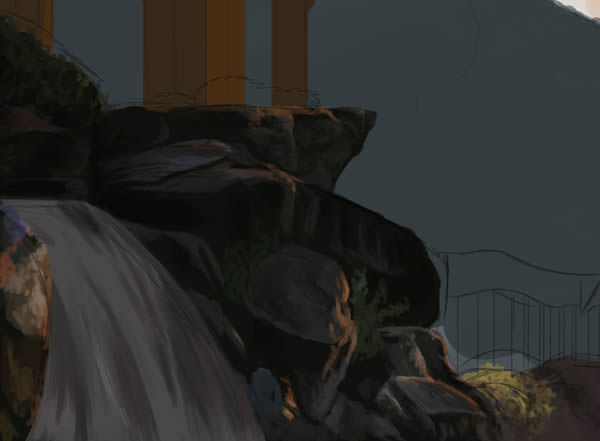
(5)新建组“structure2”,因为背光,此部分不需要太多细节!
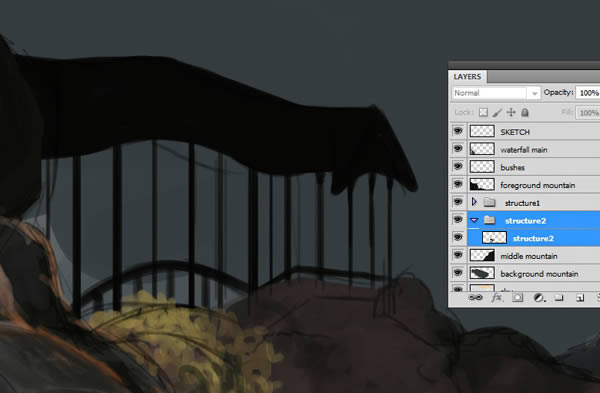
(6)回到中间山峰层,根据主光源的位置,绘制岩壁上的高光
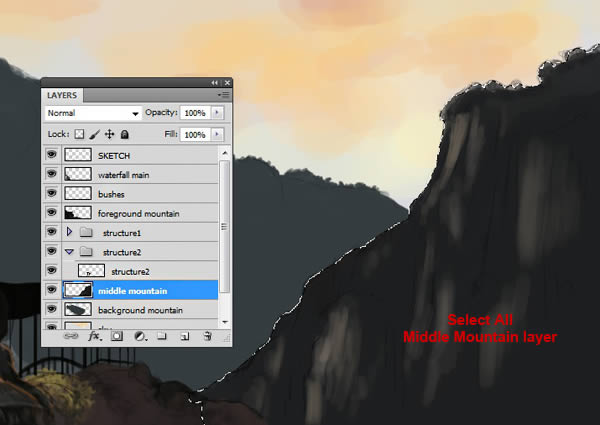
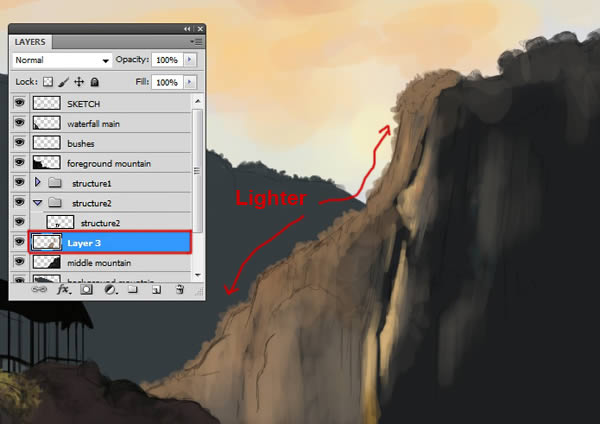
(7)新建一层,绘制一些更亮的部分!
4、绘制中间部分的细节
(1)用“Textured Round Brush”笔刷(在“Rahll Brush Set”里),绘制岩壁高光和边缘部分
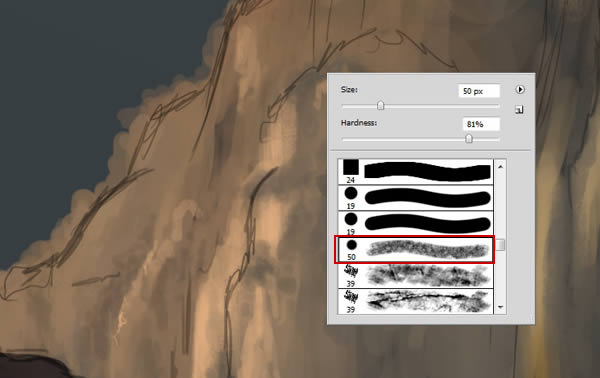
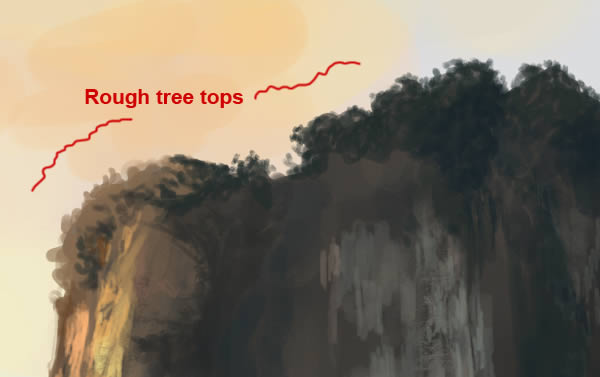
(2)同时增加更多的暗部细节以及一些山顶的树木
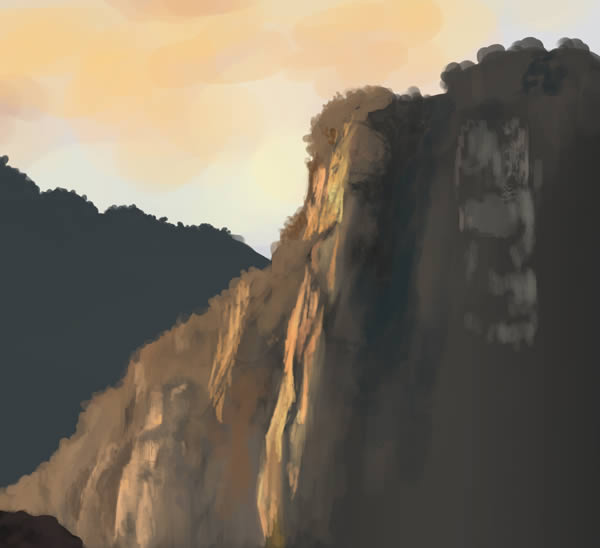
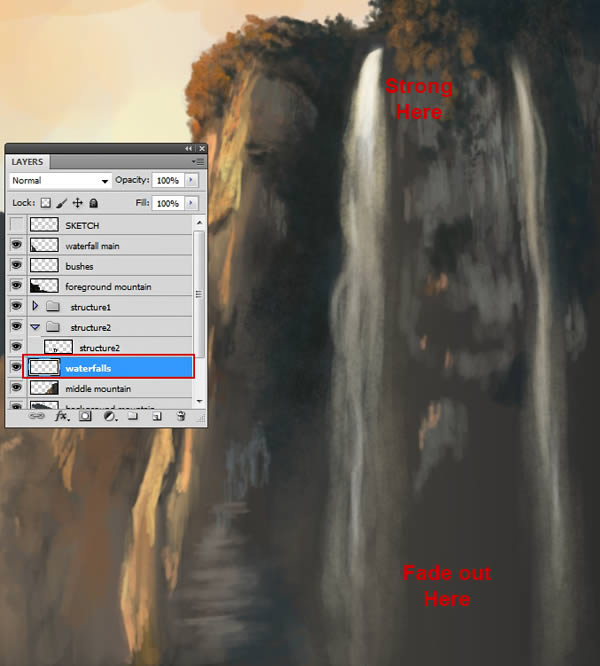
(3)新建瀑布层,使用“Textured Round Brush”笔刷,设置笔刷透明度20%左右,从上向下绘制,营造水流下的感觉
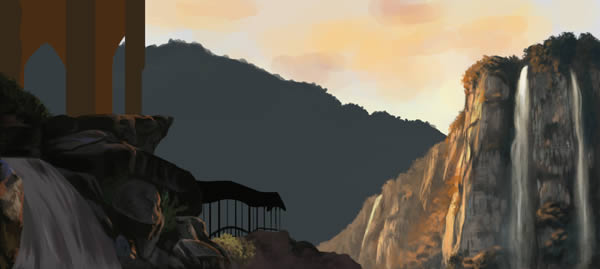
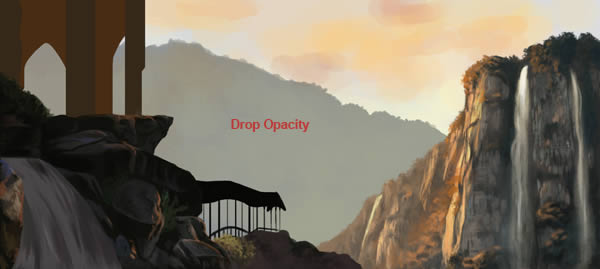
(4)增加岩石层的更多细节,将背景山峰层的透明度下降到50%左右!
5、添加纹理
(1)打开岩石纹理,并翻转90度,如下所示

复制纹理,得到下图效果
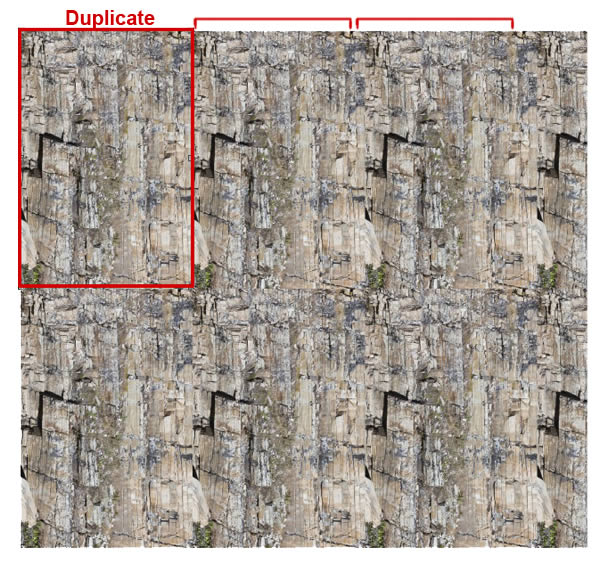
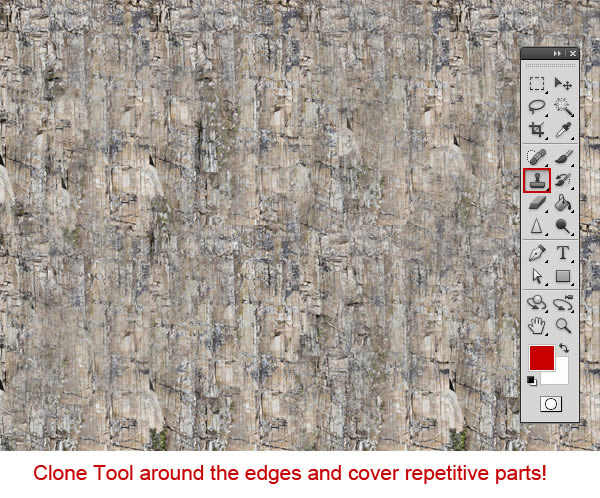
使用仿制图章工具,让接缝处更加柔和自然
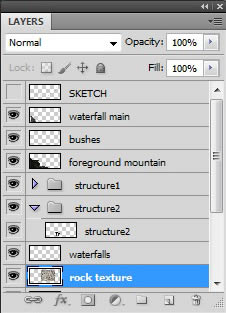
(2)拖动纹理到瀑布层的下方,执行“Ctrl+T”,自由变换
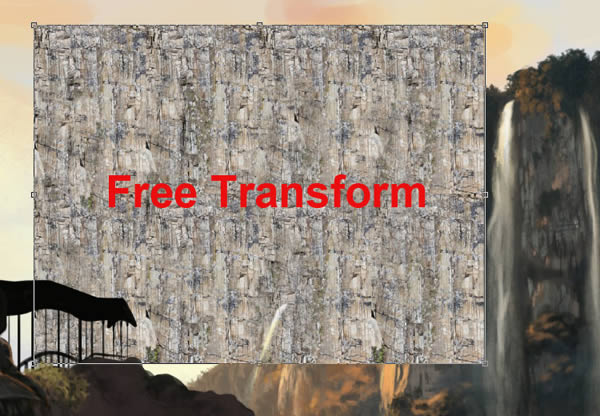
(3)将其放置在下图位置,并设置混合模式为柔光,将不透明度降为70%左右,删除多余的部分,这样岩壁的效果就更加真实可信了
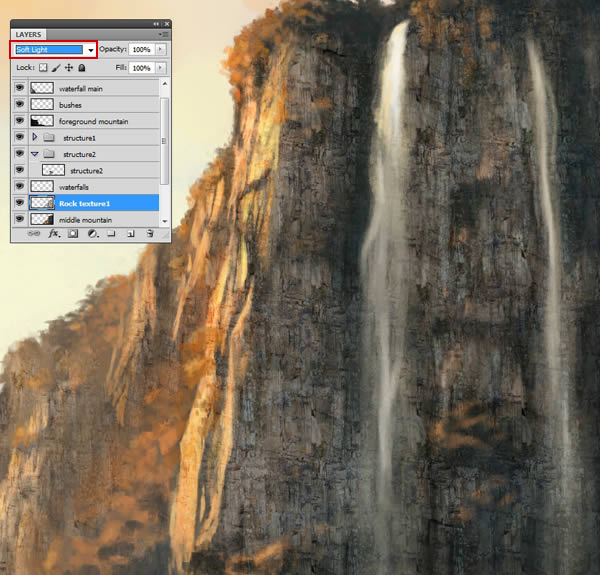
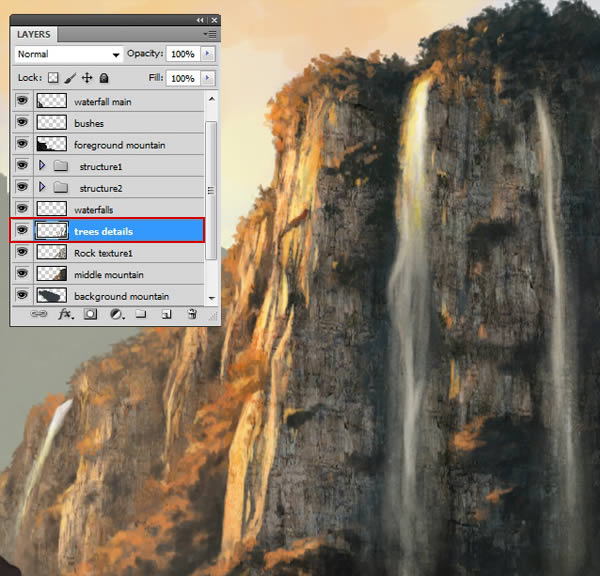
(4)在岩石层上新建树木层,绘制一些树木的细节,这样会更加有层次感
6、背景和天空
(1)选中背景山峰层,绘制一些绿色的树木细节
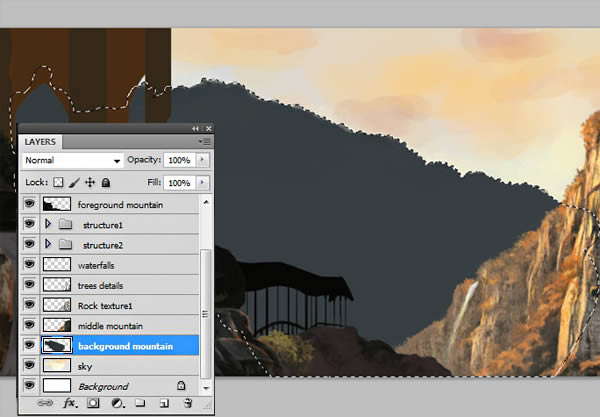
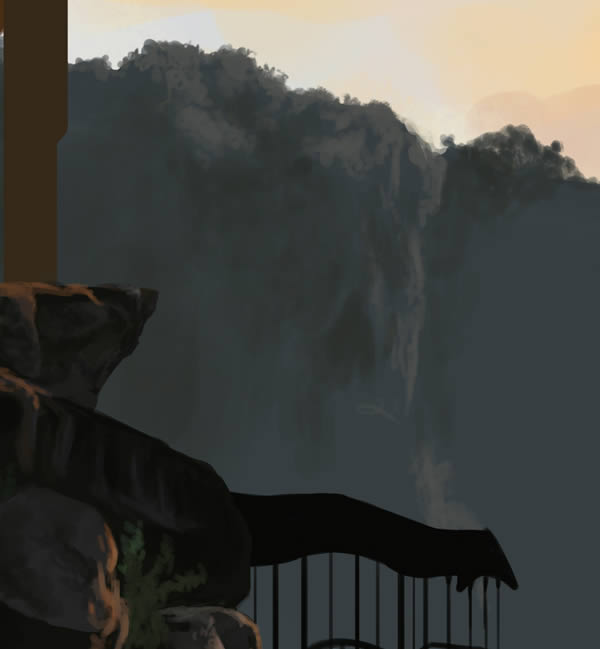
(2)让远处更亮,营造一种渐行渐远的感觉

(3)继续添加一些高光细节
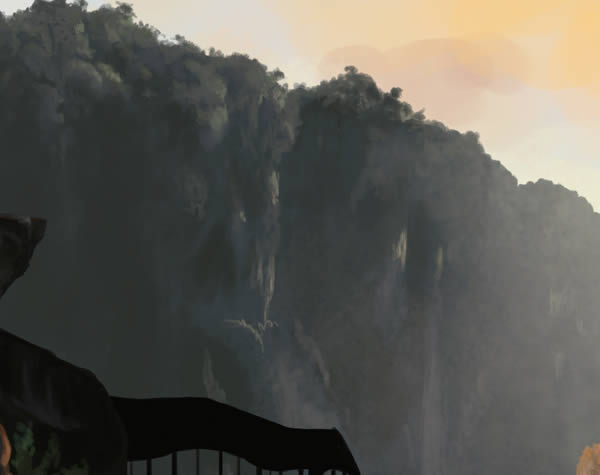
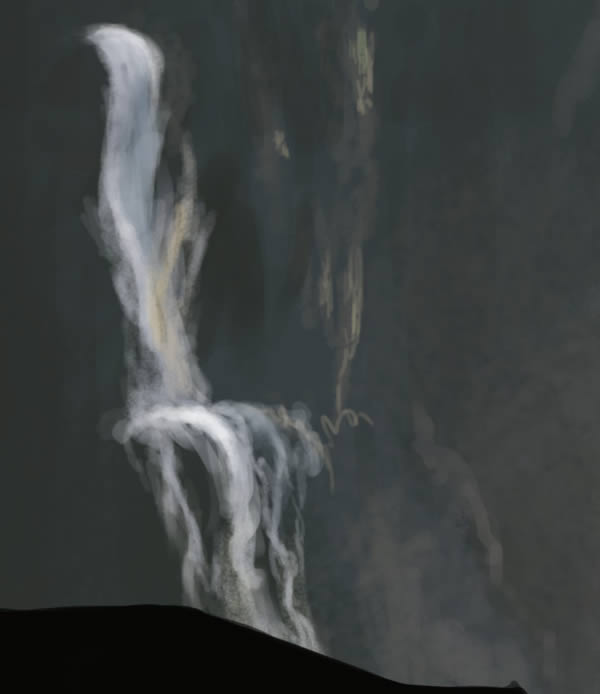
(4)新建瀑布2,绘制一些小型零散的瀑布流
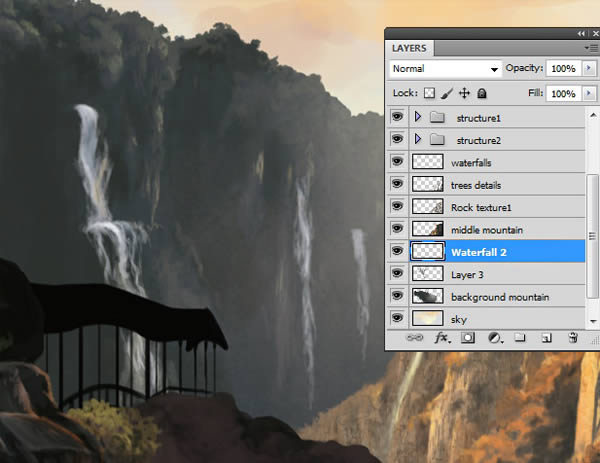
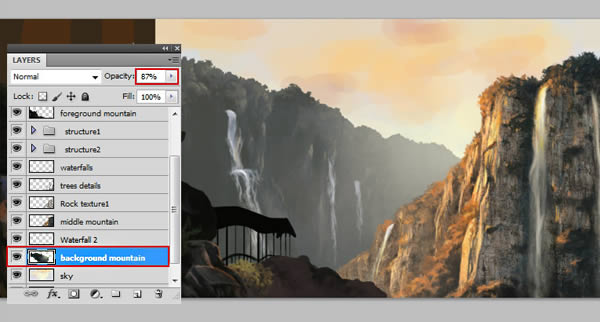
(5)调整背景山峰层的透明度为87%
(6)在天空层上方新建云层,用“Cloud Brush1”笔刷绘制天空的云,时刻遵循光是从左上角打过来的
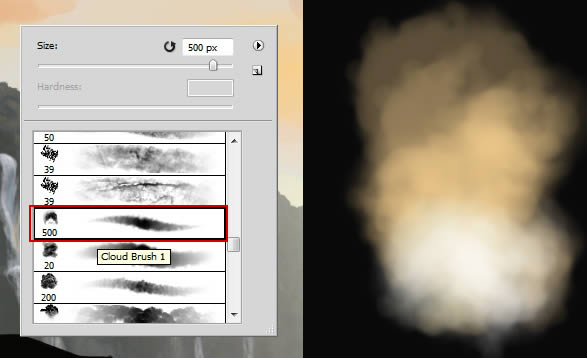
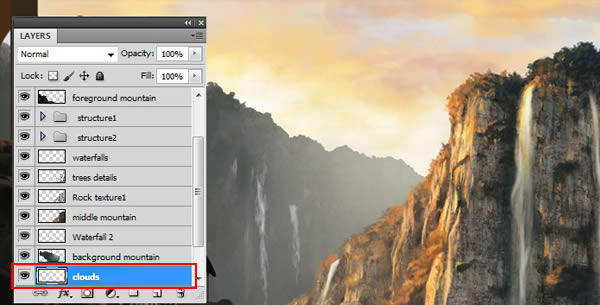
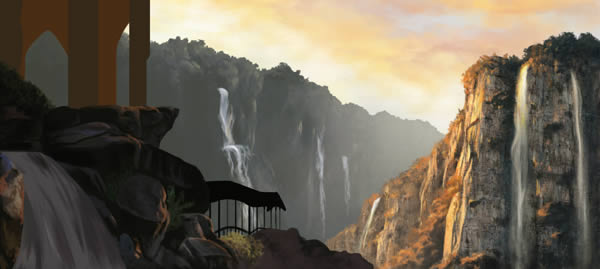
(7)上述阶段完成后,效果如下所示
(8)新建“Mist”层,使用#f5edd5,笔刷透明度降至5%-7%,在底部绘制一层薄雾
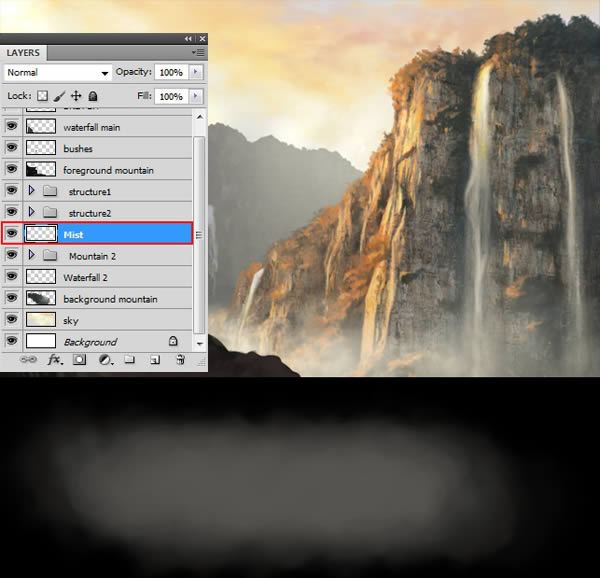
(9)同样再新建一个“Mist background”层,用#c9cbd8绘制水雾
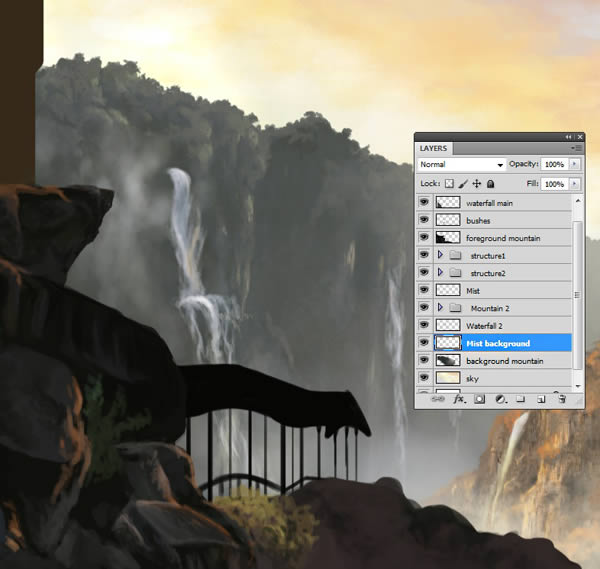
7、前景详图
(1)回到前景,选中下面的层,并执行自有变换,将其拉大一点
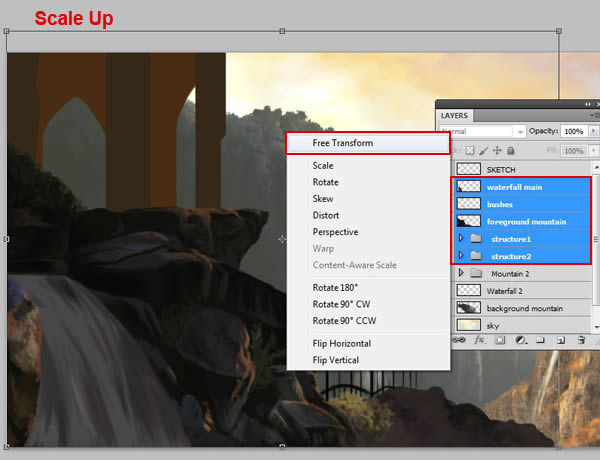
(2)虽然只是缩放了一下,但前景立马得到了突显
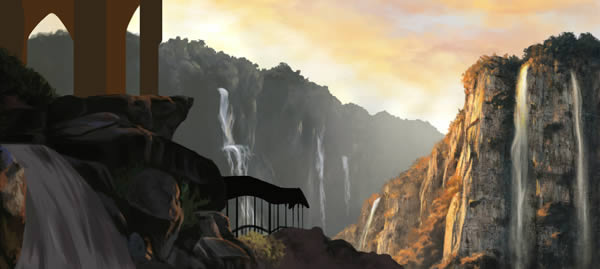
(3)继续绘制一些岩石和灌木的边缘高光
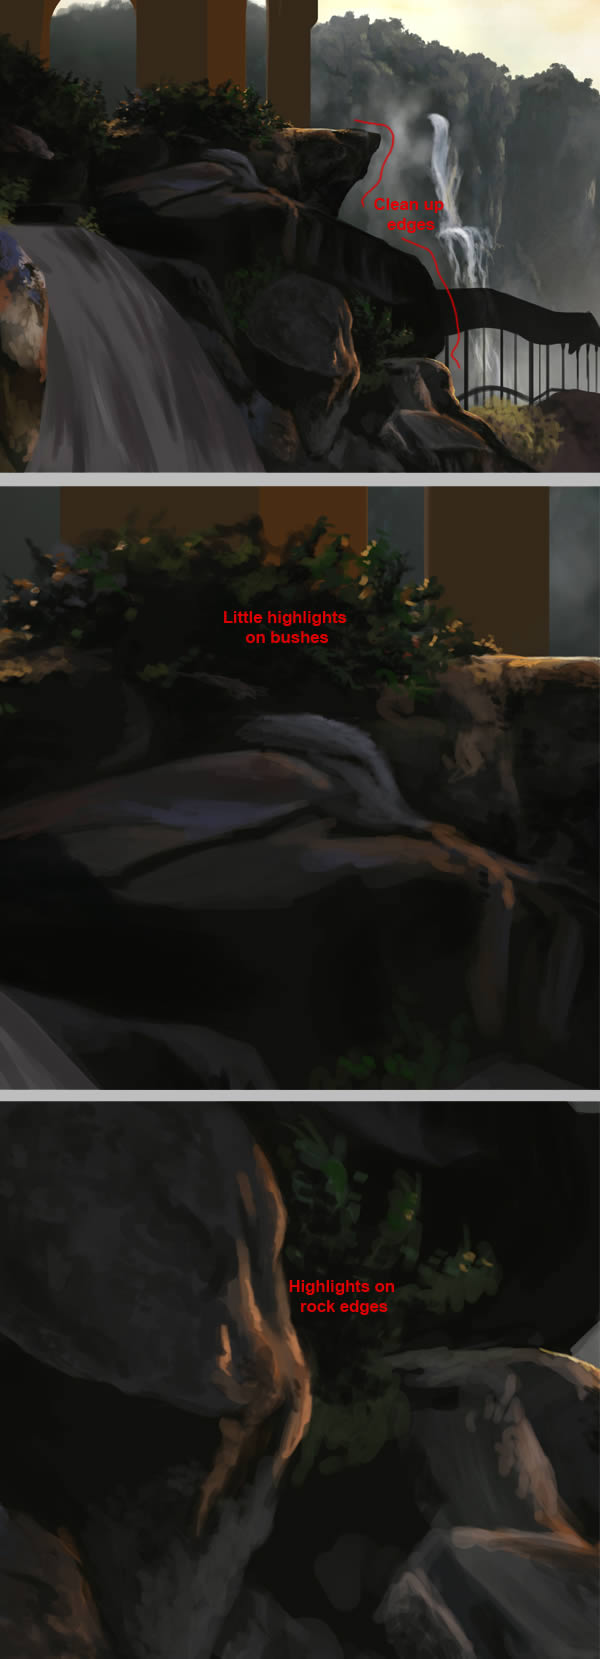
(4)打开另一个岩石纹理
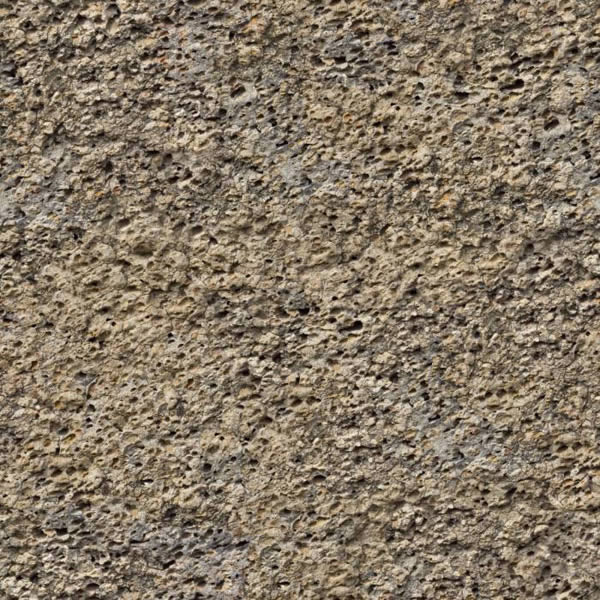
(5)将其拖放在岩石层上面
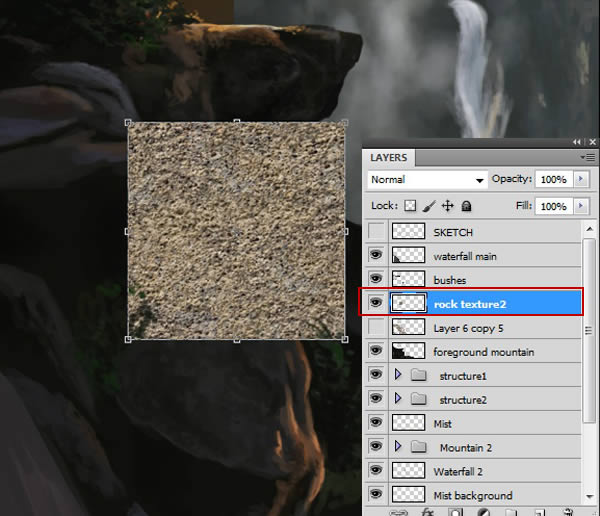
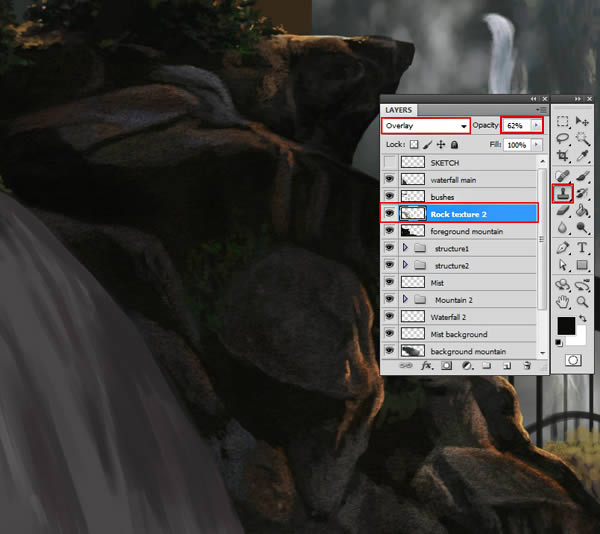
(6)设置混合模式为叠加,透明度降低至62%,用仿制图章工具给岩石表面增加上纹理
(7)继续添加更多地岩石细节
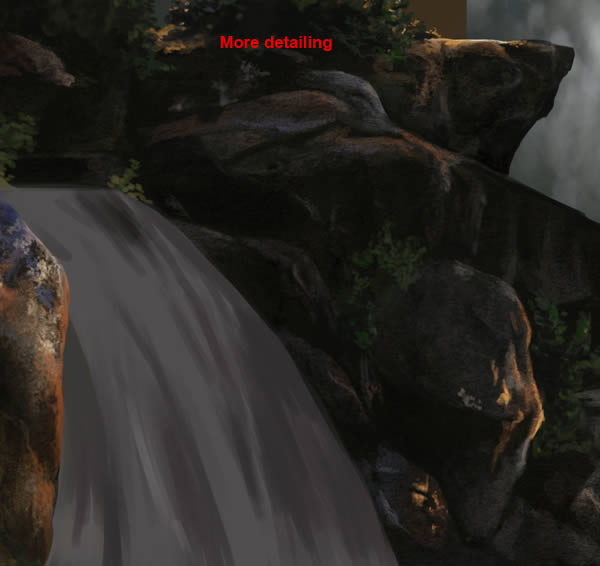
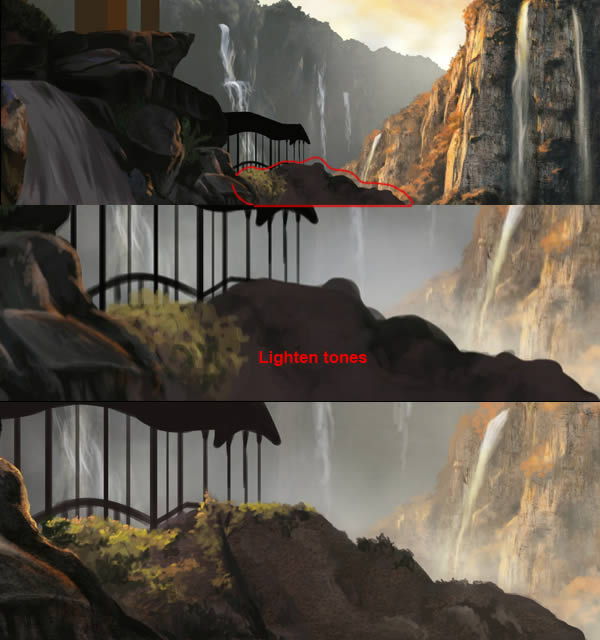
(8)使得下图部分岩石更加亮一点,这样层次感会更加突出
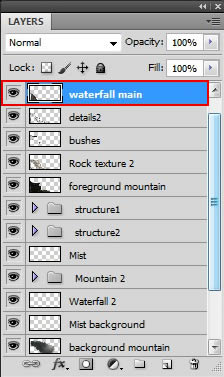
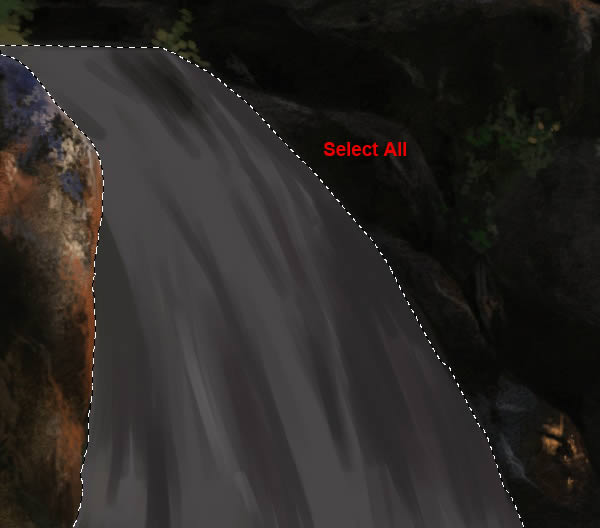
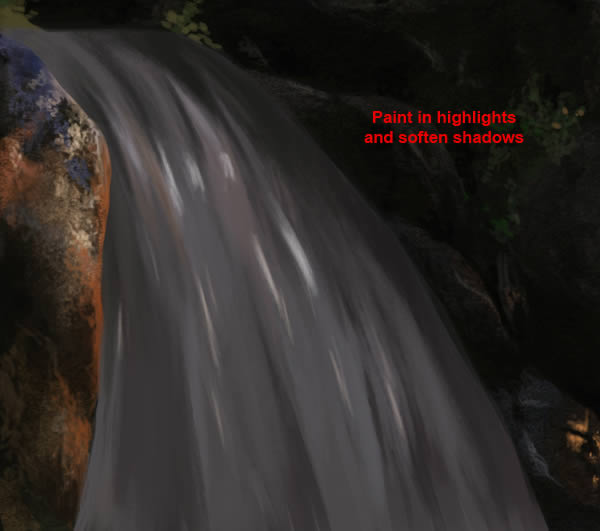
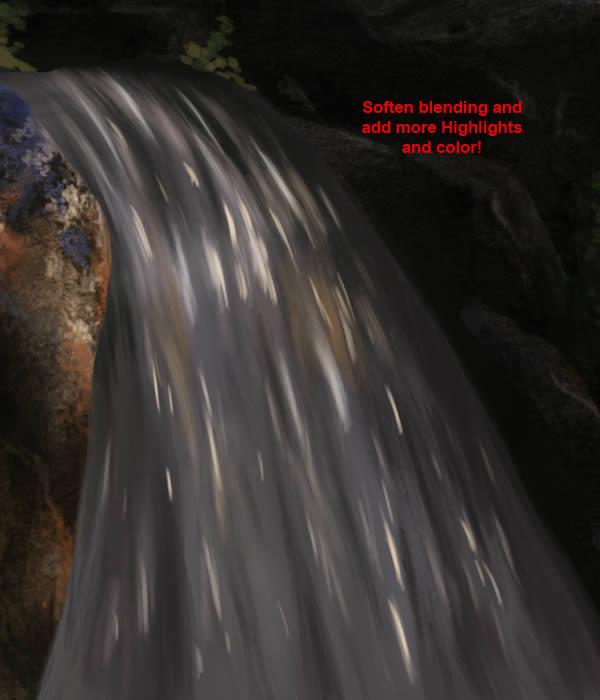
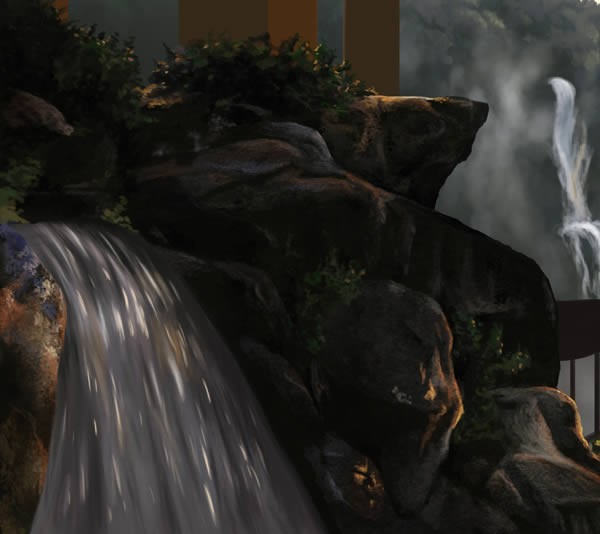
(9)回到主瀑布层,绘制更多的高光和阴影,丰富更多地细节
8、建筑物细节
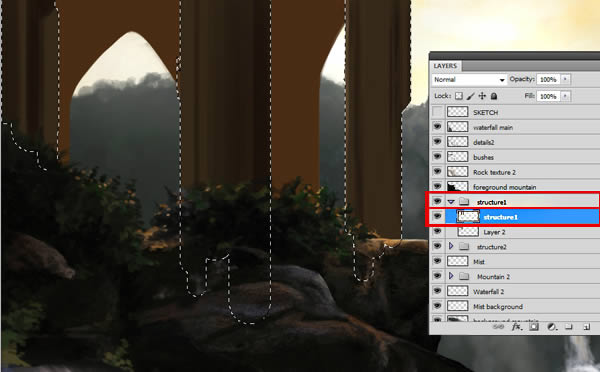
(1)选中建筑物层
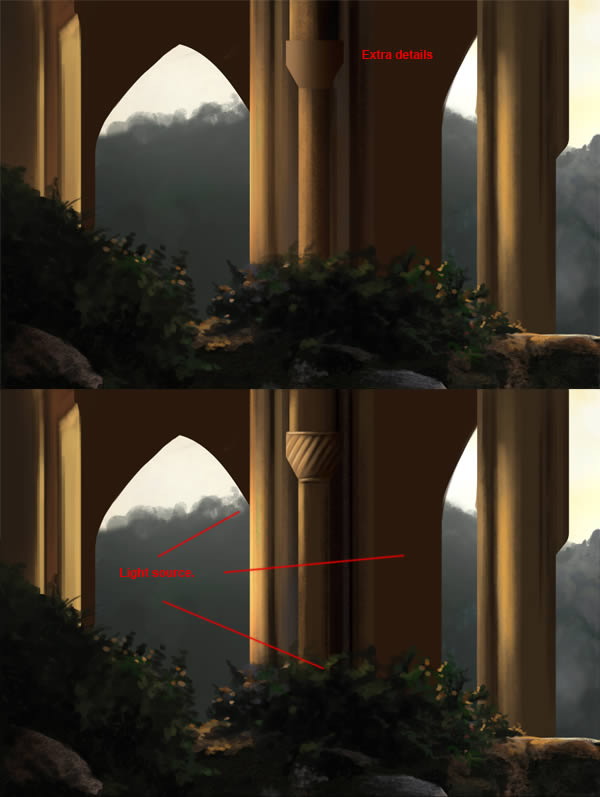
(2)添加一些高光
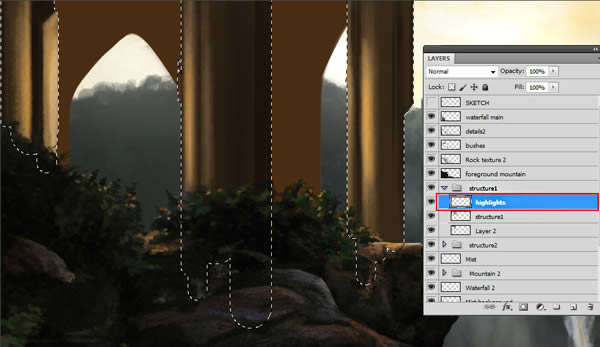
(3)添加更多的小细节,时刻注意光源的方向
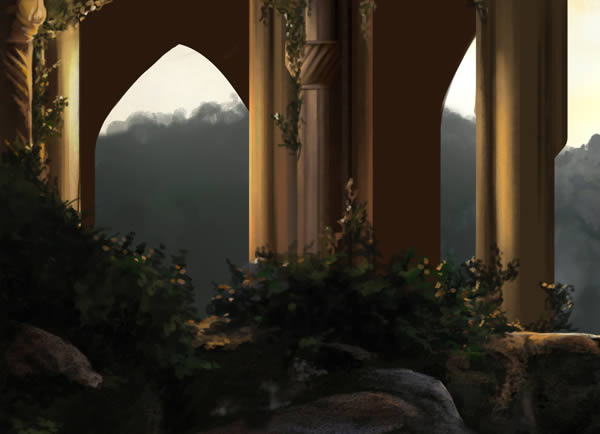
(4)在柱子周围增加更多的灌木
(5)选中柱子后面的建筑
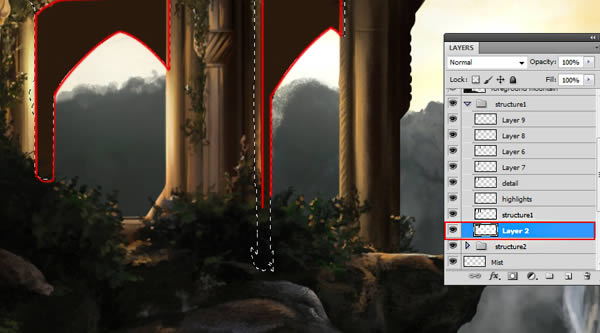
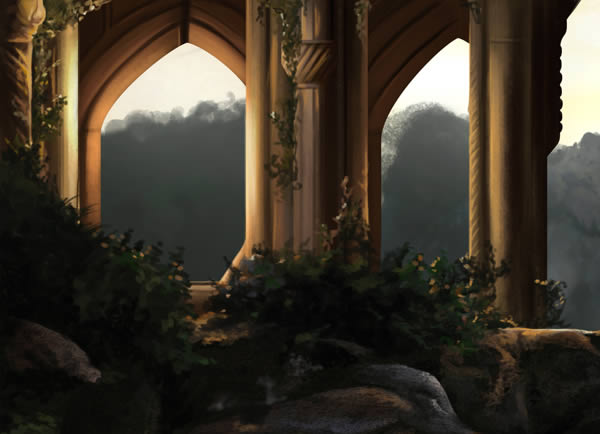
(7)选中建筑2层,用硬边橡皮把建筑边缘擦得清晰一些

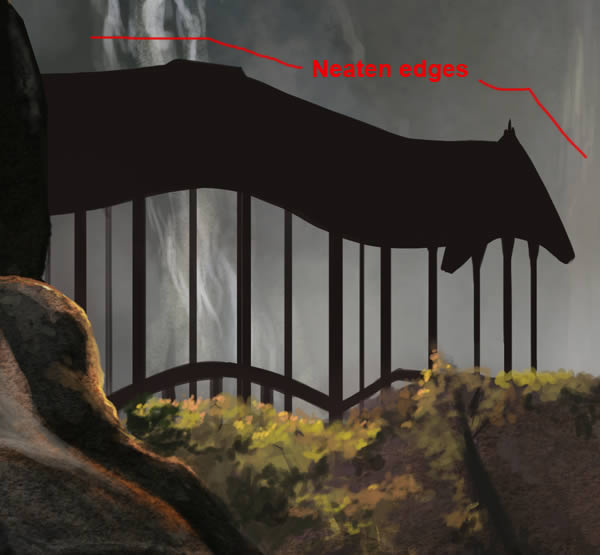
(8)新建阴影层,绘制更多阴影细节
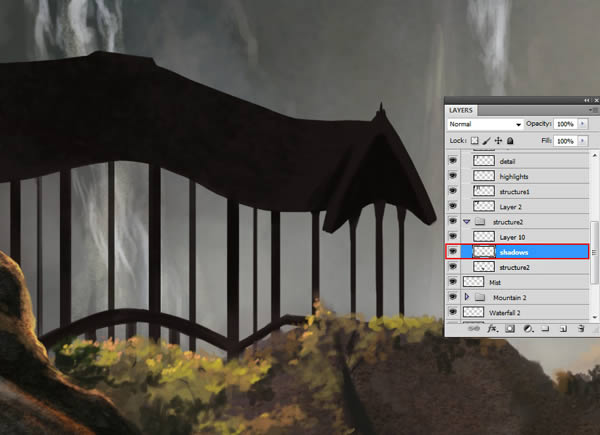
(9)新建高光层,添加更多高光细节
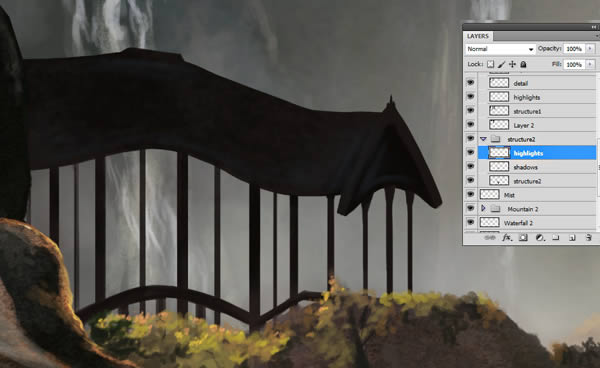
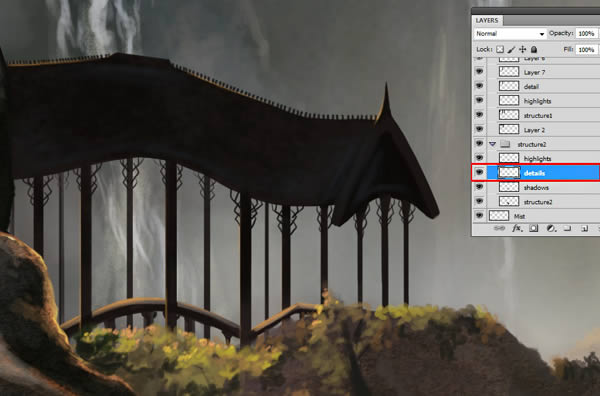
(10)在高光层下方新建细节层,画一些修饰部分
9、最红灯光效果
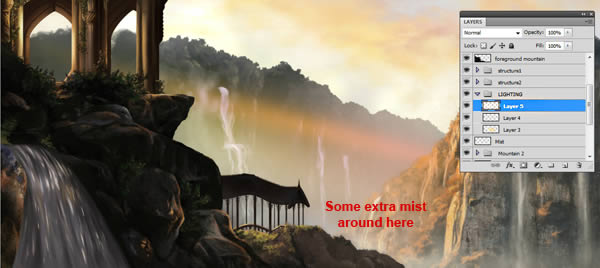
(1)新建组“Lighting”
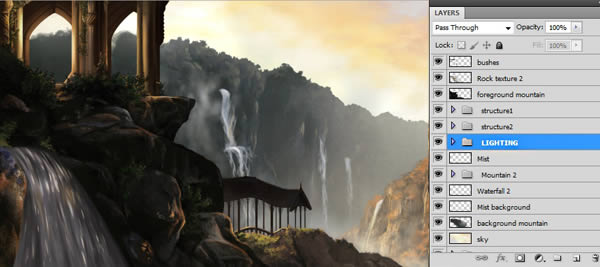
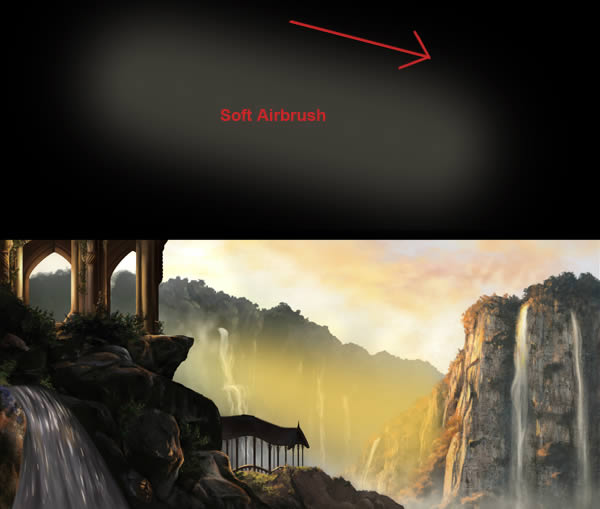
(2)使用透明度30%的软边画笔,用柔和的黄色(#fed450)绘制阳光径直穿过山峰的感觉,并将该层的混合模式设置为点光模式,图层透明度设为60%

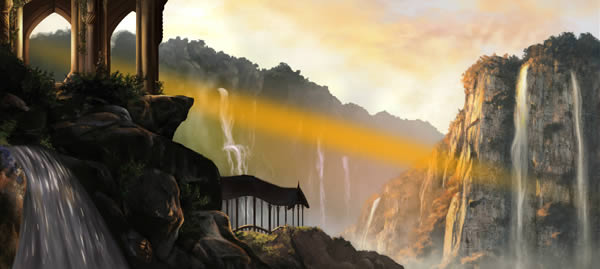
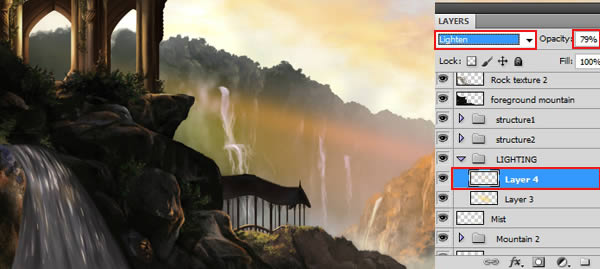
(3)新建一层,用较暗的黄色(#faa604),绘制下图效果,并设置图层模式为浅色模式,透明度为79%

好了,这个教程基本告一段落!对数字绘景技术感兴趣的同学可以尝试一下!虽然没有太多具体画的方法,但是整体的操作流程还是有很强的借鉴意义的!最后再来欣赏一下完成的效果吧!

 Photoshop's Key Features: A Deep DiveApr 19, 2025 am 12:08 AM
Key features of Photoshop include layers and masks, adjustment tools, filters and effects. 1. Layers and masks allow independent editing of image parts. 2. Adjust tools such as brightness/contrast can modify image tone and brightness. 3. Filters and effects can quickly add visual effects. Mastering these features can help creative professionals achieve their creative vision.
 Photoshop and Digital Art: Painting, Illustration, and CompositingApr 18, 2025 am 12:01 AM
Photoshop's applications in digital art include painting, illustration and image synthesis. 1) Painting: Using brushes, pencils and mixing tools, the artist can create realistic effects. 2) Illustration: With vector and shape tools, artists can accurately draw complex graphics and add effects. 3) Synthesis: Using mask and layer blending mode, artists can seamlessly blend different image elements.
 Advanced Photoshop Tutorial: Master Retouching & CompositingApr 17, 2025 am 12:10 AM
Photoshop's advanced photo editing and synthesis technologies include: 1. Use layers, masks and adjustment layers for basic operations; 2. Use image pixel values to achieve photo editing effects; 3. Use multiple layers and masks for complex synthesis; 4. Use "liquefaction" tools to adjust facial features; 5. Use "frequency separation" technology to perform delicate photo editing, these technologies can improve image processing level and achieve professional-level effects.
 Using Photoshop for Graphic Design: Branding and MoreApr 16, 2025 am 12:02 AM
The steps to using Photoshop for brand design include: 1. Use the Pen tool to draw basic shapes, 2. Add shadows and highlights through layer styles, 3. Adjust colors and details, 4. Use smart objects and actions to automatically generate different versions of the design. Photoshop helps designers create and optimize brand elements with the flexibility of layers and masks, ensuring consistency and professionalism of designs, from simple logos to complex branding guides.
 Photoshop's Subscription Model: What You Get for Your MoneyApr 15, 2025 am 12:17 AM
Photoshop's subscription model is worth buying. 1) Users can access the latest version and use across devices at any time. 2) The subscription fee is low, and continuous updates and technical support are provided. 3) Advanced functions such as neural filters can be used for complex image processing. Despite the high long-term costs, its convenience and feature updates are valuable to professional users.
 Photoshop: Investigating Free Trials and Discount OptionsApr 14, 2025 am 12:06 AM
You can get the access to Photoshop in the most economical way: 1. Experience the software features with a 7-day free trial; 2. Find student or teacher discounts, as well as seasonal promotions; 3. Use coupons on third-party websites; 4. Subscribe to Adobe CreativeCloud's monthly or annual plan.
 Photoshop for Designers: Creating Visual ConceptsApr 13, 2025 am 12:09 AM
Creating visual concepts in Photoshop can be achieved through the following steps: 1. Create a new document, 2. Add a background layer, 3. Use the brush tool to draw basic shapes, 4. Adjust colors and brightness, 5. Add text and graphics, 6. Use masks for local editing, 7. Apply filter effects, these steps help designers build a complete visual work from scratch.
 Is Photoshop Free? Understanding Subscription PlansApr 12, 2025 am 12:11 AM
Photoshop is not free, but there are several ways to use it at low cost or free: 1. The free trial period is 7 days, and you can experience all functions during this period; 2. Student and teacher discounts can cut costs by half, and school proof is required; 3. The CreativeCloud package is suitable for professional users and includes a variety of Adobe tools; 4. PhotoshopElements and Lightroom are low-cost alternatives, with fewer functions but lower prices.


Hot AI Tools

Undresser.AI Undress
AI-powered app for creating realistic nude photos

AI Clothes Remover
Online AI tool for removing clothes from photos.

Undress AI Tool
Undress images for free

Clothoff.io
AI clothes remover

AI Hentai Generator
Generate AI Hentai for free.

Hot Article

Hot Tools

MantisBT
Mantis is an easy-to-deploy web-based defect tracking tool designed to aid in product defect tracking. It requires PHP, MySQL and a web server. Check out our demo and hosting services.

SublimeText3 Linux new version
SublimeText3 Linux latest version

SublimeText3 Chinese version
Chinese version, very easy to use

Atom editor mac version download
The most popular open source editor

SublimeText3 Mac version
God-level code editing software (SublimeText3)


