


You have assembled your favorite host, but how do you prepare the software so that you can maximize its value? This guide is carefully written by PHP editor Shinichi and will provide you with detailed steps from system installation to commonly used software recommendations. Follow our guidance to easily create your perfect computer experience, making it a powerful tool for your study, work, and entertainment.

How to configure the software after the computer is assembled?
You need to turn on the computer, then install a system according to the computer configuration, and then install the software after connecting to the Internet.
How to configure Bluetooth on the assembled computer?
Just buy an external Bluetooth device.
Desktop computers generally do not come with Bluetooth, so you need to purchase a Bluetooth device that is matched and powered through the USB port:
Then install the driver, and when needed, open the application software , you can connect the Bluetooth device to the desktop computer.
The connected devices are first connected to the mobile phone in the same way as the Bluetooth headset. They need to be paired before they can be connected to each other for data exchange.
How to assemble a computer?
1. First connect the VGA cable to the monitor, and then fix the two screws at the back. The main reason for fixing is to worry about the connecting wire falling off when moving.
2. Then connect the other end of the VGA cable to the computer host.
3. Next, connect the power cord to the monitor. (Note that you are only connecting to the monitor. Do not connect the other end of the power cord to the socket. Wait until all connections are completed before turning on the power.)
4. Next, connect the mouse to the host.
5. Connect the keyboard as well. (The green one is the mouse, and the purple one is the keyboard. Also note that the internal pins of the mouse and keyboard plugs must be aligned with the pinholes in the interface before they can be inserted.) Connect one end of the network cable to the RJ45 interface of the computer host, and then connect the other end to the switch or router or modem.
6. Next, connect the power cord of the host.
7. Next, you can connect the power plugs of the host and monitor to the sockets to power on the host and monitor. You can start and use it normally.
How to assemble the tablet?
There is zero possibility of assembling a tablet by yourself.
Firstly, tablet computers require very high assembly requirements due to their small components (compared to desktop computers). Secondly, tablet computers are relatively cheap and do not have much market demand. No manufacturer sells accessories for assembling tablet computers. The emergence of "compatible machines" on desktop computers was due to the high price of computers at that time. It was easier to assemble after the accessories were standardized, and computer enthusiasts could find the fun of DIY. Therefore, various accessories were sold specifically for assembling computers.How to assemble a new computer?
Step one: Prepare tools. Tools used to assemble computers include plastic rods, screwdrivers, tin foil, etc.
Step 2: Install the motherboard. First put the motherboard into the computer case, and then fix the screws on the case.
Step 3: Install the processor. Place the processor into the CPU socket on the motherboard and lock the processor.
Step 4: Install memory. Place the memory module into the memory slot on the motherboard, and then secure the memory module in place.
Step 5: Install the graphics card. Insert the graphics card into the PCI slot on the motherboard, and then secure the graphics card.
Step 6: Install the hard drive. Insert the hard drive into the SATA interface on the motherboard, and then secure the hard drive.
Step 7: Install the CD-ROM drive. Insert the optical drive into the IDE interface on the motherboard, and then secure the optical drive.
Step 8: Install the power supply. Plug the power supply into the chassis and secure the power supply in place.
Step 9: Wire the computer. Wire various parts of the computer, including the wiring between the motherboard and the power supply, the wiring between the
graphics card and the power supply, the wiring between the hard disk and the power supply, the wiring between the optical drive and the power supply, etc.
The last step: install the operating system. Install the operating system onto the hard drive. Once the installation is complete, the entire process of assembling the computer can be completed.
How to inspect the assembled computer?
1.
is to check the packaging. First of all, the box must be new and not too old. The parameter information on the side of the box must be accurate. Make sure it is the model you want. After all, there are many businesses who like to fish in troubled waters and give machines with lower-level configurations and similar appearances to digital novices. Secondly, the box must have a seal. All laptops I have tested, as long as they are new machines, regardless of brand or price, have seals on the outside of the box. I have never seen one without them. Moreover, some first-line brands have high-tech seals. No matter how you tear them off, they will leave marks on the box body, which cannot be restored or removed. They are difficult to forge and are a very important identification point. Although there are some merchants who will replace the entire set of packaging boxes with new ones to fool digital novices.
2.
is to check the fuselage. After unpacking, please carefully check side A first. This is the easiest place to leave traces of use. If there are scratches on side A, there is probably something wrong with the machine. Then shake it and listen to see if there are any abnormal noises or if any parts fall out. Look at the interface to see if there are any traces of plugging or unplugging. Open and close the screen again to see if there is any creaking sound. If so, please return it on the spot. Because even if it is a new machine, it is defective and has quality issues.
Then, if there are no problems, then check the bottom case screws and laptop screws. Everyone knows that they are extremely soft. As long as they have been tightened, they will definitely leave marks. For gaming laptops, you can also take a look at the air inlets and heat dissipation fins. Machines that have mined mines are running at high intensity. There will be dust in the air inlets and heat dissipation fins. There will also be traces of oxidation. They are black and can be seen at a glance. Can recognize.
How to choose to assemble a computer?
When choosing to assemble a computer, pay attention to the following parts:
1. Look at the price. Choose a computer that suits your price based on your budget. Be careful not to buy a computer with too low a configuration at an exorbitant price;
2, look at the performance. Buy it at a reasonable price based on the computer performance you need. Be careful not to buy a computer with too little configuration at an exorbitant price. The complete configuration of the computer is as follows. Host part: 1. CPU. The heart of the computer is responsible for calculations. The more cores, the better the performance; 2. The display core of the graphics card and computer is used to process image data. If you are a gamer or graphics worker, you need a discrete graphics card. If you use it to surf the Internet, you don't need to buy a separate graphics card;
3, memory. Used for CPU and hard disk to exchange data for temporary storage. The more memory you have, the better the performance will be;
4, hard disk. All your computer's files are stored here. The harder the hard disk is, the more files it can store;
5, the motherboard. The various components of the computer are placed on the motherboard and work together;
6, power supply. Provide power to each component;
7, chassis. Used to protect all components inside the chassis. Peripheral part: 1. Monitor. Used to display computer images; 2. Keyboard and mouse. Used to operate computers; 4. Audio. Used to output sound; 5. Camera. Used for photography, video chatting, taking photos, etc.; 6. Microphone. Used for voice input, voice chat, etc. The following is a brief description: 1. Dual-core processor, 2G memory, integrated graphics card, mechanical hard drive. The performance is sufficient for surfing the Internet, watching movies, chatting, working, and playing small games such as chess; 2. Quad-core processor, 4G memory, independent graphics card, and mechanical hard drive. The performance is sufficient for surfing the Internet, watching movies, chatting, working, making pictures, playing stand-alone games or online games; 3. Quad-core processor, 4~8G memory, mid-to-high-end independent graphics card, mechanical hard drive or solid-state hard drive. The performance is sufficient for surfing the Internet, watching movies, chatting, working, making pictures, and playing large-scale stand-alone games or large-scale online games; 4. Six-core processor, 8G or above, high-end independent graphics card, mechanical hard drive or solid-state drive. The performance is sufficient for surfing the Internet, watching movies, chatting, working, drawing, and playing large-scale enthusiast-level stand-alone games or large-scale online games.
How to wire the assembled computer?
1 Power Fan Connector (PWR_FAN1)---Power fan socket
2 ATX 12V Power Connector (ATX12V1)---ATX host power socket
3 2 x 240 -pin DDR3 DIMM Slots (DDR3_A1, DDR3_B1)---DDR3 memory slot
4 2 x 240-pin DDR3 DIMM Slots (DDR3_A2, DDR3_B2)---DDR3 memory slot
5 ATX Power Connector (ATXPWR1)
6 USB 3.0 Header (USB3_4_5)---USB3.0 pin
7 SATA3 Connector (SATA3_1)
8 SATA3 Connector ( SATA3_0)
9 SATA3 Connector (SATA3_2)
10 SATA3 Connector (SATA3_4)
11 SATA3 Connector (SATA3_5)
12 SATA3 Connector (SATA3_3) ---7, 8, 9, 10, 11, 12---SATA3 hard disk interface
13 Chassis Fan Connector (CHA_FAN1)---Chassis fan pin-1
14 System Panel Header (PANEL1)
15 Power LED Header (PLED1)---Power LED pin
16 USB 2.0 Header (USB2_3)
17 USB 2.0 Header (USB4_5 )---16, 17---USB2.0 pin
18 Infrared Module Header (IR1)---Infrared module pin
19 Chassis Speaker Header (SPEAKER1)-- -Buzzer pin
20 Clear CMOS Jumper (CLRCMOS1)---CMOS jumper
21 COM Port Header (COM1)---Printer interface
22 SPDIF Out Connector (SPDIF_OUT)---Digital audio device output interface
23 Front Panel Audio Header (HD_AUDIO1)HD audio pin
24 Chassis Fan Connector (CHA_FAN2)---Chassis fan Pin-2
25 CPU Fan Connector (CPU_FAN1)
26 CPU Fan Connector (CPU_FAN2)---25, 26---CPU fan pin
Motherboard Rear socket
1 USB 2.0 Ports (USB01) 8 Microphone (Pink)---1: US:2.0 interface; 8: Microphone interface (pink)
2 D-Sub Port 9 Central / Bass (Orange)---2: D-Sub display interface; 9: Subwoofer speaker interface (Orange)
3 LAN RJ-45 Port* 10 USB 3.0 Ports (USB3_23)---3 : Network cable interface; 10: USB3.0 interface
4 Side Speaker (Gray) 11 USB 3.0 Ports (USB3_01)---4: Left and right speaker interface (gray); 11: USB3.0 interface-01
5 Rear Speaker (Black) 12 DVI-D Port---5. Rear speaker interface; 12: DVI display interface
6 Line In (Light Blue) 13 HDMI Port--- 6: Line input (light blue) interface; 13: HDMI high-definition multimedia interface
7 Front Speaker (Lime)** 14 PS/2 Keyboard Port---7: Front speaker interface; 14: P /S2 keyboard interface
How to assemble a desktop computer?
1: Step 1: Determine your needs:
1. Determining your own needs is the first step in doing anything. Before buying a computer, think clearly about the main purpose of buying a new computer. Different people use computers for very different purposes. The company's Clerks and people who mainly focus on gaming have very different needs for computer configurations. We should make choices based on the most appropriate budget while meeting our own needs.
2. For example, as an optional computer for general office use (except for professional software office needs), the Pentium G4560 without independent graphics is enough for daily office work, but if you have graphic design software such as PS and need it, a larger computer will be needed. Memory and gaming requirements require a better graphics card, so before you start choosing a computer, it is most important to determine your own needs.
2: Step 2: Determine the CPU
1. The first choice for all computer accessories must be the CPU. The order of selection should be to select the CPU first, then determine the motherboard, and then Determine the memory module (memory modules are so expensive now!), then select the graphics card, cooling, hard disk, etc., calculate the power consumption, and finally select the power supply and chassis.
2. If you are not a garbage person, it is recommended to buy new rather than old CPUs first. Although CPUs will not wear out, there are no new motherboards equipped with old CPUs. Old motherboards are very It's easy to have all kinds of problems, and if you're a novice and can't get a good motherboard, it's easy to fall over. Of course, it doesn't matter if you're a trash guy.
3. You can actually choose either AMD or Intel platform. After all, AMD has successfully turned around with Ryzen and is not inferior to Intel in all aspects. If I have to give a recommendation, then this is enough. For those who use it (watching movies, playing LOL games, browsing the web, and those who do light work), just choose Intel’s Pentium processor. For those who play games, choose Intel Core processor with a higher single-core frequency (in fact, i3 is enough Because games require more graphics cards), professional practitioners who need a lot of video rendering design and so on choose AMD's Ryzen platform.
Three: Step 3: Determine the motherboard
1. After determining the CPU, the pins are determined, and then there is a rough range of motherboards with the same number of pins, and then take a look at yourself Do you have any special needs, such as whether you need overclocking, how expandable the memory module is, whether you need an m.2 interface, whether all the required interfaces are complete, etc. As long as they are met, the rest is worth every penny. The goods are divided, just choose a motherboard you like.
2. Many people have two extreme attitudes towards motherboards. One type of people prefers to use the lowest-end graphics card, while the other type of people have a very large budget for motherboards. The author Then you feel that you should choose a motherboard that can meet your needs, i.e.
How to assemble a computer chair?
1
First install the casters one by one on the chair legs. After installing the chair legs, place the air pressure rod vertically into the center of the chair legs
2
Then fix the chassis to the seat with screws
3
Then connect the chair back and seat, and insert the base vertically on the air pressure rod
4
Finally install the armrests and headrests and you’re done
The above is the detailed content of How to configure the software after the computer is assembled?. For more information, please follow other related articles on the PHP Chinese website!

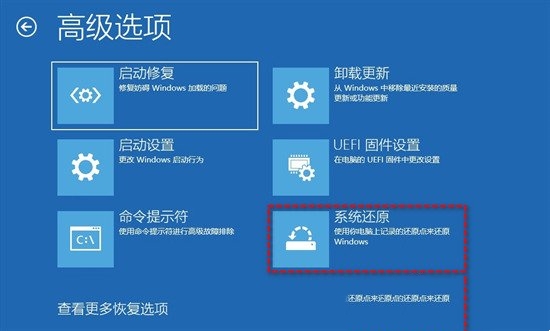 解决win11开机未能正确启动的方法Jan 29, 2024 pm 04:45 PM
win11开机未能正确启动怎么办?我们在使用电脑的过程中会遇到电脑不能正常使用的问题出现,一般出现这种情况有很多,下面就让本站来为用户们来仔细的介绍一下win11开机未能正确启动解决方法吧。win11开机未能正确启动解决方法方法一:卸载新的应用程序如果电脑在安装新应用后未正确启动,可进入安全模式卸载它们以修复问题。1、在高级选项窗口中单击启动设置。2、在启动设置窗口中按F4以启用安全模式。3、成功进入安全模式系统之后按照正常流程卸载新安装的应用程序即可。方法二:执行系统还原之前我们提到了可能导致
 先装显卡还是先装驱动Jan 29, 2024 pm 10:51 PM
一台新组装的电脑,从安装系统到安装各个硬件驱动的顺序是怎么样的...首先是准备组装的零组件:CPU,CPU散热器,内存,主板,显卡,硬盘,光驱,电源,机箱,除了上述这些东西,你还需要一把大小长短适中且好转的十字螺丝起子,还有平坦的桌面。安装操作系统:首先需要安装操作系统,例如Windows、Linux等。可以使用安装光盘或者U盘进行安装。安装驱动程序:安装操作系统后,需要安装电脑硬件的驱动程序,例如主板驱动、显卡驱动、声卡驱动等。安装向导正在安装驱动程序中,请等待安装完成。部分驱动程序可能会需要
 win10系统安装卡在海内存知己怎么办Jan 04, 2024 pm 11:50 PM
如果我们准备给自己的电脑安装win10操作系统的话,对于安装的过程中发现安装进度卡在海内存知己显示界面的情况,很多小伙伴不知道应该怎么解决。我们可以在系统设置中找到系统恢复,然后将电脑系统重置再重新升级安装即可。详细步骤就来看下小编是怎么解决的吧~win10系统安装卡在海内存知己怎么办方法一:大部分的时候,我们只需要重启电脑就可以正常进入系统了,非常方便。方法二:1、如果我们重启之后无法解决问题,那么可以进入安全模式下的windows设置当中。2、接着点击windows“更新和安全”选项。3、然
 华为笔记本win11如何降级为win10系统?华为笔记本win11回退到win10的步骤Jan 30, 2024 am 08:33 AM
华为笔记本win11怎么回退到win10系统?不少的用户们在购买完华为笔记本后用不习惯win11系统就想着能不能更改为win10系统,其实是可以的,下面就让本站来为用户们来仔细的介绍一下华为笔记本win11改win10方法教程吧。华为笔记本win11改win10方法教程创建Windows10安装媒体的步骤如下:首先,你需要准备一个可引导的Windows10安装媒体。可以使用官方的Windows10安装媒体创建工具,也可以下载Windows10ISO镜像文件并制作USB安装盘。2、进入BIOS设置
 无需U盘,如何在全新电脑上安装操作系统Jan 30, 2024 pm 01:39 PM
在现代社会,电脑已经成为我们生活中不可或缺的一部分。然而,当我们购买了一台全新的电脑时,我们通常需要使用U盘来安装操作系统。但是,有没有一种方法可以在新电脑上安装系统,而无需使用U盘呢?本文将介绍一种简单而有趣的方法,让您轻松在新电脑上安装系统。工具原料:系统版本:Windows10品牌型号:HPPavilion15软件版本:Windows10安装镜像文件一、使用网络共享安装系统1、首先,确保您的新电脑和另一台已经安装好系统的电脑连接在同一个局域网中。2、在已安装好系统的电脑上,打开文件资源管理
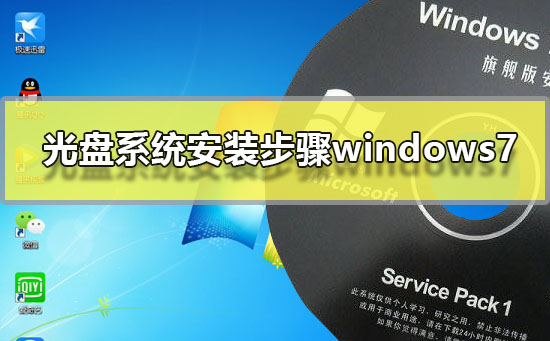 Windows 7光盘系统的安装指南Dec 28, 2023 pm 08:41 PM
然后win10系统都已经出来很久了,但是win7系统依然是最受用户们喜爱的了,很多的用户们想要将电脑上的系统重装成win7系统,但是不知道怎么去操作,那就快来看看详细的教程吧~光盘系统安装步骤windows7:台式机win764位系统下载>>>台式机win732位系统下载>>>笔记本win764位系统下载>>>笔记本win732位系统下载>>>1.重启电脑,然后在开机界面出来的时候,按下U盘启动快捷键。点击查看你的电脑U盘启动键>
 在Win11系统中如何安装打印机驱动程序Jan 30, 2024 am 08:39 AM
Win11系统如何安装打印机驱动在Win11系统中安装打印机驱动可能会有一些新的步骤和注意事项。下面我将为大家介绍一种简单的方法来安装打印机驱动。首先,我们需要确保打印机与电脑连接正常。可以使用USB线缆将打印机与电脑连接,或者通过无线网络连接打印机和电脑。确保打印机已经打开,并且处于可用状态。接下来,我们需要找到打印机的驱动程序。通常情况下,打印机会随附一张光盘,里面包含了驱动程序和其他必要的软件。如果你没有光盘,可以尝试在打印机制造商的官方网站上下载最新的驱动程序。一旦你找到了驱动程序,双击
 如何删除联想预装系统重装Jan 29, 2024 pm 05:42 PM
如何删除联想预装系统重装联想电脑是一款备受欢迎的品牌,但很多用户可能对其预装的系统并不满意,希望能够删除预装系统并进行重装。本文将为大家介绍如何删除联想预装系统并进行重装的方法。第一步:备份重要数据在进行系统重装之前,务必备份重要的个人数据。因为重装系统会将硬盘上的所有数据清空,所以在操作之前,将重要的文件、照片、音乐等数据备份到外部存储设备或云盘中,以免丢失。第二步:准备系统安装介质在删除预装系统之前,需要准备一个可用的系统安装介质。可以选择使用官方原版的Windows系统安装盘或者制作一个启


Hot AI Tools

Undresser.AI Undress
AI-powered app for creating realistic nude photos

AI Clothes Remover
Online AI tool for removing clothes from photos.

Undress AI Tool
Undress images for free

Clothoff.io
AI clothes remover

AI Hentai Generator
Generate AI Hentai for free.

Hot Article
Hot Tools

Dreamweaver Mac version
Visual web development tools

SublimeText3 Chinese version
Chinese version, very easy to use

SAP NetWeaver Server Adapter for Eclipse
Integrate Eclipse with SAP NetWeaver application server.

Safe Exam Browser
Safe Exam Browser is a secure browser environment for taking online exams securely. This software turns any computer into a secure workstation. It controls access to any utility and prevents students from using unauthorized resources.

VSCode Windows 64-bit Download
A free and powerful IDE editor launched by Microsoft

