


PS教你设计有范儿的个人作品时间轴网页,制作出来很有范儿,喜欢的朋友可以一起来学习
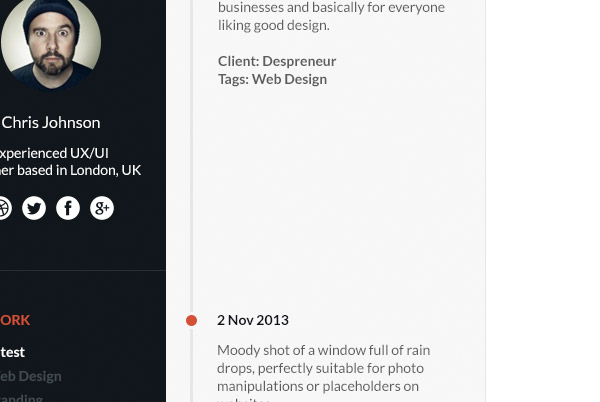
先上效果图:
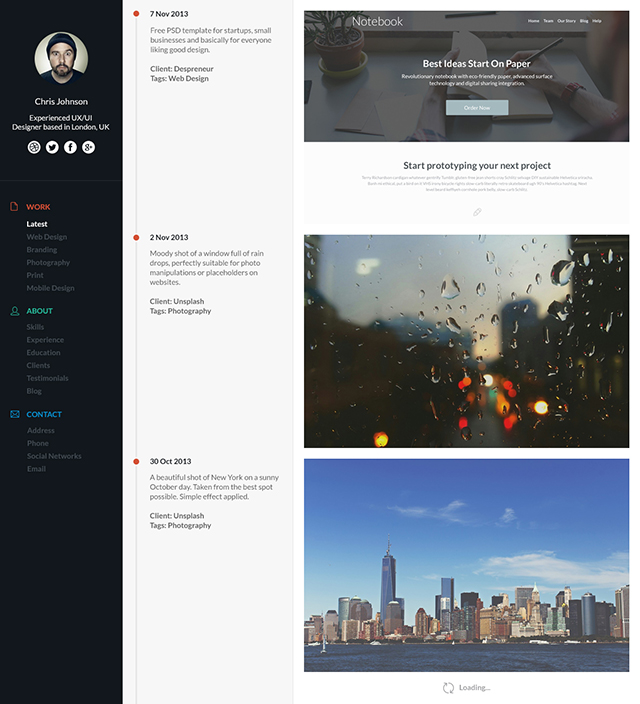
很有范儿是不是,恩啦,现在开始吧。
Step 1
创建新文件,参数如图:

Step 2
新建参考线,以便平衡视觉。位置:水平 60px,垂直分别是 20px,,50px,115px,230px,550px,570px,875px和1180px,这里推荐同学们使用神器「GuideGuide」,具体使用有劳移步:PS 参考线插件GUIDEGUIDE下载及使用说明,非常方便。

Step 3
为了保证我们的设计有序专业,我们先新建3个图层组,分别命名为:左侧栏、简介、作品。平常没关注规范的同学,优设哥特别向您和您所在的团队推荐《PS礼仪手册》!网页设计师必须修炼的内功技法,更是不可或缺的WEB设计指南。


准备工作就此完毕咯。
Step 4
侧边栏为我们展示联系方式、作导航,让我们来建设它吧。
选择矩形工具,前景色改为 #11171c,在左侧栏的图层组里画一个大小230x1320px的矩形,移到左侧边缘,紧贴着第四条参考线就对咯,如图:

Step 5
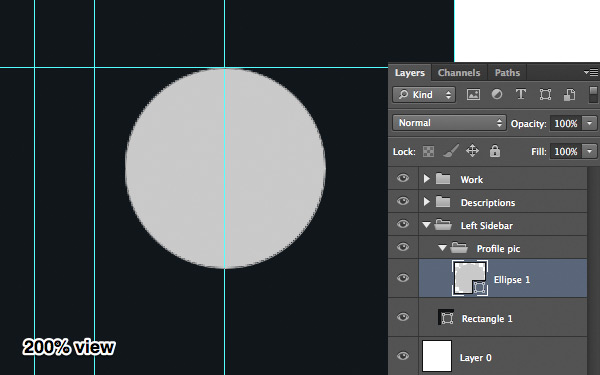
在左侧栏的图层组新建一个图层组,位置在矩形上边,命名为轮廓图。
然后利用椭圆工具,摁住Shift,绘制大小100x100px的圆形,移到左数第三条参考线的中间,上边紧贴水平参考线,如图:
Step 6
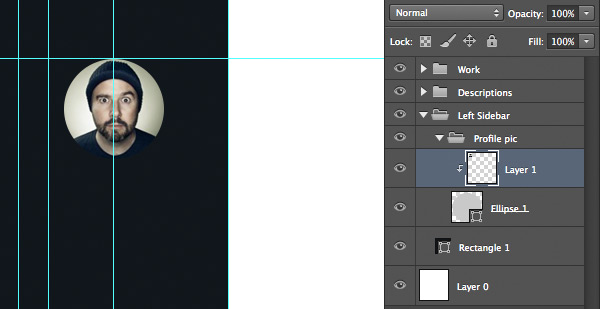
现在,请听指挥 ^_^ ,把电脑里最帅气最漂酿的头像找出来,拖进去,摁住Alt,单击圆形,作为剪切蒙版,然后移动调整到合适(看得到脸)的位置。
Step 7
改变前景色为 #FFFFFF,选择文字工具,选择安装好的字体,大小16pt,写上你的英文名,移动到距头像下25px的位置,确保在第三条参考线的中间。

Step 8
现在为自己添加点个人介绍吧,作者使用的字体大小14pt,距名字20px,这样界面看起来有呼吸感。

Step 9
棒极了,现在继续在左侧栏的图层组下新建一个图层组,命名为社交媒体。把素材里的图标拖进组里,双击图层,颜色叠加——选择白色。将图层样式复制到其他图标上。

图标间距调整为10px,整个图标的图层组距离 简介 20px

Step 10
选择直线工具,前景色为白色,大小1px,在图标下方50px处画一条直线,长度:从边缘到第四条参考线

为了视觉微妙点,将图层不透明度调整到10%
Step 11
继续新建一个图层组,命名为导航。把素材的矢量图标拖进来,大小调整为13*16px,将这个图标命名为作品。
双击图层,颜色叠加:#d35136,位置:直线下方40px,紧贴第一条垂直参考线。

Step 12
使用 14pt 大小的文字,写上作品,或者Work,位置:第二条参考线处,水平方向与图标对齐。
前景色改成#424a51,继续文字工具打字,内容随喜,大小14pt,行距设置成24pt,完成后将这个目录图层移到距「作品」下方24px处

Step 13
当点击时,我们需要使链接变亮,所以改变Lastest的文字颜色为白色。

Step 14
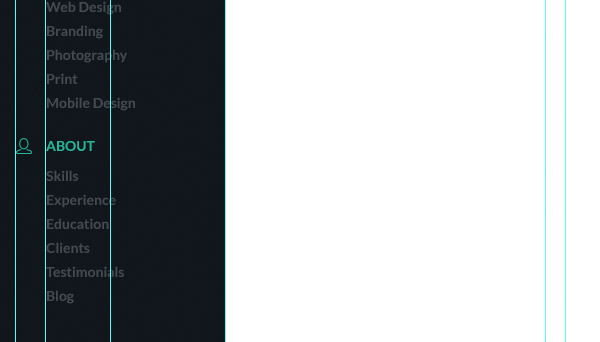
把联系人的图标拖进来,转成智能对象,大小调整成16x16px,颜色叠加#27b599,位置在目录30px下,紧贴第一条参考线。

Step 15
重复上次步骤。唯一不同的是,「关于」的文本颜色改为#424a51
Step 16
最后创建联系方式。图标拖进来,大小调整成16x13px,颜色叠加#088ecc,其他同上,不同的就是「联系」字样颜色为#424a51
Step 17
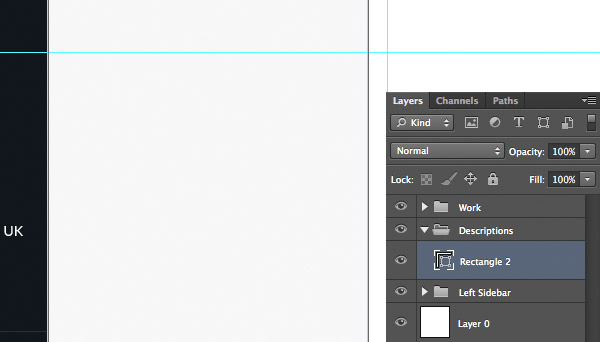
现在做简介页面,回到简介图层组。
前景色改成 #f7f7f7,创建一个大小320x1320px的矩形,紧贴左侧栏和第五条参考线。
Step 18
前景色改成#e7e7e8,创建一条直线,大小1px,放在底部,长度到第五条参考线处,见图:
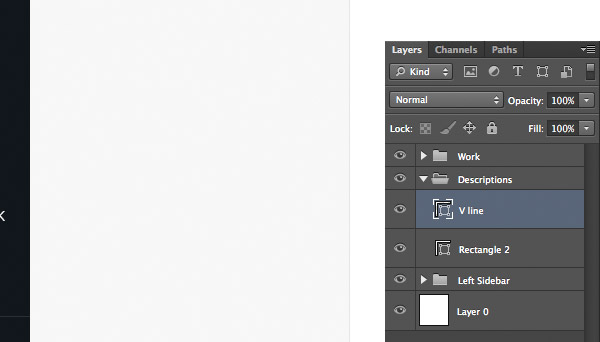
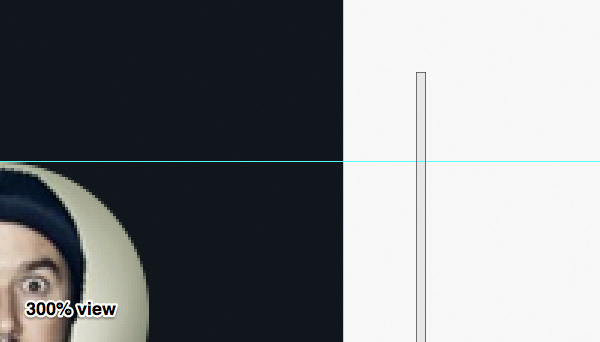
Step 19
现在创建时间轴,利用直线工具,画一条竖线,大小为3px,命名为时间轴,位置:距左侧栏24px,顶部30px
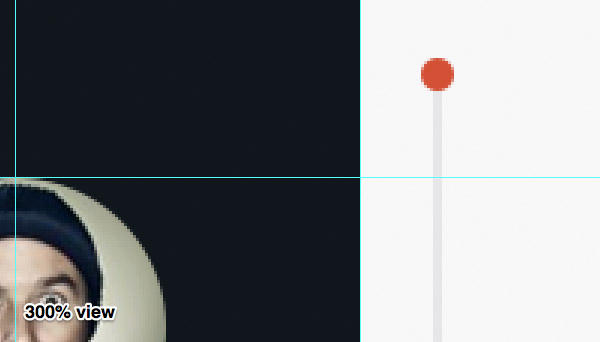
Step 20
前景色改成#d35136,画一个圆形,大小11x11px,位置:距左侧栏跟顶部都是20px,见图:
Step 21
为圆形图层添加样式,参数如下:


Step 22
前景色改成#11171c,打字,随喜,按照作者的例子也行。大小14pt,加粗,位置:距圆形和顶部都是20px。
恩,到这个时候你可能注意到整个设计的节奏感了,如何去平衡页面的各个元素非常重要,这也是这个教程的目的。

Step 23
前景色改成#5e5e5e,颜色的减淡使页面有层次感,阅读更加容易。
文字改成正常,不加粗,打出简介的内容,间距18pt。
回车两次,介绍客户,贴上标签,加粗文字,以便突出,间距同上,如图:

Step 24
复制圆形,重复步骤,圆形的位置取决于后面内容的篇幅。
Step 25
最后一个区域了,回到作品图层组
创建610x400px大小的矩形,颜色可以先搁下,位置:紧贴第六条参考线与第八条,距顶部20px
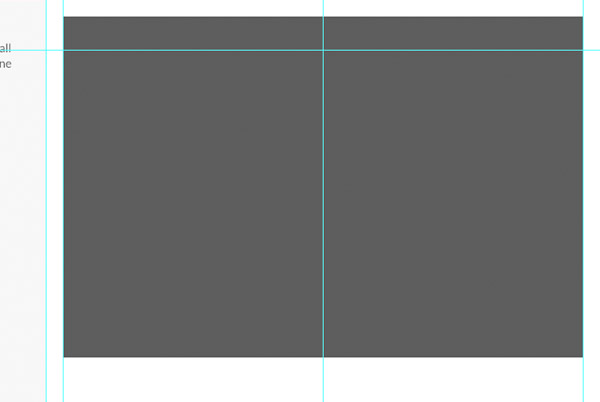
Step 26
将素材的笔记本PSD拖进来,同样转成矩形的剪切模板,调整到合适大小。

Step 27
复制矩形,移动到离第一个矩形20px处,以此类推,再加上素材里的图片,重复蒙版的步骤。

Step 28
重复简介部分的操作,记得对齐。

Step 29
把矢量素材的刷新图标拖进来,颜色叠加#a0a2a4,大小20x20px,位置:距图片下方20px,

Step 30
最后一步咯
打字,大小14pt,加粗,输入Loading…移动到距图标10px处,水平对齐。然后一起移动两个图层,直到在参考线的中间。

现在一个作品集时间轴的效果图已经完成了,你随时可以交给网页设计师,在浏览器上实现它。

 Photoshop: Mastering Layers and CompositionMay 01, 2025 am 12:05 AM
The method to create a new layer in Photoshop is: 1. Click the "New Layer" button at the bottom of the layer panel; 2. Use the shortcut keys Ctrl Shift N (Windows) or Command Shift N (Mac). The layers are like transparent sheets on canvas, allowing design elements to be managed separately, non-destructive editing and experimenting, and improving design levels.
 Photoshop Applications: From Photo Editing to Digital ArtApr 30, 2025 am 12:10 AM
Photoshop is widely used in the fields of image processing and digital art, and is suitable for photo editing and digital art creation. 1. Photo editing: Adjust brightness and contrast Use the "Brightness/Contrast" tool. 2. Digital art: Use brush tools to create paintings. 3. Basic usage: Use the "Red Eye Tool" to remove red eyes. 4. Advanced usage: Use layers and masks for image synthesis. 5. Debug: Recover the lost layers by checking the layer panel. 6. Performance optimization: Adjust memory usage to improve running speed.
 Photoshop's Core Function: Image Editing and ManipulationApr 29, 2025 am 12:17 AM
Photoshop's core functions are image editing and operation, including adjusting the color, brightness, contrast of images, applying filter effects, cropping and adjusting image size, performing image synthesis, etc. 1. Adjust brightness and contrast: Open the image, select the "Adjust" option in the "Image" menu, select "Brightness/Contrast", and adjust the slider. 2. Use the color level adjustment layer and layer mask: Click the "Create a new fill or adjust layer" button, select "Scale", adjust the color level, add a layer mask, and use the brush tool to control the adjustment effect.
 Photoshop: The Power of Raster Graphics EditingApr 28, 2025 am 12:13 AM
Photoshop is a powerful tool for handling raster graphics, and its core functions include layers and masks, filters and adjustments. 1. Layers and masks allow independent editing and non-destructive modifications. 2. Filters and adjustments can quickly change the appearance of the image, but they should be used with caution to avoid affecting the image quality. By mastering these functions and advanced skills, you can greatly improve your image editing and creative abilities.
 Photoshop: A Versatile Tool for Image ManipulationApr 27, 2025 am 12:13 AM
Photoshop is so powerful in the field of image processing because of its versatility and intuitive operating interface. 1) It can handle various tasks from basic adjustment to complex synthesis, such as adjusting brightness and contrast. 2) Working based on layers and masks allows non-destructive editing. 3) Examples of usage include adjusting color balance and creating layer masks. 4) Common errors such as excessive editing can be avoided through the History panel. 5) Performance optimization suggestions include the use of smart objects and shortcut keys.
 Photoshop Trials and Alternatives: Exploring Free AccessApr 26, 2025 am 12:23 AM
Photoshop offers a free 7-day trial period. To maximize the use of the trial period, 1) sign up for multiple Adobe accounts, 2) use the student or education version, and 3) subscribe to Adobe CreativeCloud. Free alternatives include: 1) GIMP, 2) Photopea, 3) Krita, these software can meet daily image editing needs.
 Photoshop for Photographers: Enhancing and Retouching ImagesApr 25, 2025 am 12:01 AM
Enhance and retouching photos in Photoshop can be achieved by adjusting brightness and contrast, using the Repair Brush Tool. 1) Adjust brightness and contrast: Increase brightness and contrast to improve underexposed photos through the Image->Adjustments->Brightness/Contrast menu. 2) Use the Repair Brush Tool: Select HealingBrushTool in the toolbar and apply to remove miscellaneous points or scars in the image.
 Accessing Photoshop: Methods and AvailabilityApr 24, 2025 am 12:07 AM
Photoshop can be obtained by purchasing a permanent license or subscribing to CreativeCloud. 1. Purchase a permanent license for long-term use, no monthly payment, but no latest updates are available. 2. Subscribe to CreativeCloud to access the latest version and other Adobe software, and you need to pay a monthly or annual fee. The choice should be based on frequency of use and requirements.


Hot AI Tools

Undresser.AI Undress
AI-powered app for creating realistic nude photos

AI Clothes Remover
Online AI tool for removing clothes from photos.

Undress AI Tool
Undress images for free

Clothoff.io
AI clothes remover

Video Face Swap
Swap faces in any video effortlessly with our completely free AI face swap tool!

Hot Article
Hot Tools

SecLists
SecLists is the ultimate security tester's companion. It is a collection of various types of lists that are frequently used during security assessments, all in one place. SecLists helps make security testing more efficient and productive by conveniently providing all the lists a security tester might need. List types include usernames, passwords, URLs, fuzzing payloads, sensitive data patterns, web shells, and more. The tester can simply pull this repository onto a new test machine and he will have access to every type of list he needs.

SublimeText3 Mac version
God-level code editing software (SublimeText3)

EditPlus Chinese cracked version
Small size, syntax highlighting, does not support code prompt function

SublimeText3 Linux new version
SublimeText3 Linux latest version

Zend Studio 13.0.1
Powerful PHP integrated development environment

