Home >Software Tutorial >Computer Software >How to create a picture zoom-in effect in Premiere_Premiere tutorial to create a picture zoom-in effect
How to create a picture zoom-in effect in Premiere_Premiere tutorial to create a picture zoom-in effect
- WBOYWBOYWBOYWBOYWBOYWBOYWBOYWBOYWBOYWBOYWBOYWBOYWBforward
- 2024-04-29 14:10:321314browse
The image enlargement and reduction problem that has troubled many Premiere users finally has a solution! PHP editor Xigua reveals the ultimate tutorial on how to enlarge and reduce images in Premiere. This tutorial will guide you step by step to use keyframe technology to easily set the zoom in and zoom out effect of the image. Through easy-to-understand explanations and clear, intuitive demonstrations, you'll master the skills to add a unique visual impact to your videos.
1. Open the Premiere software, enter the interface, import a picture material, drag the picture to the timeline, select the picture with the mouse, and click the [Effect Control] above, as shown in the figure.
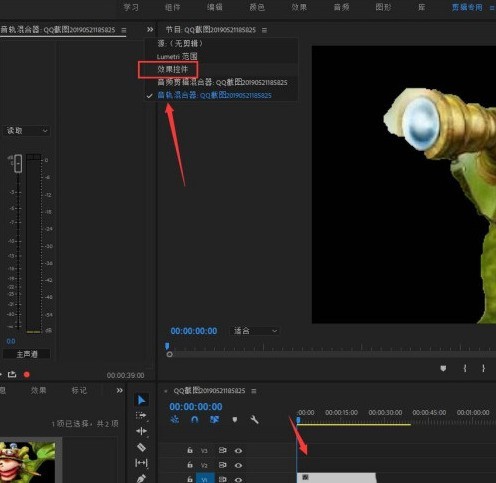
2. Then click [Video Effect]-[Zoom] function to adjust the frame here.

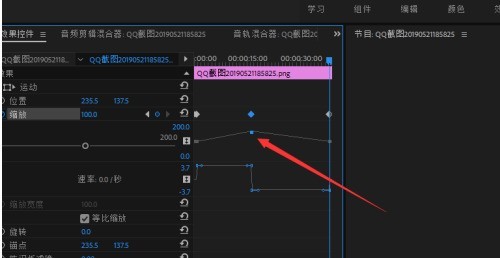
3. Click the drop-down arrow, and the frame dot will appear. We will add the frame at the specified position when the picture is played.
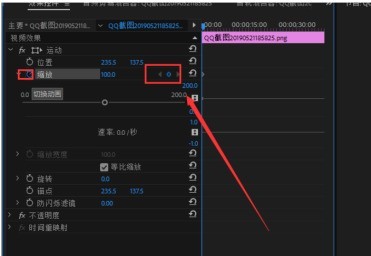
4. Just click the dot to add.
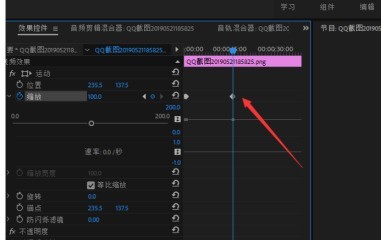
5. The addition is completed, as shown in the figure.
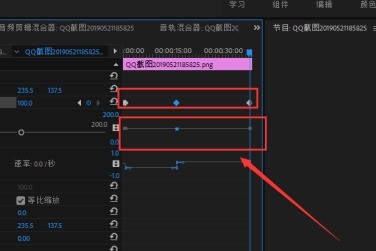
6. Play the video and you will find that the zoom data will also change accordingly.
The above is the detailed content of How to create a picture zoom-in effect in Premiere_Premiere tutorial to create a picture zoom-in effect. For more information, please follow other related articles on the PHP Chinese website!
Related articles
See more- How to get started quickly with Premiere?
- How to export original quality video in Premiere
- How to make pictures move in premiere
- Adobe updates Premiere Pro, opening up AI functionality for editing videos through text
- Arc A770 surpasses RTX 4060 in Adobe Premiere Pro 2024 Beta, adding Intel independent graphics hardware codec support

