


How to dismantle the Ceres ge70 butterfly box? If you have any questions about this, PHP editor Apple will provide you with detailed graphic tutorials to facilitate the disassembly of the Ceres ge70 butterfly box.

How to dismantle the Ceres ge70 butterfly box?
If you need to disassemble the Ceres GE70 butterfly box, you can follow the steps below:
1. Turn off the computer first and disconnect the power supply.
2. Use a Phillips screwdriver or a Torx screwdriver to remove the screws at the bottom of the notebook.
3. Turn the notebook over, gently lift the bottom edge with your fingers, and then slowly separate the battery and motherboard.
4. After removing the battery, you will see one or more screws, which are used to fix the butterfly box. Use a screwdriver to remove these screws.
5. After unscrewing the screws, gently lift the butterfly box, being careful not to use excessive force to avoid damaging the internal components.
6. If you want to replace the internal hardware, you can perform the corresponding operations at this time. Once completed, reinstall the butterfly box in reverse order.
Please note that you must be careful when disassembling your notebook to avoid damaging internal components. If you are unfamiliar with this process, it is recommended to seek professional help.
What is the disassembly value of computer motherboard?
The disassembly value of a computer motherboard may vary based on a number of factors, including the following:
1. Parts recycling: Computer motherboards contain many useful parts, such as Metal, plastic, resistors, capacitors, etc. These parts can be dismantled for recycling and made available to other electronics manufacturers. Recycling these parts can save resources and reduce environmental pollution.
2. Precious metal recycling: Computer motherboards usually contain some precious metals, such as gold, silver, etc. These precious metals can be separated out and recycled because of their high value. Precious metal recycling has certain significance from both resource utilization and economic perspectives.
3. Secure data destruction: For old computer motherboards, disassembly can ensure that the sensitive information stored in them is completely destroyed to prevent data leaks and privacy issues.
Although there may be some value in the disassembly of computer motherboards, this is usually more economically feasible in a large-scale recycling process. Disassembling a computer motherboard is not always economically feasible for an individual and requires specialized knowledge and equipment. If you are considering recycling your old electronic equipment, we recommend that you check with your local recycling center or e-waste disposal agency for more information.
How to disassemble Xingge Reader?
Follow the following steps to disassemble
1. Prepare tools, a pry bar, a small screwdriver, a subway card or a scrap bank card (used with the pry bar to pry open the buckle). 2. Use a pry bar to pry the buckle from the gap on the right side of the back. Change the position, pry the upper seam, and tear it off. The entire back cover will fall off. The back cover of Kindle 3 is all clipped on, without screws. The huge black part is the Kindle's battery. Like almost all electronic products, the battery occupies the largest space. You can see a SIM card in the middle on the left side of the battery, indicating that it is a WiFi 3G version. Below the battery is the screen cable, and the two silver squares above the battery and on the right side are two small speakers. After removing all the screws and the battery cable, you can easily separate the motherboard and screen. 3. There is no problem in the test. Cover the back cover as it is, press hard, and the back cover will be closed.
How to save yourself when the screen of a dropped mobile phone is separated from the motherboard?
The answer is as follows: If the screen of the phone is separated from the motherboard, it may be caused by falling or other physical damage. Here are some possible solutions:
1. Try reconnecting: First, make sure your phone is turned off. Then, carefully reconnect the screen to the motherboard. If necessary, you can refer to the disassembly guide of the phone or contact a professional repairman for help.
2. Check the connection cable: Check whether the cable connecting the screen and the motherboard is intact. If you find a damaged or loose cable, you can try to repair or replace it.
3. Try a soft reset: Sometimes, after the phone screen and motherboard are separated, restarting may help solve the problem. Press and hold your phone's power button or the power and volume down buttons simultaneously until your phone restarts.
4. Seek professional repair: If none of the above methods work, or you are not sure how to operate, it is recommended to send the phone to a professional repair center for inspection and repair. They will have more professional equipment and technology to deal with such problems.
It should be noted that the above methods are for reference only, and the specific operations may vary depending on the phone model and damage. Before making any repair attempts, make sure the phone is turned off to avoid further damage.
Are the computer motherboard and CPU sold separately?
You don’t mean to move these three to another computer, this should be to move the computer into a nest. First remove the graphics card, and then unplug the power cord and the like. If the cooling fan is not in the way, you don't have to remove it. Then find there should be three or four fixing screws on the motherboard. After unscrewing them, you can remove the motherboard.
How to remove the motherboard power supply interface?
First, use appropriate tools to open the computer case cover to expose the motherboard. Locate the power connector on the motherboard, usually located in the upper left or upper right corner of the motherboard. Use your fingers or tweezers to gently hold the buckle of the power supply interface and push it upward or outward until the power supply interface is separated from the motherboard.
After unplugging the power supply interface, please keep it properly to avoid loss or damage. If you need to reinstall the power supply interface, please follow the reverse order of the above steps.
How to disassemble Lenovo all-in-one computer b300?
Disassembling the Lenovo all-in-one computer B300 may require certain technical knowledge and experience, so it is recommended that you understand the relevant operating steps before disassembly and ensure that you have sufficient technical ability to complete this process. Here are the general steps for disassembling an all-in-one computer:
1. Turn off the computer and disconnect the power source. Make sure there is no power connected to the computer and that the computer is turned off.
2. Separate the monitor board from the motherboard. You may need to use a screwdriver or other tool to remove the monitor panel, and there are usually some screws or tabs that need to be released.
3. Remove the back cover. There is usually a back cover over the area where internal components are accessed. Find the screws or buckles that secure the back cover and remove them.
4. Release the internal connector. This includes freeing the power, data, and other cables connected to the motherboard.
5. Remove internal components. You can remove memory modules, hard drives, optical drives, etc. as needed.
Please note that there may be slight differences between different computer models, and the specific disassembly procedures may vary. To ensure safe and correct operation, it is highly recommended that you look for the official disassembly guide for your Lenovo B300 or contact the Lenovo customer support team for detailed disassembly instructions.
How to take out the inverter mainboard?
How to take it out:
The key to disassembling and assembling the inverter is to cut off the high-voltage power first. For other disassembly and assembly, just remove the screws normally.
It can be disassembled by removing the bottom nut.
1. Pry up the plastic batten on the edge of the door;
2. Remove the nut (under the plastic batten);
3. Pry up the small backrest;
4. Push the small backrest upwards (there is a hook behind the upper part); 5. Remove the small backrest.
The inverter disassembly method of the embodiment includes the following steps: Step A, in a driving device provided with a motor fixed to the conveyor machine and a circuit box that accommodates the inverter and is installed on the motor from above , discharge the cooling liquid from the cooling flow path, which is arranged in the circuit box in a manner connected to the inverter; step B, after step A, disassemble the electrical system relative to the inverter; and Step C, remove the circuit box from the motor after step B.
The disclosed inverter installation method of one embodiment includes the following steps: a step, install the circuit box containing the inverter on the motor fixed on the conveying machine; b step, in step a Then, the electrical system is connected to the inverter; and step c, after step b, the cooling liquid passes through the cooling flow path provided in the circuit box in a manner connected to the inverter.
share
The above is the detailed content of How to disassemble the Ceres ge70 butterfly box?. For more information, please follow other related articles on the PHP Chinese website!

 R.E.P.O. Save File Location: Where Is It & How to Protect It?Mar 06, 2025 pm 10:41 PM
Are you hooked on R.E.P.O.? Curious where your game progress is stored? This guide reveals the location of your R.E.P.O. save files and shows you how to protect them. Losing your game progress is frustrating, so let's ensure your hard work is safe
 How to fix Microsoft Teams error 9hehw in Windows?Mar 07, 2025 am 12:00 AM
Understanding Microsoft Teams error tag 9hehw on Windows Microsoft Teams is a crucial communication and collaboration application by which users are able to joi
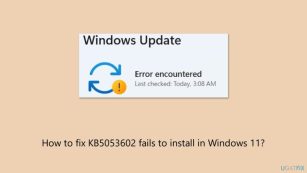 How to fix KB5053602 fails to install in Windows 11?Mar 13, 2025 am 10:00 AM
The KB5053602 patch, released on March 11, 2025, targets Windows 11 editions 22H2 and 23H2, elevating the OS to OS Builds 22621.5039 and 22631.5039, respectivel
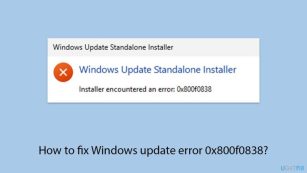 How to fix Windows update error 0x800f0838?Mar 11, 2025 am 12:00 AM
Windows updates are essential components delivered by Microsoft to enhance the functionality, security, and stability of the Windows operating system. These upd
 R.E.P.O. Crashing & Freezing on PC? Result-Driven FixesMar 07, 2025 pm 08:02 PM
Troubleshooting R.E.P.O. Game Crashes: A Comprehensive Guide Experiencing frustrating game crashes, especially in a team-based game like R.E.P.O., can be incredibly disruptive. This guide offers several solutions to resolve R.E.P.O. crashes, freezes
 Spotlight on KB5053606 Not Installing for Windows 10, Exact StepsMar 13, 2025 pm 08:02 PM
Windows 10 KB5053606 Update installation failed? This guide provides effective solutions! Many users are having problems trying to install the Windows 10 KB5053606 update released on Tuesday of Microsoft's March 2025 patch, such as SSH connection interruption, Dwm.exe unresponsiveness, or input method editor (IME) issues. Updates may be stuck during downloading or installation, or error codes may appear, such as 0x800f0922, 0xd000034, 0x80070437 and 0x80072efe. KB5053606 installation failure is usually caused by a variety of reasons, including Windows update component failure, system file corruption, and disk
 Grand Theft Auto V Enhanced Save File Location, A Roadmap HereMar 06, 2025 pm 10:34 PM
This MiniTool guide shows you how to locate and back up your Grand Theft Auto V Enhanced save files on your Windows PC. Rockstar Games' enhanced edition boasts impressive visuals (ray-traced shadows, AMD FSR1 & 3, NVIDIA DLSS 3), improved audio,
 GTA V Enhanced ERR_GFX_D3D_NOD3D12, Quick Fix in 4 WaysMar 14, 2025 pm 08:04 PM
GTA 5 Enhanced ERR_GFX_D3D_NOD3D12 Error Fix Guide Grand Theft Auto V Enhanced (GTA 5 Enhanced) is an upgraded game, but some players encounter the "ERR_GFX_D3D_NOD3D12: DirectX 12 adapter or runner found" error when starting. This article provides several solutions. Cause of the Error: This error usually indicates that your system is missing a DirectX 12 runtime library or a compatible DirectX 12 graphics card. Solution: Method 1: Install DirectX Runtime Library Inspection


Hot AI Tools

Undresser.AI Undress
AI-powered app for creating realistic nude photos

AI Clothes Remover
Online AI tool for removing clothes from photos.

Undress AI Tool
Undress images for free

Clothoff.io
AI clothes remover

AI Hentai Generator
Generate AI Hentai for free.

Hot Article
Hot Tools

SAP NetWeaver Server Adapter for Eclipse
Integrate Eclipse with SAP NetWeaver application server.

SublimeText3 Linux new version
SublimeText3 Linux latest version

MinGW - Minimalist GNU for Windows
This project is in the process of being migrated to osdn.net/projects/mingw, you can continue to follow us there. MinGW: A native Windows port of the GNU Compiler Collection (GCC), freely distributable import libraries and header files for building native Windows applications; includes extensions to the MSVC runtime to support C99 functionality. All MinGW software can run on 64-bit Windows platforms.

WebStorm Mac version
Useful JavaScript development tools

VSCode Windows 64-bit Download
A free and powerful IDE editor launched by Microsoft

