


Struggling to install and configure the Java Development Kit (JDK 10) on Windows 10? don’t worry! PHP editor Baicao will provide you with a detailed step-by-step guide to take you through the installation and configuration process easily. Continue reading in this article for detailed steps to ensure proper setup and configuration of JDK 10 on your system.
First, download and install JDK10,

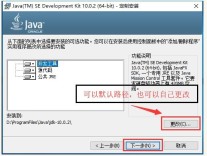
Double-click the .exe installation package, follow the wizard and proceed to the next step,

If you need to change the installation path, click the [Change] button, set the path, and continue to the next step.
The setting is completed. Start installing updated components. Wait patiently.

After the JDK installation is completed, the jre installation will pop up. If you need to modify the installation path, the editor recommends that it be in the same directory as the JDK.


The setting is completed and wait. Installation,


Configuration environment
As shown in the figure, right-click [This Computer], pop-up menu, select [Properties],

Enter the system interface, click the [Advanced System Settings] option on the left,

Open the system properties interface, click the [Environment Variables] button,

Enter the interface, click [New] in [System Variables], a dialog box will pop up, the variable name is [JAVA_HOME], the variable value refers to the installation path of the JDK software, enter [D:ProgramFilesJavajdk-10.0.2 ], click OK,

Find [Path], edit it, if not found, click New, enter [%JAVA_HOME%bin], click OK,

JAVA_HOME and Path settings are completed, click OK and exit,

Test environment
Test whether the JDK is configured successfully, press the [Win R] shortcut key, Open the run window, enter cmd, click OK,

Open the DOS command prompt interface, enter [java-version] to test, the result is as shown in the figure, the configuration is successful.

The above is the detailed content of Graphic method for installing and configuring JDK10 on WIN10. For more information, please follow other related articles on the PHP Chinese website!

 iFixit Is Helping Make HP Laptops More RepairableMay 04, 2025 am 12:53 AM
Related ##### Samsung hinders mobile phone repair iFixit's partnership with Samsung broke down, and Samsung reportedly forced repair shops to share customer information. Article The blog post also mentioned: "A interesting feature worth watching is the new battery replacement tool, which [HP] calls it the Revivekit. There are two smaller boxes in the box - one with a new battery, and the other designed to safely store the old battery after replacement. The cardboard profile design allows it to cover the old battery and protect it from accidental poking when you do repairs. It also comes with some strategically placed adhesive pads to help securely hold it to the battery when you work - and it is designed to still stick to the battery when you lift it, which you can fold and store after that.
 This 100W USB-C Baseus Charger Is 45% OffMay 04, 2025 am 12:52 AM
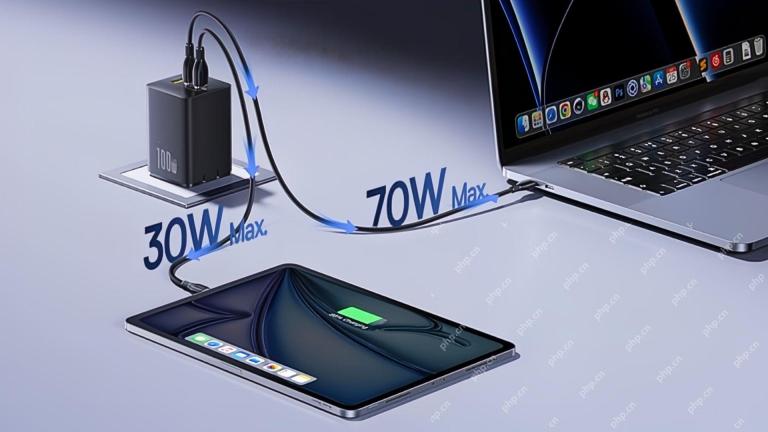
Baseus 100W Three-Port USB-C Charger: Great Value! The Baseus 100W three-port USB-C charger provides ultra-high speed charging for up to three devices at the same time. The two USB-C ports each provide 100W output, while one USB-A port adds more compatibility. Its compact and portable design and foldable plug are perfect for traveling. Advanced cooling system and intelligent power distribution technology ensure safe and efficient charging. Amazon Baseus flagship store is currently in a big promotion. If you purchase Baseus 100W three-port USB-C charger, you will get two 45W USB-C chargers and charging cables. The total price is only
 How to Transfer Windows to Another DriveMay 02, 2025 pm 02:01 PM
Perhaps your old hard drive is starting to slow down and fail, or maybe you’re looking to migrate your files to a disk with much more space. There are plenty of reasons to migrate Windows from one drive to another, and just as many
 How to Add a User Interface to Windows' Winget UtilityMay 02, 2025 am 06:04 AM
Does Windows lack a convenient package manager? UniGetUI is here to help you! The package manager for Linux systems is very convenient, but Windows systems lack similar tools. However, with a free open source project UniGetUI and Windows built-in command line tool winget, you can get the same functionality on Windows. The best feature for Windows missing: a convenient package manager Package Manager allows you to add and remove programs, system libraries, and drivers. You can search for programs almost instantly, retrieve information about them, and adjust settings. In other words, they are features that Microsoft stores dream of. Every Linux distribution has one
 Arch Linux Is Now in the Windows Subsystem for LinuxMay 02, 2025 am 06:02 AM
Arch Linux officially joins the Windows Subsystem for Linux (WSL) family! No external downloads are needed; installation is a breeze using PowerShell: wsl --install archlinux First-time WSL users will need to run this command first, followed by a sy
 Alienware's New 240Hz 34-Inch QD-OLED Monitor Is Finally OutMay 02, 2025 am 03:05 AM
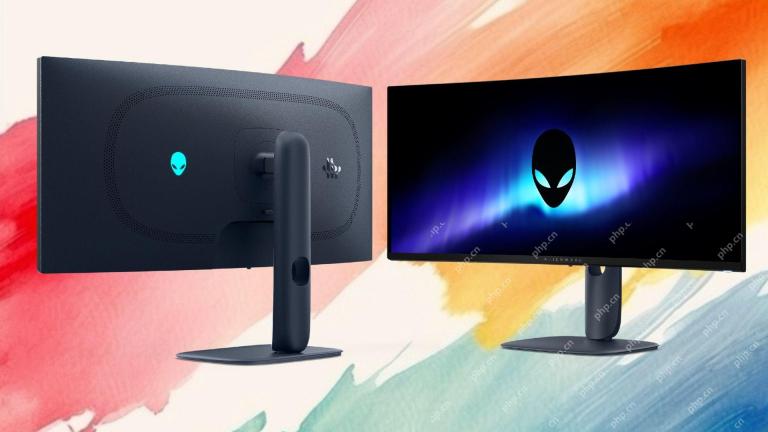
This monitor boasts extensive connectivity, featuring a DisplayPort 1.4 port (supporting up to 3440 x 1440 at 240Hz, DSC, and HDR) and two HDMI 2.1 FRL ports (also supporting 3440 x 1440 at 240Hz, FRL, HDR, and VRR). These high-speed HDMI 2.1 ports
 How to Install Windows 11 With No TPM 2.0May 01, 2025 pm 08:01 PM
Windows 10 support is ending in late 2025, prompting many users to upgrade to Windows 11. However, the TPM 2.0 requirement can be a significant hurdle. This guide outlines methods to install Windows 11 even without TPM 2.0, but proceed with caution.
 Acer Has Two New Monitors for GamingMay 01, 2025 am 06:06 AM
The Acer Predator XB323QK V4 and Nitro XV240 F6: A Tale of Two Monitors Acer offers two distinct gaming monitors catering to different needs: the color-focused XB323QK V4 and the speed-demon XV240 F6. Let's break down their key features. The XB323QK


Hot AI Tools

Undresser.AI Undress
AI-powered app for creating realistic nude photos

AI Clothes Remover
Online AI tool for removing clothes from photos.

Undress AI Tool
Undress images for free

Clothoff.io
AI clothes remover

Video Face Swap
Swap faces in any video effortlessly with our completely free AI face swap tool!

Hot Article
Hot Tools

SublimeText3 Linux new version
SublimeText3 Linux latest version

ZendStudio 13.5.1 Mac
Powerful PHP integrated development environment

DVWA
Damn Vulnerable Web App (DVWA) is a PHP/MySQL web application that is very vulnerable. Its main goals are to be an aid for security professionals to test their skills and tools in a legal environment, to help web developers better understand the process of securing web applications, and to help teachers/students teach/learn in a classroom environment Web application security. The goal of DVWA is to practice some of the most common web vulnerabilities through a simple and straightforward interface, with varying degrees of difficulty. Please note that this software

EditPlus Chinese cracked version
Small size, syntax highlighting, does not support code prompt function

SAP NetWeaver Server Adapter for Eclipse
Integrate Eclipse with SAP NetWeaver application server.

