
Home >System Tutorial >Windows Series >How to set a scheduled boot in Windows 10 system_How to set a scheduled boot in Windows 10 system
How to set a scheduled boot in Windows 10 system_How to set a scheduled boot in Windows 10 system

- 王林forward
- 2024-04-25 13:07:19951browse
With the popularity of electronic devices, more and more people hope that their computers can automatically turn on. For users using Windows 10 systems, they can implement scheduled power-on through simple settings. PHP editor Xigua will introduce you in detail the steps to set up a scheduled boot on Windows 10 system to help you easily solve this problem.
The tutorial is as follows:
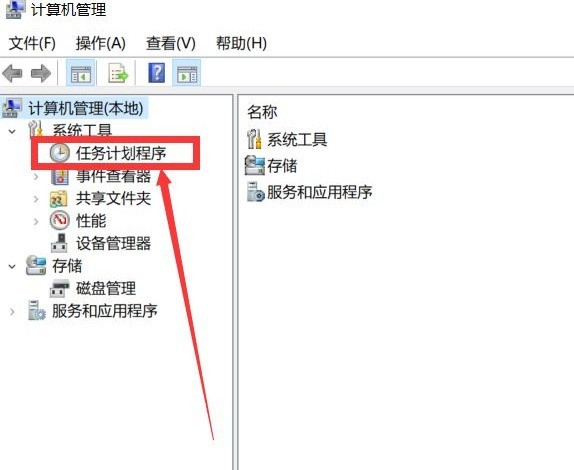
First, we open the laptop, find the [This PC] application on the desktop, right-click the mouse, and select the [Manage] option to enter.
In the pop-up dialog box, click Task Scheduler in the left column. After entering the page, click the Create Basic Task button in the right column.

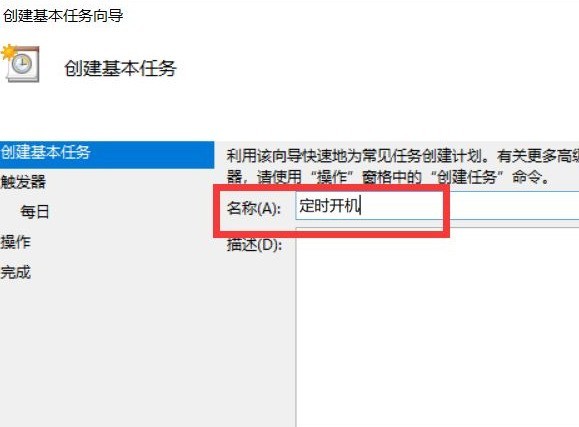
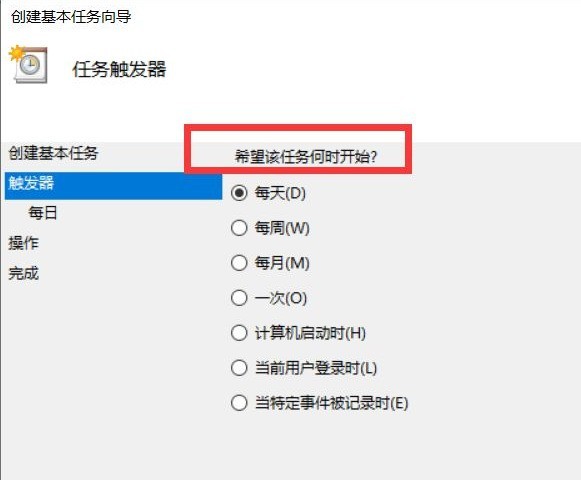
In the pop-up dialog box, enter [Scheduled power on] in the name, click the [Next] button, and then we select the required options on the task trigger page frequency.
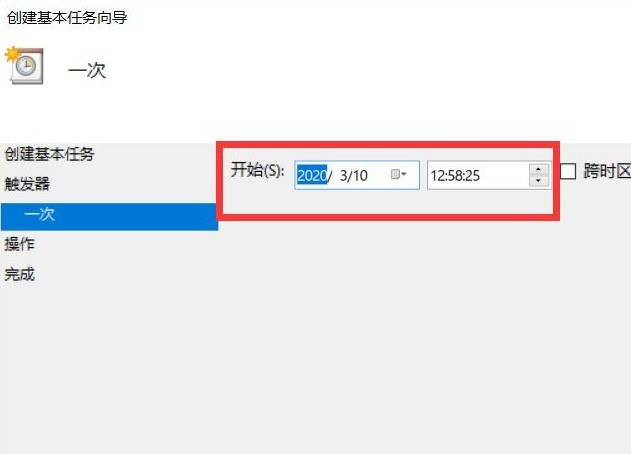
After clicking Next, select the time we require, click Next again, enter the program [gina" in the program or script options, parameter "-s -t 3600", after filling in, click Next, click Finish.
The above is the detailed content of How to set a scheduled boot in Windows 10 system_How to set a scheduled boot in Windows 10 system. For more information, please follow other related articles on the PHP Chinese website!
Related articles
See more- How to solve the problem that win10 cannot connect to this network
- How much space is needed on C drive in Win10 system
- What are the English names of the various versions of win10?
- What to do if deleting a folder in Windows 10 requires administrator rights
- How to completely close the Security Center in Windows 10