


In the daily use of computers, the need to burn discs may appear from time to time, especially when backing up important data or creating distributable software or media. However, for many users, especially those who are new to the WIN10 system, the process of burning a disc may be confusing. In this article, PHP editor Apple will introduce you in detail how to burn a disc in WIN10, from preparation to completion of burning, and guide you step by step to easily complete this task.
Open the folder to be burned, select all the files to be burned, and click the [Burn] button on the Robbin toolbar.

The burning and driver interface will automatically open, click the [Burn to Disc] button at the top.

After entering the burning and closing interface, give the disc a nice name. The default is time. Try to choose English characters. Select the default burning speed. Of course, you are afraid of Chuhuai disk. You can Select the burning speed of the first temple and click Next.

The burning progress interface will then appear. We need to wait patiently. It takes about 3 minutes for 1.32G of data.

Then a prompt interface will appear [You have burned the file to the disc]. Click [Finish], and the CD-ROM drive will automatically eject the burned disc. If you are afraid of errors, you can turn off Insert the disk into the CD-ROM drive, double-click to open it and check it out!

The above is the detailed content of Detailed method of burning disc in WIN10. For more information, please follow other related articles on the PHP Chinese website!

 Excel Data Source Reference Not ValidMay 14, 2025 pm 04:38 PM
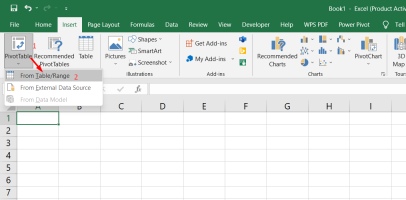
Are you facing the annoying "Excel data source reference not valid" error? Don't fret, we're here to assist you in resolving this issue and getting your spreadsheets functioning smoothly again. Microsoft Excel, with its vast array of tools
 Excel Found Unreadable Content - How to Fix the IssueMay 14, 2025 pm 04:37 PM
Learn about the most effective solutions to tackle the "Excel found unreadable content" error in XLSX files. We recognize the challenges you might encounter when facing this error, which can make it difficult to access your essential data.D
 Fix the 'No Internet, Secured' Problem in Windows 10May 14, 2025 pm 04:35 PM
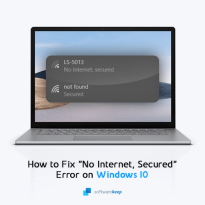
Many users who upgrade to Windows 10 encounter WiFi connectivity issues, experiencing slow internet or complete inability to connect. If you're facing the latter, you'll notice the "No Internet, secured" message next to your WiFi network in
 Solved: No Internet Connection Windows 10May 14, 2025 pm 04:33 PM
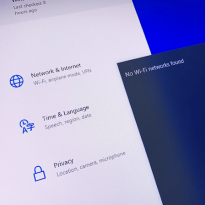
Windows 10 updates can occasionally introduce new issues to your system, including the No Internet Connection error, which can prevent your computer from accessing the internet. Fortunately, this frustrating problem can be resolved using our outlined
 How to Improve Game Data Loading Times in Windows - Make Tech EasierMay 14, 2025 pm 04:32 PM
To enhance gaming performance, many games load assets on-the-fly, making an SSD highly beneficial for reducing load times. If your SSD is slow or you're still using an HDD, you might experience extended loading times, stuttering, and fluctuating FPS.
 Microsoft Word Keeps Freezing in Windows 10 - 10 ways to fix ItMay 14, 2025 pm 04:31 PM
Are you facing issues with Microsoft Word freezing on your Windows 10 system? This can be highly frustrating, especially when you're in the middle of important work.When Microsoft Word keeps freezing on Windows 10 during your tasks, it indicates an u
 What to Do When Windows Update Keeps Failing on Windows 10May 14, 2025 pm 04:30 PM
Windows 10, a widely used operating system around the world, often faces various issues despite its widespread adoption. One common problem is the recurring failure of the Windows Update feature, which prevents users from updating their systems.If yo
 Spotify Web Player Not Working? What To Do?May 14, 2025 pm 04:28 PM
If you're struggling with the Spotify web player not functioning properly, you're not alone. Many users face similar issues when trying to enjoy their favorite music on this popular streaming platform. Fortunately, there are several troubleshooting s


Hot AI Tools

Undresser.AI Undress
AI-powered app for creating realistic nude photos

AI Clothes Remover
Online AI tool for removing clothes from photos.

Undress AI Tool
Undress images for free

Clothoff.io
AI clothes remover

Video Face Swap
Swap faces in any video effortlessly with our completely free AI face swap tool!

Hot Article
Hot Tools

WebStorm Mac version
Useful JavaScript development tools

SublimeText3 Linux new version
SublimeText3 Linux latest version

SublimeText3 Mac version
God-level code editing software (SublimeText3)

Atom editor mac version download
The most popular open source editor

Dreamweaver CS6
Visual web development tools

