Want to lock and protect a specific area of the table to avoid accidentally modifying the data? Both WPS Office tables and Excel provide partition locking functions, allowing you to easily protect tables in partitions. In this article, PHP editor Zimo brings you detailed steps for locking tables by region. Whether you use WPS Office or Excel, you can easily complete the operation according to the guide in this article.
Open an Excel document, select all cells, and then hold down the [Ctrl] key to cancel the cells that need to be locked:

We select on the toolbar [Review], select [Allow users to edit areas] in the drop-down menu, and the corresponding dialog box will pop up:

In the pop-up dialog box, select [New]:

In the pop-up [New Area], you can see that there is already content in the input field below [Reference Cell]. We keep it unchanged and click OK:

Return to the dialog box and continue to select [Protect Worksheet]:

In the pop-up [Protect Worksheet] dialog box, select [Select Locked Cells] and [ Select the unlocked cells], enter the password twice, and click OK:

At this time, we click on the cells outside the red font area and can still edit:

When you click on the cell in the red area, the locked dialog box will pop up:

The above is the detailed content of How to lock WPS table by area_Steps to lock Excel table by area. For more information, please follow other related articles on the PHP Chinese website!
 怎么看office是什么版本的Jan 04, 2021 pm 01:55 PM
查看office版本的方法:1、新建一个excel表格,并双击点开;2、在excel的左上角点击【文件】进入;接着从【文件】进入之后选择【账户】;3、在打开的页面中查看使用的Microsoft Office版本信息即可。
 mac复制文件损坏(mac复制文件损坏怎么解决)Feb 02, 2024 pm 04:00 PM
本文将为大家介绍mac复制文件损坏的相关内容,希望能给大家提供帮助。请继续阅读。苹果电脑不能拷贝写入复制文件到硬盘/U盘怎么办根据向导提示,重启电脑后,打开Mac的“偏好设置”,即可双击图标打开该软件。如果你的文件容量大于硬盘容量,无法将文件复制或拷贝到移动硬盘或U盘。此时,你可以考虑更换硬盘。首先,将硬盘或U盘插入电脑。接着,按下【+空格】快捷键,打开【磁盘工具】窗口。根据下图箭头所指的位置,选择相应的磁盘。进行格式化设置,可选择FAT或ExFAT格式。点击确定后,右键菜单将出现复制选项,可方
 mac的word没有文件?Jan 31, 2024 pm 04:27 PM
导读:本文本站来给大家介绍有关mac的word没有文件的相关内容,希望对大家有所帮助,一起来看看吧。mac上没有word怎么办?启动台找不到word,则点击访达。点击访达侧边栏上应用程序上,如图。翻页应用到word点击它,如图。那么即可将其打开了,如图。在Mac上用Pages打开你想转换/存储为Word格式的文件。在“文件”菜单里选择“导出到”,然后在子菜单里选择“Word...”。在“导出您的文稿”下拉菜单“Word”选项里,按一下高级选项旁的三角形。打开任意苹果电脑,进入电脑桌面主页,在桌面
 Go语言中实现将PDF文件转换为Word文档的实用方法Jan 31, 2024 pm 06:07 PM
Go语言实现PDF转Word文档的实用方法前言PDF和Word是两种常用的文档格式,在不同的场景下有不同的用途。PDF格式的文档具有跨平台兼容性好、安全性高、易于存储和传输等优点,而Word格式的文档则具有可编辑性强、易于修改和格式化等优点。因此,在某些情况下,需要将PDF文档转换为Word文档。Go语言实现PDF转Word文档Go语言是一个开源的、编译型的
 学习如何升级Office 2007至2016Jan 06, 2024 pm 05:10 PM
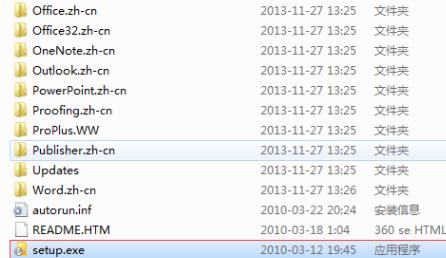
office2007有些用户觉得版本老旧,很多的功能已经不够用了,因此想要去升级为2016,为此下面带来了升级教程,一起来看看office2007怎么升级到2016吧。office2007怎么升级到2016:1、首先用户需要下载office2016,然后点击“setup.exe”。2、然后就可以等待安装了,如果自带office2007那么就会出现升级。3、等到完成安装就可以覆盖之前的版本了。4、最后就可以在左下角的开始程序中看到已经升级成功了。
 为什么office无法激活Jun 28, 2023 pm 01:31 PM
office无法激活解决原因及解决方法:1、网络或更换网络联接方式错误,需要更换网络并更新Office;2、微软帐户信息不正确,使用微软工具修复;3、没有卸载所有Office软件后重装,可以尝试卸载后重装;4、F10恢复出厂设置;5、联系微软Office客服获取帮助。
 手机做文件表格用什么软件Jan 30, 2024 pm 10:33 PM
手机上做表格用什么软件1、手机上可以做表格的软件有:《WPSOffice》《石墨文档》《腾讯文档》《表格编辑》《Excel电子表格教程》《MicrosoftExcel》等。2、手机上可以做表格的软件:WPSOffice、Excel、石墨文档、永中Office、表格编辑。WPSOffice一款移动办公的神器。3、手机上做表格用WPSOffice软件。WPSOffice是一款老牌的办公软件套装,可以实现办公软件最常用的文字、表格、演示等多种功能。4、WPSOffice。是一款老牌的办公软件套装,可以
 win11怎么激活officeOct 18, 2023 pm 02:45 PM
win11激活office的步骤如下:1、点击“文件”菜单中的“账户”选项,然后选择“登录”;2、使用Microsoft 账户和密码登录后,Office 将被自动激活;3、点击“开始”按钮,然后选择“设置”选项。;4、在“设置”窗口中,选择“应用”选项,然后点击“Office 应用”;5、在“Office 应用”页面中可以更改 Office 的默认保存位置、字体和主题等设置。


Hot AI Tools

Undresser.AI Undress
AI-powered app for creating realistic nude photos

AI Clothes Remover
Online AI tool for removing clothes from photos.

Undress AI Tool
Undress images for free

Clothoff.io
AI clothes remover

AI Hentai Generator
Generate AI Hentai for free.

Hot Article

Hot Tools

MinGW - Minimalist GNU for Windows
This project is in the process of being migrated to osdn.net/projects/mingw, you can continue to follow us there. MinGW: A native Windows port of the GNU Compiler Collection (GCC), freely distributable import libraries and header files for building native Windows applications; includes extensions to the MSVC runtime to support C99 functionality. All MinGW software can run on 64-bit Windows platforms.

mPDF
mPDF is a PHP library that can generate PDF files from UTF-8 encoded HTML. The original author, Ian Back, wrote mPDF to output PDF files "on the fly" from his website and handle different languages. It is slower than original scripts like HTML2FPDF and produces larger files when using Unicode fonts, but supports CSS styles etc. and has a lot of enhancements. Supports almost all languages, including RTL (Arabic and Hebrew) and CJK (Chinese, Japanese and Korean). Supports nested block-level elements (such as P, DIV),

WebStorm Mac version
Useful JavaScript development tools

Atom editor mac version download
The most popular open source editor

ZendStudio 13.5.1 Mac
Powerful PHP integrated development environment


