
 System TutorialWindows SeriesSteps to solve the problem that the readyboost function cannot be started in WIN10 system
Steps to solve the problem that the readyboost function cannot be started in WIN10 system

The ReadyBoost function cannot be enabled, affecting your system performance? Don't worry! PHP editor Xigua brings you detailed processing steps to help you solve this problem easily. By following these steps, you can take full advantage of ReadyBoost and make your system run faster. Read on below to learn how to fix ReadyBoost feature not starting in Windows 10.
1. First, press the Win R shortcut key combination, open Run, enter services.msc in the box and click OK to open the service.

2. Then, after opening the service, I could not find the sysmain service. I found the superfetch service. Its description was to maintain and improve system performance over a period of time. At that time, it was Disabled status?

3. Change the startup type of the superfetch service to automatic, click Apply, and click Start.

4. After starting, right-click on my U disk, and finally click Properties in the pop-up dialog box, and click ReadyBoost to set it.
The above is the detailed content of Steps to solve the problem that the readyboost function cannot be started in WIN10 system. For more information, please follow other related articles on the PHP Chinese website!

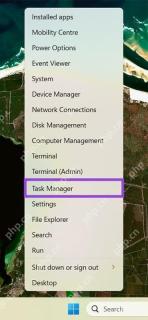
 13 Windows Keyboard Shortcuts I Couldn't Live WithoutMay 12, 2025 am 03:02 AM
Mastering Windows keyboard shortcuts isn't just about efficiency; it streamlines your entire computing experience. Windows' interface can be less than intuitive, hiding crucial settings within layers of menus. Fortunately, countless shortcuts exist
 How to Speed Up Your PC (Windows 11)May 11, 2025 pm 06:01 PM
Is your Windows 11 PC running slower than usual? Opening apps and loading websites taking an eternity? You're not alone! This guide offers three simple, no-download solutions to boost your computer's performance without complex settings adjustments
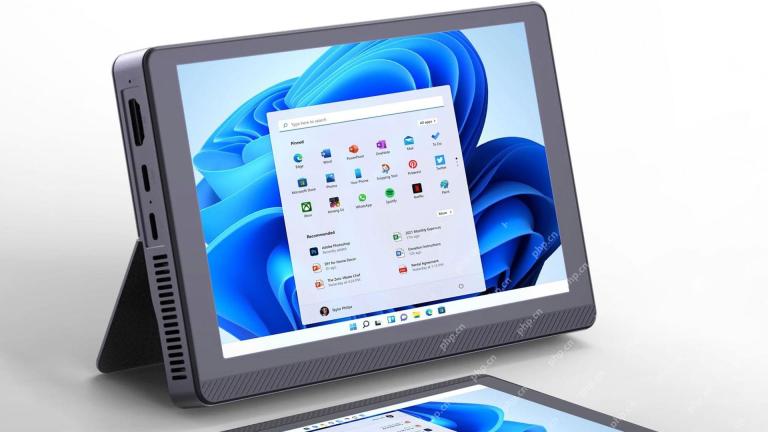 This Mini PC Doubles as a Not-So-Great TabletMay 11, 2025 am 06:01 AM
This mini PC, masquerading as a tablet, leaves much to be desired. The 7-inch, 1290x800 resolution screen is underwhelming. While some might use it for media consumption (similar to a 7-inch Amazon Fire Tablet), it's unlikely to be a primary choice
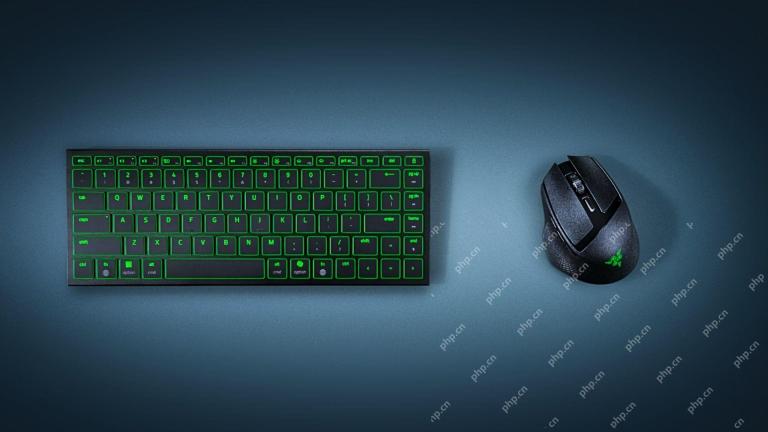 Razer's New Basilisk Mobile & Joro Are for on-the-go GamingMay 11, 2025 am 03:02 AM
Razer launches the new Basilisk Mobile and Joro gaming keyboards, designed for mobile gamers. The Joro keyboard is small, but it comes with a full function key row and full-size arrow keys, providing a familiar and comfortable layout. The low button design helps maintain ergonomic hand posture and reduces fatigue caused by long-term gaming. Joro uses game-level keys to ensure fast and accurate key response and satisfying feedback, and enhances durability with durable UV-coated ABS keycaps. For competitive players, Joro also comes with Snap Tap mode, which improves first-person shooting game by allowing faster input between two keys without releasing the first key
 Lenovo's Legion 9i Gaming Laptop Has a Massive 18-Inch ScreenMay 10, 2025 pm 09:04 PM
Lenovo's latest Legion 9i gaming laptop is a powerhouse, but portability might be a concern. This 10th-generation model boasts a groundbreaking 18-inch display, a first for the Legion 9i series. The screen offers stunning visuals, with up to 4K res
 You Can't Buy MSI's Latest Tiny PCMay 10, 2025 am 03:01 AM
MSI Unveils Compact, Fanless Embedded PC: The MS-C927 For those who appreciate smaller-sized computers, MSI's latest offering, the MS-C927, is a noteworthy addition, though its aesthetics might not be award-winning. This fanless embedded PC is desig
 My Favorite Fidget Toys are Mechanical SwitchesMay 10, 2025 am 01:04 AM
The crisp sound of the mechanical keyboard is pleasant, but it can only be heard when using the keyboard. These small and cheap stress-relieving toys solve this problem. Playing with the clicking stuff calmed me down—the sound was pleasant, and my hands were moving while focusing on other things. I used to do this with a telescopic pen (in the age when I needed to write my papers) which bothered my classmates. But now, mechanical keyboards and mechanical shafts bring the same effect. The clicking and sounds made by the mechanical shaft are pleasant, and the different feels and "clicking" of different mechanical shafts add to the satisfaction. Related ###### I am addicted to mechanical axes and keycaps, not collecting keyboards OK, maybe I'm just addicted to collecting anything clicking. Article 1
 How to Change Default View in File Explorer (Windows 11)May 09, 2025 pm 02:02 PM
Customize Your Windows 11 File Explorer: A Guide to Setting and Saving Your Preferred View Tired of File Explorer's default view? This guide shows you how to easily change and permanently save your preferred folder view in Windows 11, whether it's l


Hot AI Tools

Undresser.AI Undress
AI-powered app for creating realistic nude photos

AI Clothes Remover
Online AI tool for removing clothes from photos.

Undress AI Tool
Undress images for free

Clothoff.io
AI clothes remover

Video Face Swap
Swap faces in any video effortlessly with our completely free AI face swap tool!

Hot Article
Hot Tools

WebStorm Mac version
Useful JavaScript development tools

SecLists
SecLists is the ultimate security tester's companion. It is a collection of various types of lists that are frequently used during security assessments, all in one place. SecLists helps make security testing more efficient and productive by conveniently providing all the lists a security tester might need. List types include usernames, passwords, URLs, fuzzing payloads, sensitive data patterns, web shells, and more. The tester can simply pull this repository onto a new test machine and he will have access to every type of list he needs.

mPDF
mPDF is a PHP library that can generate PDF files from UTF-8 encoded HTML. The original author, Ian Back, wrote mPDF to output PDF files "on the fly" from his website and handle different languages. It is slower than original scripts like HTML2FPDF and produces larger files when using Unicode fonts, but supports CSS styles etc. and has a lot of enhancements. Supports almost all languages, including RTL (Arabic and Hebrew) and CJK (Chinese, Japanese and Korean). Supports nested block-level elements (such as P, DIV),

SublimeText3 Mac version
God-level code editing software (SublimeText3)

Atom editor mac version download
The most popular open source editor

