

 Computer TutorialsTroubleshootingHow to make money assembling computers? How can a computer store make money selling assembled machines?
How to make money assembling computers? How can a computer store make money selling assembled machines?

Is it possible to make money by assembling computers? Is it profitable to open a computer store and sell assembled machines? PHP editor Zimo brings you the following answer: With the development of e-commerce, the cost of assembling computers has been greatly reduced, but is it still profitable to assemble computers? And is it possible to make money by opening a computer store and selling assembled machines? This article will provide you with an in-depth analysis of these two issues and provide you with professional insights and suggestions. Read on to learn how you can make money building computers and selling them in computer stores.

How to make money by assembling computers?
Assembling computers is to earn the price difference of accessories and corresponding labor costs by assembling them for others.
In the past, the profit from assembling computers was relatively high. Now the prices are very transparent. Most of the money earned is labor costs. For a computer, you could earn four or five hundred in the past, but now two or three hundred is pretty good. , but if the quantity is large, it is still good. You have to think carefully to see if it is suitable for you.
How can a computer store make money selling assembled machines?
Under normal circumstances, conscientious businesses do not make much money on computer assembly machines. Three major components: memory, CPU, and hard drive. Generally it is not profitable. Mainly, the chassis power supply and monitor motherboard make a little difference. Under normal circumstances, the profit of an assembly machine is generally between 8% and 13%. Because we still need to do after-sales maintenance. All core accessories come with a three-year warranty.
Can you make money assembling computers or selling hardware?
Of course, the price of hardware fluctuates greatly. Merchants make money by relying on the price difference. The goods are delivered at one price and sold at another price. The profits in the middle are very generous! In addition, some unscrupulous merchants will rip off customers, quote high prices to novice buyers, sell parallel imports, etc. . . .
How to assemble a computer mouse?
The steps are as follows:
1. First, prepare all the accessories of the wireless mouse, including: a wireless mouse, 2 batteries matching the wireless mouse, and a USB plug-in for the mouse.
2. The next step is to install the mouse battery. First, gently open the mouse cover. Note: Just lift it gently from the high-curved tail of the mouse. Do not lift it from the scroll wheel (left and right buttons) to avoid damaging the mouse.
3. After opening the mouse cover, you can see that there are two battery slots on the left and right inside. The above prompts the battery installation direction of the positive and negative poles. According to this prompt, insert the 2 batteries and install them.
4. After installing the battery, close the mouse cover.
5. Next, find the notebook USB socket and insert the USB plug-in for the mouse into it.
6. At this time, press the computer power button to turn on the computer. Then turn the mouse over, turn it on, and the prompt light will light up. Note: "I" means open, O means closed.
How to assemble a computer neatly
I got a new computer after joining the company, and the configuration is pretty good. But every time I use a new computer or reinstall the system, the desktop always becomes a mess after a while. I must change this situation this time. How can this situation be improved? Just do it and think about it, this is not something that can be accomplished overnight.
First of all, to make the desktop look clutter-free, there must not be too many icons on the desktop. I still remember that I had a conceited roommate who had so many desktop icons that he almost filled up his desktop. It looked really bad. Therefore, I have to strictly control the number of icons. Only one column can be left on the desktop and one column is empty. So far, this visual effect is not bad. For some other software you need to use, you can search directly through the lower left corner. It is quite convenient. In fact, it is faster than searching for icons when you fill the desktop with them.
How to assemble a computer keyboard?
1. First of all, we need to understand the structure of the button. If the removed button is x, see what the structure inside is like. Align the direction of the keycap and press it against the bracket.
2. Use a little force and a click sound will appear, indicating that the installation is successful. Next, install the more complicated shift key. The two situations are slightly different. The bracket of the x key is directly connected to the keyboard, while the bracket of the shift key is connected to the keycap.
3. Now you need to remove the white bracket from the keycap. There are three parts in total, two white parts and a small steel wire. The small steel wire is connected to the inside of the keycap and does not need to be removed.
4. Combine the two white parts into one, and then install the integrated white bracket onto the keyboard. Note that there are buttons on the keyboard. Be careful when installing and remember to pull or pull hard.
How to assemble lenovo computer?
The specific installation steps are as follows
1. CPU installation
The CPU should be put down smoothly, then cover the iron cover, press the iron rod firmly into place, and the CPU installation is completed.
Then apply CPU cooling silicone evenly on the CPU
2. Install the CPU radiator
First, turn the four foot pins to the opposite direction of the arrow above. Then align the four empty spots on the motherboard and press down hard to complete the installation of one position. Repeat four times.
If you want to disassemble the radiator, turn the four pins in the direction of the arrow above, then pull hard, repeat four times to disassemble.
3. The installation of the memory is very easy. Align the convex and convex parts of the memory and the memory slot, and push it to the left/right respectively. When you hear a small "pop" sound, the left/right slot will automatically close up, and then Press the other side in the same way.
4, Power supply installation
Install the four screws of the power supply
5, Motherboard installation Use a screwdriver to press the screws into the reserved screw holes to fix the motherboard.
6. Hard drive installation
You can choose the bay to install the hard drive. The general principle is to install it in the middle to ensure more heat dissipation. Four screws are installed. If you are lazy, you can also install two diagonally. .
7. Graphics card installation
Nowadays, independent graphics cards are not required to be installed. The CPU or motherboard has integrated graphics cards, so it is no problem to meet the basic requirements. Installing the graphics card is not difficult. Just remove the chassis baffle, insert it into the PCI-E slot, and then tighten the screws. If the motherboard has multiple PCI-E
8, motherboard wiring
1. Motherboard power supply/CPU auxiliary power supply: align the bayonet and connect
2. Front audio and front USB: align Plug in the fool-proof interface
3. The hard disk light, power light, power button, and restart button are installed according to the motherboard markings (color wire positive, black and white wire negative)
HDD LED represents the hard disk light , POWER LED is the power light, RESET SW is the reset button, POWER SW is the switch, and PC SPEAKER is the PC speaker.
4. Hard drives now basically have SATA interfaces. Just connect the SATA power cable (5PIN flat cable) and data cable.
5. Don’t forget to connect mid-to-high-end graphics cards. How to assemble the computer configuration using 6PIN or 8PIN auxiliary power supply?
1. Assembling a computer configuration requires certain skills and knowledge. 2. First, you need to clarify your needs and budget, and determine the purpose and performance requirements of the computer to be assembled. Then, choose the appropriate hardware components such as motherboard, processor, memory, hard drive, graphics card, etc., and ensure compatibility between them. Next, install these hardware components into the computer chassis and connect the corresponding power cables, data cables, etc. Finally, install the operating system and necessary drivers. 3. Assembling a computer configuration is a relatively complex process that requires certain experience and skills. During the assembly process, you can also make some optimizations and adjustments based on personal needs, such as selecting a suitable radiator, adding additional fans, etc. Additionally, it's helpful to know some common troubleshooting methods.
How to assemble a computer host?
The assembly steps are as follows:
1: Tools and components. First of all, you need to prepare the corresponding tools, such as screwdrivers and screwdrivers. Usually, simple tools are given when you purchase the case. At the same time, you must also prepare various components of the host such as motherboard, graphics card, memory stick, CPU, power supply, chassis, etc.
二: Install the CPU. The installation of the host starts with the CPU. Unpack the motherboard and CPU packaging boxes, take out the motherboard, find the location of its CPU interface, press the lever downward to open it, then take out the CPU and align it for installation. Be gentle. Be slow and careful to avoid bending the CPU pins.
Three: Install a cooling fan. If it is a boxed CPU, it will come with a cooling fan, which can be installed on the motherboard together with the CPU. If you purchase a separate cooling fan yourself, you need to apply silicone grease to the CPU before installing the fan.
Four: Install the power supply. Put the motherboard with the CPU installed next to it, first disassemble the case and then install the power supply. Here you need to use a screwdriver to tighten the screws to fix the power supply in the case, and remove some cards on the back of the case to facilitate the installation of the motherboard later.
Five: Install the motherboard. After the power supply is installed, you can fix the motherboard inside the chassis, determine the installation direction, and then use screws to fix the motherboard. Be careful not to make a mistake. You can confirm it by looking at the slot of the graphics card. It is generally easier to find the direction.
Six: Install the memory module. Take out the memory stick. If it is two memory sticks, it is recommended to install it in slots 1-3. If it is a single memory stick, install it in the second slot. After the memory stick is installed, press the fixing rings on both sides to ensure The memory stick will not loosen.
Seven: Install the graphics card. Then take out the graphics card, align it with the slot and install it. At the same time, use a screwdriver to fix the graphics card on the chassis to ensure that the graphics card does not shake left and right, and the interface of the graphics card needs to face the outside of the chassis.
Eight: Wiring. After these are installed, you can observe the layout of the chassis, and then start wiring. In principle, it is better to be as simple as possible. You need to connect the graphics card, motherboard and power supply. At the same time, the motherboard may also need to be connected to the graphics card. Nine: Others. If there is an optical drive on the host, you need to install it on the upper part of the chassis and fix it with a screwdriver. Then connect the power supply and motherboard. After all the cables are connected, you can connect the monitor to test whether it can boot normally.
How to assemble and turn on the computer?
When assembling a computer, the first step is to select the motherboard, CPU, and memory. harddisk. graphics card. chassis and power supply.
The second keyboard, mouse, monitor, camera and other peripherals.
The third part is assembled. Insert the cpu, hard drive, and graphics card. Power supply, etc. are connected as required. The keyboard, mouse, and monitor peripherals are connected to the corresponding interfaces.
The fourth step is to choose a windows system or a linux system when making a system disk. The fifth step is to install the system.
The sixth part starts.
The above is the detailed content of How to make money assembling computers? How can a computer store make money selling assembled machines?. For more information, please follow other related articles on the PHP Chinese website!

 How to Fix Failed to Load xgameruntime.dll Error Code 126May 06, 2025 pm 08:03 PM
Encountering the "failed to load xgameruntime.dll error code 126"? This guide provides effective solutions to resolve this game launch issue. The xgameruntime.dll Error (Code 126): This error prevents certain games from launching, displayin
 Oblivion Remastered Unreal Process Has Crashed: Quick Fix!May 06, 2025 pm 08:02 PM
The "An Unreal Process Has Crashed" error in Oblivion Remastered prevents players from enjoying this updated RPG. This guide offers several solutions to resolve this issue. Try each fix until the problem is solved. Quick Navigation: An Un
 Scan for Hardware Changes Freezes Windows Computer? Fix It!May 06, 2025 pm 08:01 PM
Troubleshooting "Scan for Hardware Changes" Freezing Windows Some users experience system freezes after selecting "Scan for hardware changes" in Device Manager. This guide provides solutions to resolve this issue. A user on the M
 Learn How to Recover 3DS SD Card Data on Windows: GuideMay 06, 2025 pm 06:03 PM
Recovering Lost Data from Your Nintendo 3DS SD Card: A Step-by-Step Guide Losing precious photos, videos, or game saves from your Nintendo 3DS SD card is frustrating. This guide offers solutions to recover your 3DS SD card data on a Windows PC. Unde
 How to Fix Sunderfolk Save File Location & Not SavingMay 06, 2025 pm 06:02 PM
This guide explains how to locate your Sunderfolk save files and troubleshoot saving issues. Knowing your save file location allows you to manage your game progress. Sunderfolk Save File Location Sunderfolk, Dreamhaven's debut game, saves game data
 How to fix Microsoft Teams Error tag 7ita9 in Windows?May 06, 2025 pm 04:00 PM
Microsoft Teams is widely used for virtual meetings, team collaboration, and workplace communication. But from time to time, users encounter technical issues th
 How to get real-time translations on your phoneMay 06, 2025 am 09:44 AM
AI-powered mobile translation apps have dramatically improved real-time conversation capabilities. With a strong internet connection, most apps now seamlessly translate spoken words, eliminating the need for manual typing or pronunciation struggles.
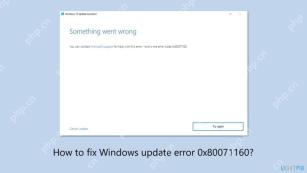 How to fix Windows update error 0x80071160?May 05, 2025 pm 10:00 PM
While many users dont realize that, Windows updates are among the most important features for maintaining the systems stability and security, as well as ensurin


Hot AI Tools

Undresser.AI Undress
AI-powered app for creating realistic nude photos

AI Clothes Remover
Online AI tool for removing clothes from photos.

Undress AI Tool
Undress images for free

Clothoff.io
AI clothes remover

Video Face Swap
Swap faces in any video effortlessly with our completely free AI face swap tool!

Hot Article
Hot Tools

Zend Studio 13.0.1
Powerful PHP integrated development environment

SecLists
SecLists is the ultimate security tester's companion. It is a collection of various types of lists that are frequently used during security assessments, all in one place. SecLists helps make security testing more efficient and productive by conveniently providing all the lists a security tester might need. List types include usernames, passwords, URLs, fuzzing payloads, sensitive data patterns, web shells, and more. The tester can simply pull this repository onto a new test machine and he will have access to every type of list he needs.

Dreamweaver CS6
Visual web development tools

Atom editor mac version download
The most popular open source editor

SublimeText3 Mac version
God-level code editing software (SublimeText3)

