


这篇教程是向脚本之家的朋友介绍Photoshop设计大气的好莱坞电影海报之皇家赌场教程,教程很不错,推荐过来,大家一起来学习吧
这几天我利用搬砖的空闲时间想了又想,与其用许多复杂的工具绘制一张海报,让一些新手云里雾里,还不如重点讲解一个工具的使用来得实在。比如这一期我找了一张很有代表性的海报讲解“矢量蒙版”的应用。
最终效果:

当你看到这张海报的时候你准备从哪里入手?你会去弄个自定义图案接着填充,粘贴图片然后添加剪贴蒙版是吗?其实这样也不是不行,用图案填充加剪贴蒙版缺点是操作性不强。原图的方块排列规矩,不过有些地方需要随机挖空,还有零碎的小图需要粘贴,操作起来的确分成棘手。如果用矢量蒙版的话相对会轻松得多。
下面开始转入正题。
新建一个大小比例跟原图差不多的新画布。

点击“自定形状工具”右边的“几何选项”,设置圆角矩形工具数值,画一个固定尺寸的矢量图。
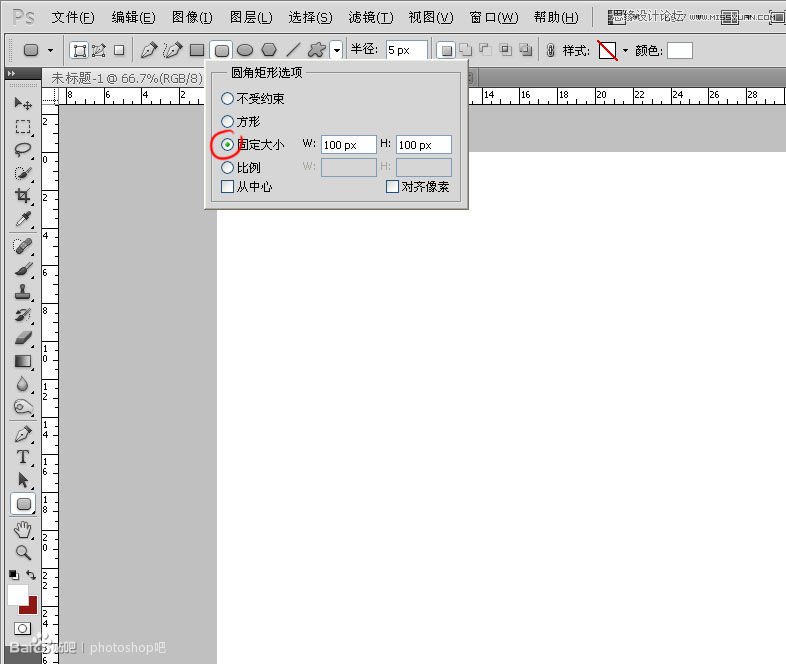
在画布任意位置点一下,一个100*100像素。圆角半径为5像素的圆角矩形形状出现了,这个尺寸我也是经过粗略计算的,虽然不是很精确,但差不多。

按A(路径选择工具),左键点击这个圆角矩形,再按CTRL+T,我要把这个形状移到画布的左上角,靠近边角。

这个矩形的尺寸是100*100,所以要让它对齐在边角的话,它的中心的是50*50,我只需在水平位置和垂直位置各输入50就行了,它会精确的到达位置。

现在我准备让这个圆角矩形以相隔2个像素铺满整个画布,按CTRL+ALT+T,在水平位置里输入152。

狂按CTRL+SHIFE+ALT+T,直至水平方向铺满。

继续按A,框住所有的矩形,CTRL+ALT+T,在垂直位置里也输入152。

继续狂按CTRL+SHIFE+ALT+T,直至垂直方向铺满。

按A,框住全部形状,CTRL+T,在水平和垂直位置分别输入750和600,让它们居中.因为刚才建立的画布是1500*1200,所以中心位置就是750和600。

准备工作到此完成。
我贴入两张从网上找到的主角图片,用色阶,色彩平衡,色相饱和度等等工具尽量让着两张色彩迥异的图片统一起来。
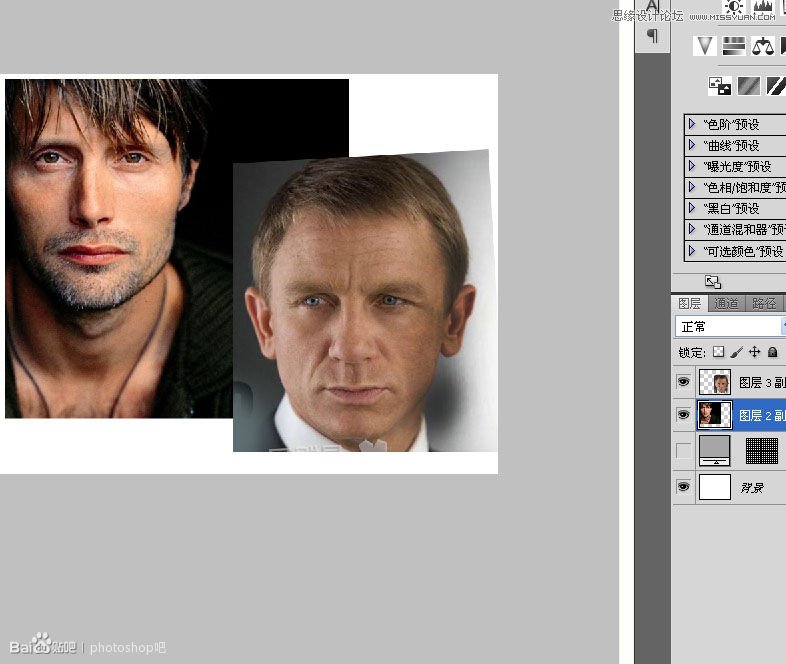
调色这一步骤我就略过不提了,调色是仁者见仁智者见智的东西,几乎不用学的,唯一要学的就是记住去哪个菜单里找哪个命令并且知道它起什么作用,这里我就用了一堆的色阶,亮度对比度,色相饱和度和颜色平衡。

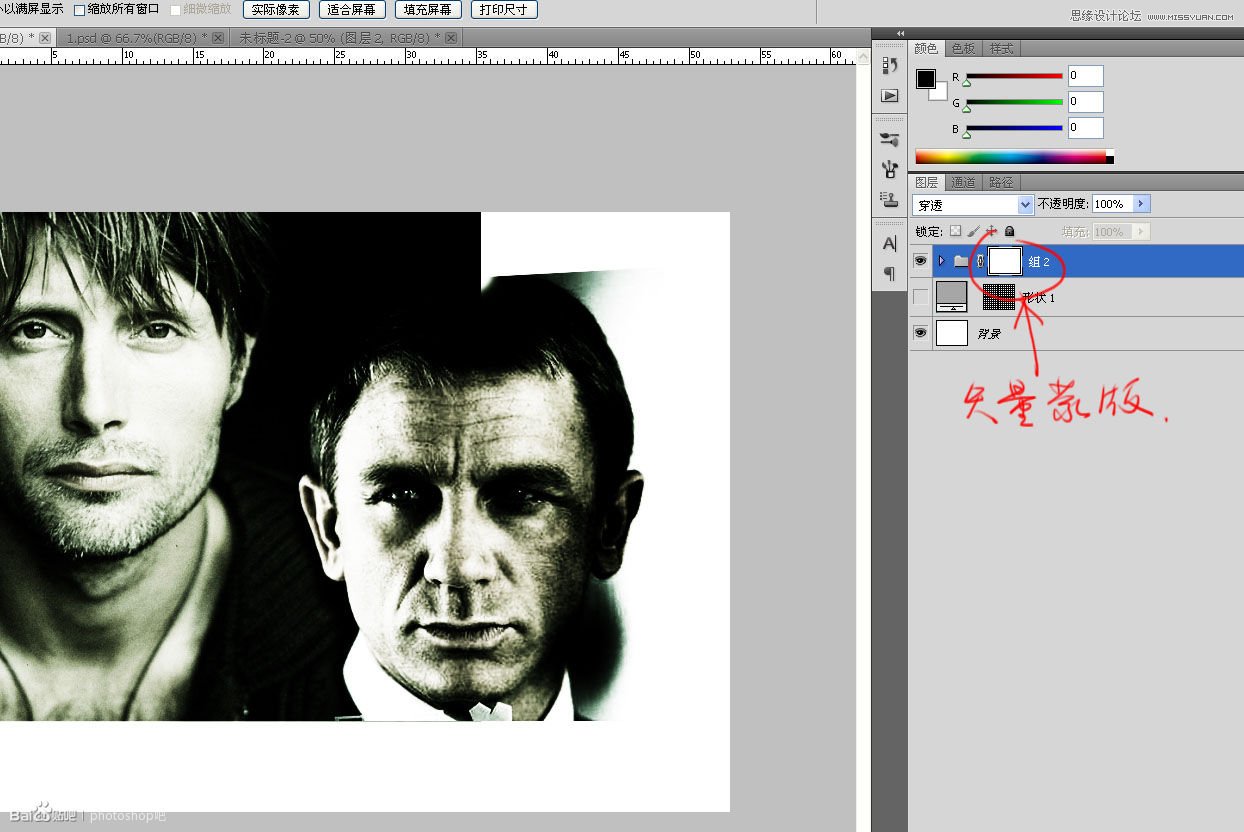
为了让图层栏显得简洁一些,我把这一堆东西打包成一个组,“组”有好几个用途,让界面简洁也是“组”的用途之一。

选择组,点击“图层-矢量蒙版-显示全部”,在组后面添加一个矢量蒙版。这里不管你选择显示还是隐藏效果都一样,所以不用纠结。
点击下面被隐藏的矢量蒙版缩览图,按A,框住所有路径,CTRL+C拷贝。

在组后面的矢量蒙版中CTRL+V粘贴,效果立显。

下面是一份很轻松的活,我要让一些地方挖空,方法很简单,在矢量蒙版中点击矩形,DELETE就行了。

假如万一你手抖了一下,把不该删除的地方给删了怎么办?

更简单,在下面的备份层里复制相同位置的路径粘贴到蒙版里就行了。

粘贴!恢复原状。

我找了几张小图片来装饰这张海报。

把这六张小图也打包成组,添加矢量蒙版。

从备份中复制相应位置的矩形路径,再粘贴到小图的矢量蒙版中,大功告成!

接下去都是体力活,编辑文本,没什么好说的了.我就略过不提了。

教程结束,以上就是Photoshop设计大气的好莱坞电影海报之皇家赌场教程,希望能对大家有所帮助!

 Photoshop: Mastering Layers and CompositionMay 01, 2025 am 12:05 AM
The method to create a new layer in Photoshop is: 1. Click the "New Layer" button at the bottom of the layer panel; 2. Use the shortcut keys Ctrl Shift N (Windows) or Command Shift N (Mac). The layers are like transparent sheets on canvas, allowing design elements to be managed separately, non-destructive editing and experimenting, and improving design levels.
 Photoshop Applications: From Photo Editing to Digital ArtApr 30, 2025 am 12:10 AM
Photoshop is widely used in the fields of image processing and digital art, and is suitable for photo editing and digital art creation. 1. Photo editing: Adjust brightness and contrast Use the "Brightness/Contrast" tool. 2. Digital art: Use brush tools to create paintings. 3. Basic usage: Use the "Red Eye Tool" to remove red eyes. 4. Advanced usage: Use layers and masks for image synthesis. 5. Debug: Recover the lost layers by checking the layer panel. 6. Performance optimization: Adjust memory usage to improve running speed.
 Photoshop's Core Function: Image Editing and ManipulationApr 29, 2025 am 12:17 AM
Photoshop's core functions are image editing and operation, including adjusting the color, brightness, contrast of images, applying filter effects, cropping and adjusting image size, performing image synthesis, etc. 1. Adjust brightness and contrast: Open the image, select the "Adjust" option in the "Image" menu, select "Brightness/Contrast", and adjust the slider. 2. Use the color level adjustment layer and layer mask: Click the "Create a new fill or adjust layer" button, select "Scale", adjust the color level, add a layer mask, and use the brush tool to control the adjustment effect.
 Photoshop: The Power of Raster Graphics EditingApr 28, 2025 am 12:13 AM
Photoshop is a powerful tool for handling raster graphics, and its core functions include layers and masks, filters and adjustments. 1. Layers and masks allow independent editing and non-destructive modifications. 2. Filters and adjustments can quickly change the appearance of the image, but they should be used with caution to avoid affecting the image quality. By mastering these functions and advanced skills, you can greatly improve your image editing and creative abilities.
 Photoshop: A Versatile Tool for Image ManipulationApr 27, 2025 am 12:13 AM
Photoshop is so powerful in the field of image processing because of its versatility and intuitive operating interface. 1) It can handle various tasks from basic adjustment to complex synthesis, such as adjusting brightness and contrast. 2) Working based on layers and masks allows non-destructive editing. 3) Examples of usage include adjusting color balance and creating layer masks. 4) Common errors such as excessive editing can be avoided through the History panel. 5) Performance optimization suggestions include the use of smart objects and shortcut keys.
 Photoshop Trials and Alternatives: Exploring Free AccessApr 26, 2025 am 12:23 AM
Photoshop offers a free 7-day trial period. To maximize the use of the trial period, 1) sign up for multiple Adobe accounts, 2) use the student or education version, and 3) subscribe to Adobe CreativeCloud. Free alternatives include: 1) GIMP, 2) Photopea, 3) Krita, these software can meet daily image editing needs.
 Photoshop for Photographers: Enhancing and Retouching ImagesApr 25, 2025 am 12:01 AM
Enhance and retouching photos in Photoshop can be achieved by adjusting brightness and contrast, using the Repair Brush Tool. 1) Adjust brightness and contrast: Increase brightness and contrast to improve underexposed photos through the Image->Adjustments->Brightness/Contrast menu. 2) Use the Repair Brush Tool: Select HealingBrushTool in the toolbar and apply to remove miscellaneous points or scars in the image.
 Accessing Photoshop: Methods and AvailabilityApr 24, 2025 am 12:07 AM
Photoshop can be obtained by purchasing a permanent license or subscribing to CreativeCloud. 1. Purchase a permanent license for long-term use, no monthly payment, but no latest updates are available. 2. Subscribe to CreativeCloud to access the latest version and other Adobe software, and you need to pay a monthly or annual fee. The choice should be based on frequency of use and requirements.


Hot AI Tools

Undresser.AI Undress
AI-powered app for creating realistic nude photos

AI Clothes Remover
Online AI tool for removing clothes from photos.

Undress AI Tool
Undress images for free

Clothoff.io
AI clothes remover

Video Face Swap
Swap faces in any video effortlessly with our completely free AI face swap tool!

Hot Article
Hot Tools

SecLists
SecLists is the ultimate security tester's companion. It is a collection of various types of lists that are frequently used during security assessments, all in one place. SecLists helps make security testing more efficient and productive by conveniently providing all the lists a security tester might need. List types include usernames, passwords, URLs, fuzzing payloads, sensitive data patterns, web shells, and more. The tester can simply pull this repository onto a new test machine and he will have access to every type of list he needs.

SublimeText3 Mac version
God-level code editing software (SublimeText3)

EditPlus Chinese cracked version
Small size, syntax highlighting, does not support code prompt function

SublimeText3 Linux new version
SublimeText3 Linux latest version

Zend Studio 13.0.1
Powerful PHP integrated development environment

