


今天小编教大家使用photoshop利用置换滤镜快速制作密密麻麻的文字人像,教程效果很好,喜欢的朋友可以一起来学习
作者制作文字人像的方法非常简单,过程:选好人像素材,去色后调整好明暗对比;然后输入文字,让文字填满人像部分;把人物图层复制一层适当模糊处理,然后保持为PSD格式;回到文字图层用置换滤镜做出文字扭曲效果;最后用文字选区复制人像,再更换背景色即可。
最终效果
1、在这个教程中,我们用的图来自电影,文字是随便找的一篇演讲稿。图找到后裁剪一下,符合你要的海报尺寸。 
2、添加一个黑白调整图层,参数如上图或自定义。 
3、添加高斯模糊滤镜,大小为20px,让画面变得柔和。(这一步记得应用在原图上,不是调整图层)。 
4、保存成PSD文件,然后Ctrl + Alt + Z 恢复到高斯模糊前的效果。 
5、选择文字工具,复制个稿子粘贴过来,记得别留空行/空格。把连字选项的勾去掉,选择段落对齐方式,如上图。 
6、如果文字没填满,继续粘贴就可以了。选择你喜欢的英文字体,把字体调小。 
7、在文字图层选择滤镜 – 扭曲 – 置换,同意栅格化请求。参数都是10,文件选择刚才保存的PSD。 
8、Ctrl + 单击文字图层选中文字选区,然后单击图层的小眼睛取消图层可见,选择 编辑 – 合并拷贝。(Ctrl + Shift + C) 补充:这一步做完暂时木有效果,别管它,先执行下一步。 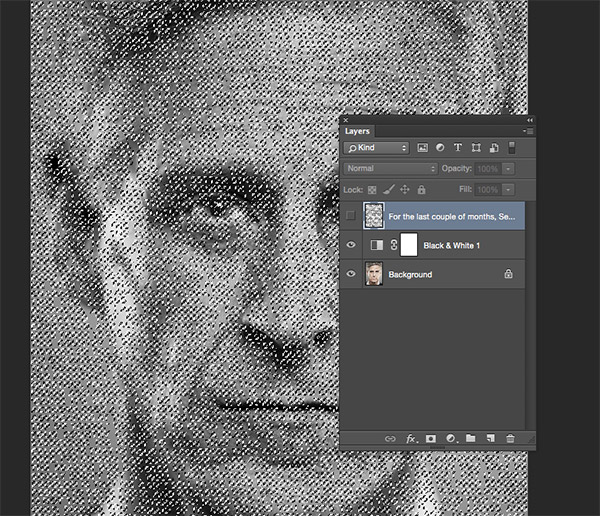
9、新建文件,大小能覆盖你的图像就好。粘贴过去,填充黑色。让小眼睛再亮起来就OK啦。教程效果不同的,尝试下换个字体,缩小上下间距。 另外评论的同学提供了一个方法,供参考:把黑白图层和原图合并后剪切到文字里,再填充黑色背景。 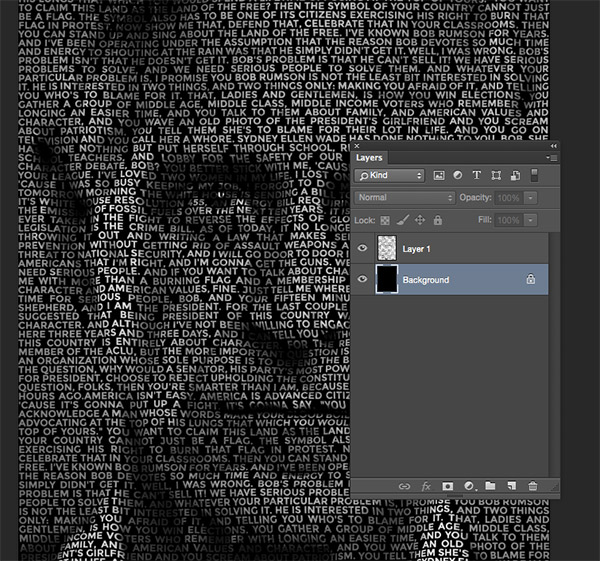
最终效果:

 Photoshop: Mastering Layers and CompositionMay 01, 2025 am 12:05 AM
The method to create a new layer in Photoshop is: 1. Click the "New Layer" button at the bottom of the layer panel; 2. Use the shortcut keys Ctrl Shift N (Windows) or Command Shift N (Mac). The layers are like transparent sheets on canvas, allowing design elements to be managed separately, non-destructive editing and experimenting, and improving design levels.
 Photoshop Applications: From Photo Editing to Digital ArtApr 30, 2025 am 12:10 AM
Photoshop is widely used in the fields of image processing and digital art, and is suitable for photo editing and digital art creation. 1. Photo editing: Adjust brightness and contrast Use the "Brightness/Contrast" tool. 2. Digital art: Use brush tools to create paintings. 3. Basic usage: Use the "Red Eye Tool" to remove red eyes. 4. Advanced usage: Use layers and masks for image synthesis. 5. Debug: Recover the lost layers by checking the layer panel. 6. Performance optimization: Adjust memory usage to improve running speed.
 Photoshop's Core Function: Image Editing and ManipulationApr 29, 2025 am 12:17 AM
Photoshop's core functions are image editing and operation, including adjusting the color, brightness, contrast of images, applying filter effects, cropping and adjusting image size, performing image synthesis, etc. 1. Adjust brightness and contrast: Open the image, select the "Adjust" option in the "Image" menu, select "Brightness/Contrast", and adjust the slider. 2. Use the color level adjustment layer and layer mask: Click the "Create a new fill or adjust layer" button, select "Scale", adjust the color level, add a layer mask, and use the brush tool to control the adjustment effect.
 Photoshop: The Power of Raster Graphics EditingApr 28, 2025 am 12:13 AM
Photoshop is a powerful tool for handling raster graphics, and its core functions include layers and masks, filters and adjustments. 1. Layers and masks allow independent editing and non-destructive modifications. 2. Filters and adjustments can quickly change the appearance of the image, but they should be used with caution to avoid affecting the image quality. By mastering these functions and advanced skills, you can greatly improve your image editing and creative abilities.
 Photoshop: A Versatile Tool for Image ManipulationApr 27, 2025 am 12:13 AM
Photoshop is so powerful in the field of image processing because of its versatility and intuitive operating interface. 1) It can handle various tasks from basic adjustment to complex synthesis, such as adjusting brightness and contrast. 2) Working based on layers and masks allows non-destructive editing. 3) Examples of usage include adjusting color balance and creating layer masks. 4) Common errors such as excessive editing can be avoided through the History panel. 5) Performance optimization suggestions include the use of smart objects and shortcut keys.
 Photoshop Trials and Alternatives: Exploring Free AccessApr 26, 2025 am 12:23 AM
Photoshop offers a free 7-day trial period. To maximize the use of the trial period, 1) sign up for multiple Adobe accounts, 2) use the student or education version, and 3) subscribe to Adobe CreativeCloud. Free alternatives include: 1) GIMP, 2) Photopea, 3) Krita, these software can meet daily image editing needs.
 Photoshop for Photographers: Enhancing and Retouching ImagesApr 25, 2025 am 12:01 AM
Enhance and retouching photos in Photoshop can be achieved by adjusting brightness and contrast, using the Repair Brush Tool. 1) Adjust brightness and contrast: Increase brightness and contrast to improve underexposed photos through the Image->Adjustments->Brightness/Contrast menu. 2) Use the Repair Brush Tool: Select HealingBrushTool in the toolbar and apply to remove miscellaneous points or scars in the image.
 Accessing Photoshop: Methods and AvailabilityApr 24, 2025 am 12:07 AM
Photoshop can be obtained by purchasing a permanent license or subscribing to CreativeCloud. 1. Purchase a permanent license for long-term use, no monthly payment, but no latest updates are available. 2. Subscribe to CreativeCloud to access the latest version and other Adobe software, and you need to pay a monthly or annual fee. The choice should be based on frequency of use and requirements.


Hot AI Tools

Undresser.AI Undress
AI-powered app for creating realistic nude photos

AI Clothes Remover
Online AI tool for removing clothes from photos.

Undress AI Tool
Undress images for free

Clothoff.io
AI clothes remover

Video Face Swap
Swap faces in any video effortlessly with our completely free AI face swap tool!

Hot Article
Hot Tools

SublimeText3 English version
Recommended: Win version, supports code prompts!

ZendStudio 13.5.1 Mac
Powerful PHP integrated development environment

MantisBT
Mantis is an easy-to-deploy web-based defect tracking tool designed to aid in product defect tracking. It requires PHP, MySQL and a web server. Check out our demo and hosting services.

Dreamweaver CS6
Visual web development tools

mPDF
mPDF is a PHP library that can generate PDF files from UTF-8 encoded HTML. The original author, Ian Back, wrote mPDF to output PDF files "on the fly" from his website and handle different languages. It is slower than original scripts like HTML2FPDF and produces larger files when using Unicode fonts, but supports CSS styles etc. and has a lot of enhancements. Supports almost all languages, including RTL (Arabic and Hebrew) and CJK (Chinese, Japanese and Korean). Supports nested block-level elements (such as P, DIV),

