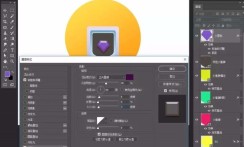
Are you looking for ways to make beautiful diamond medal icons? This time, PHP editor Yuzi will introduce the detailed steps of using Photoshop to create a realistic diamond medal icon. From creating a new canvas to adding textures and shadows, we'll guide you through the process step by step. If you're a graphic designer or looking for ways to improve your icon design skills, this tutorial is for you. Read on to learn how to create a stunning diamond medal icon in Photoshop.
Create a new file and fill the background with your favorite color

Select the Elliptical Shape Tool, pull out a perfect circle, and add a layer style—Gradient Overlay

Select the rectangle tool, make a small shield shape, add a layer style - Gradient Overlay

Select the small shield layer, CTRL J to copy two , reduce it proportionally, and modify the layer style

Then select the small shield layer, CTRL J to copy one, reduce it proportionally, remove the layer style, and set a dark fill

Select the pen tool and outline the small icon. You can make any shape you want. Add layer styles - beveled relief and shadow effects


Select the rectangle tool, add wear, draw three rectangles, one big and two small, fill them with color respectively, create a clipping mask, select them all, and tilt them


Select them, ctrl j to copy, ctrl t to transform, flip horizontally, move to the appropriate position

Pen tool, add a small background and Ornaments

Add layer style - inner shadow, drop shadow,


Add drop shadow

Finally add the overall long shadow with the pen tool

Finally save and export.

The above is the detailed content of How to create a diamond medal icon in photoshop. For more information, please follow other related articles on the PHP Chinese website!
 How much does Microsoft PowerToys cost?Apr 09, 2025 am 12:03 AM
Microsoft PowerToys is free. This collection of tools developed by Microsoft is designed to enhance Windows system functions and improve user productivity. By installing and using features such as FancyZones, users can customize window layouts and optimize workflows.


Hot AI Tools

Undresser.AI Undress
AI-powered app for creating realistic nude photos

AI Clothes Remover
Online AI tool for removing clothes from photos.

Undress AI Tool
Undress images for free

Clothoff.io
AI clothes remover

Video Face Swap
Swap faces in any video effortlessly with our completely free AI face swap tool!

Hot Article

Hot Tools

Safe Exam Browser
Safe Exam Browser is a secure browser environment for taking online exams securely. This software turns any computer into a secure workstation. It controls access to any utility and prevents students from using unauthorized resources.

SublimeText3 Linux new version
SublimeText3 Linux latest version

DVWA
Damn Vulnerable Web App (DVWA) is a PHP/MySQL web application that is very vulnerable. Its main goals are to be an aid for security professionals to test their skills and tools in a legal environment, to help web developers better understand the process of securing web applications, and to help teachers/students teach/learn in a classroom environment Web application security. The goal of DVWA is to practice some of the most common web vulnerabilities through a simple and straightforward interface, with varying degrees of difficulty. Please note that this software

SublimeText3 English version
Recommended: Win version, supports code prompts!

Dreamweaver Mac version
Visual web development tools


