Home >System Tutorial >Windows Series >Steps to modify virtual memory size on win8 computer
Steps to modify virtual memory size on win8 computer
- WBOYWBOYWBOYWBOYWBOYWBOYWBOYWBOYWBOYWBOYWBOYWBOYWBforward
- 2024-04-02 20:37:10887browse
php editor Zimo will introduce you to the steps of modifying the virtual memory size of a win8 computer in this article. When using a win8 computer, if the system runs slowly or there is insufficient memory, you can solve the problem by adjusting the virtual memory size. Virtual memory refers to a mechanism by which the system uses hard disk space as memory. By setting the virtual memory size appropriately, the computer's running speed can be improved. Next, let us learn the specific steps.
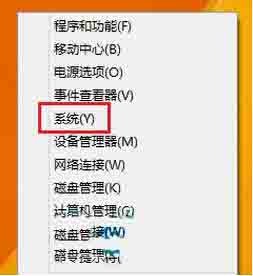
1. Right-click the system desktop, and then click [System] on the system control menu that pops up in the lower left corner of the system desktop. As shown in the picture:

2. Open the system interface, and then click [Advanced System Settings] in the left pane. On the Win8 system advanced system settings interface, click the [Settings] button under Performance.
3. On the performance options window, click the [Change] button under virtual memory. Then on the virtual memory settings window, uncheck [Automatically manage paging file size for all drives], then select the drive, and then select [Custom size] or [System-managed size] or [No paging file]. as the picture shows:

The above is the detailed content of Steps to modify virtual memory size on win8 computer. For more information, please follow other related articles on the PHP Chinese website!
Related articles
See more- How to cancel icon pinning in Windows 11_How to cancel icon pinning in Windows 11
- How to enable quick startup in win10 How to enable fast startup in win10
- How to delete old password information in win11 How to delete old password information in win11
- How to solve the problem of plugging in headphones and still playing music in win10?
- What should I do if the win11 controller is successfully connected but cannot control the game?

