


php editor Yuzai introduces you to the Win10 system backup file operation process. Win10 system comes with a backup tool that can easily back up important files to prevent data loss. First, open Control Panel and select "Backup and Restore," then click "Set Up Backup" to select the files and drives you want to back up. Then, set the backup plan and target path, and click "Next" to start the backup. Once the backup is complete, files can be restored at any time to ensure data security.
1. Win10 system comes with the [Local Backup] function. Right-click the Win icon in the lower left corner of the desktop to pop up the menu, click [Control Panel], as shown in the figure, and set the viewing mode to [Small Icon] , and then click [Storage Space]; as shown in the figure:

2. Enter the following interface, click [Create New Pool and Storage Space], browse the status of each disk of the computer, and select One as the drive used to create the storage pool, and then click [Create Pool]; as shown in the figure:

Specify the drive name and drive letter, select a layout, and finally specify the storage space Size, click [Create Storage Space], complete these operations, and wait for the automatic computer backup to complete. This process is time-consuming!
That’s it. If you don’t know, you can do it according to the content in the article.
The above is the detailed content of Win10 system backup file operation process. For more information, please follow other related articles on the PHP Chinese website!

 win10关机快捷键键盘的方法Jul 12, 2023 pm 02:09 PM
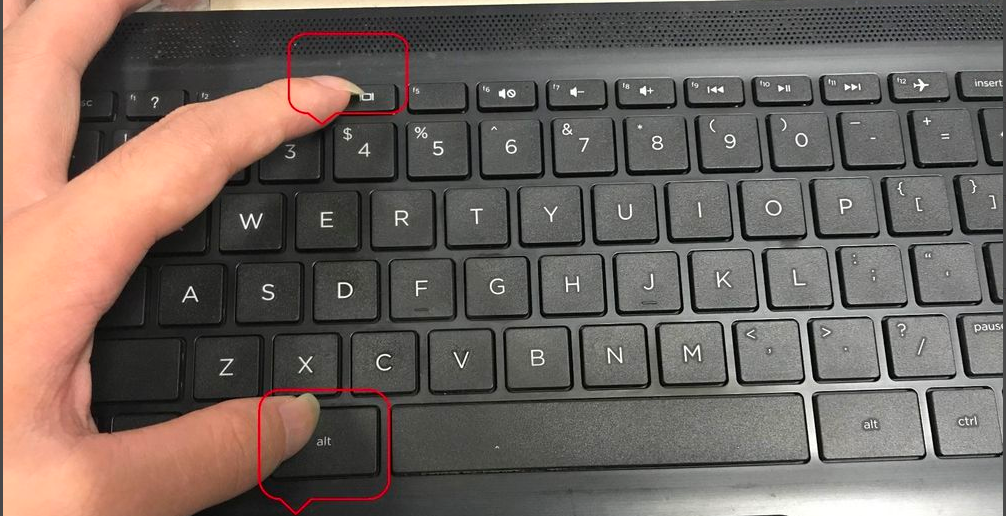
在日常工作生活中,电脑关机是常用的操作,不过很多小伙伴都不知道键盘也是可以快速关机的,那么win10关机快捷键键盘是哪个呢,接下来小编就把win10快捷键键盘关机的方法分享给大家。 win10关机快捷键键盘: 1.首先我们可以按键盘上的“alt+F4"调出关机界面。 2.然后按回车键,即可关机。 3.我们也可以长按电源键进行关机操作,不过长按电源键属于强制关机,对硬盘容易造成损害,只需按住2秒以内便可自动关机。 4.在键盘上按住”win+x"然后再按两次“u&q
 win10中提示80070035找不到网络路径怎么办May 12, 2023 pm 05:17 PM
win10中提示80070035找不到网络路径的解决办法:1、单击“网络”,“打开网络和Internet设置”,选择“网络和共享中心”后再选择“更改高级共享设置”,然后勾选“启用共享以便可以访问网络的用户读取公用文件夹中的文件”;2、返回“网络和共享中心”单击“宽带连接”并选择“属性”,点击“网络”,勾选“microsoft网络客户端”即可。
 win10自带的看图软件叫什么Oct 18, 2022 pm 02:48 PM
win10自带的看图软件叫“Microsoft照片”,其下载方法是:1、打开win10电脑;2、在Microsoft Store中搜索“Microsoft照片”并下载;3、将照片查看器的默认软件设置为【照片】即可。
 windows7禁用麦克风操作流程Jul 16, 2023 pm 09:53 PM
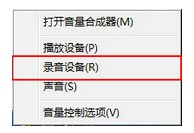
麦克风是电脑常用功能之一,有些windows7客户想要将办公电脑的声音彻底屏蔽,那么应该怎么禁用麦克风呢?操作步骤非常简单,你先点击一下声音图标,以后右键挑选录音设备,然后在开启窗口中切换到录制菜单栏,选定麦克风,右键就可禁用了,假如以后又想启用的话,同样的方式最终改为右键启用即可。windows7如何禁用麦克风:1、最先右键电脑桌面右下角的任务栏里的声音图标,在菜单中选择“录音设备”;2、然后在弹出的声音特性提示框,切换到“录制”菜单栏,然后右击选择“禁用”就可以;3、那样就可以既不影响声卡,
 win10底部任务栏无响应怎么办Mar 17, 2023 am 11:47 AM
解决方法:1、先重启“Windows资源管理器”;然后以管理员身份运行powershell,执行命令重新部署进程;最后在“个性化”设置界面中,关闭加载最常访问列表功能。2、打开powershell窗口,利用命令检查并修复Windows文件。3、打开“本地组策略编辑器”,进入“内置管理员帐户的管理员批准模式”的属性窗口;然后在“本地安全设置”选项卡中,点击“启用”;最后重启电脑。
 win10右键没有管理员权限怎么办Feb 21, 2023 pm 04:22 PM
win10右键没有管理员权限的解决办法:1、在电脑桌面右键点击“此电脑”;2、在弹出的列表中找到“管理”,点击打开;3、依次选取“系统工具”->“本地用户和组”->“用户”;4、在中间栏找到并点击打开“Administrator”;5、取消勾选“账户已禁用”,然后点击“应用”和“确定”即可。
 4g内存win10够用吗Mar 15, 2023 pm 02:28 PM
不够用。虽然4G内存足够满足Windows 10系统的安装需求,但问题是不可能只在电脑里安装一个系统,还要安装其他应用,而这些应用也会占用一定的内存空间;先不考虑CPU、硬盘和显卡等配件是否能够满足需求,只单独说内存,假设用户安装的Windows 10系统占用了2G内存,但其他的辅助插件和应用可能还会占去2G内存,一旦内存被占满,必然会导致电脑出现卡顿、运行慢的情况。
 win10本地组策略编辑器找不到怎么解决Jun 15, 2023 am 10:18 AM
win10本地组策略编辑器找不到解决步骤:1、新建文本文档;2、打开文档,输入代码“@echo off...pause”;3、输入代码后,点击“文件”,选择“另存为”选项;4、在弹窗中,将文件后缀名改成“.bat”;5、鼠标右键点击.bat文件,点击“以管理员身份运行”;6、键盘按下“Win+R”打开运行,输入“gpedit.msc”并点确认;7、成功打开本地组策略编辑器。


Hot AI Tools

Undresser.AI Undress
AI-powered app for creating realistic nude photos

AI Clothes Remover
Online AI tool for removing clothes from photos.

Undress AI Tool
Undress images for free

Clothoff.io
AI clothes remover

AI Hentai Generator
Generate AI Hentai for free.

Hot Article
Hot Tools

EditPlus Chinese cracked version
Small size, syntax highlighting, does not support code prompt function

SublimeText3 Chinese version
Chinese version, very easy to use

DVWA
Damn Vulnerable Web App (DVWA) is a PHP/MySQL web application that is very vulnerable. Its main goals are to be an aid for security professionals to test their skills and tools in a legal environment, to help web developers better understand the process of securing web applications, and to help teachers/students teach/learn in a classroom environment Web application security. The goal of DVWA is to practice some of the most common web vulnerabilities through a simple and straightforward interface, with varying degrees of difficulty. Please note that this software

PhpStorm Mac version
The latest (2018.2.1) professional PHP integrated development tool

Dreamweaver CS6
Visual web development tools

