php editor Xinyi will introduce you to the steps of setting up automatic network search in WIN10 system. In the WIN10 system, setting up automatic network search allows you to connect to available wireless networks more conveniently. It only takes a few simple steps to easily complete the setup, making your online experience more convenient. Next, let’s take a look at the specific steps!
1. Open the [Start] menu and click the [Settings] option in the list.

2. Click [Network and Internet] in the settings.

3. After opening the network and Internet interface, if you are currently using a wired network, select [Ethernet] network; if it is a wireless network, select [WiFi].

4. Click on the currently active network signal, and a [Find Devices and Content] switch will appear. If it is off, just drag the slider to turn it on.

The above is the detailed content of Steps to set up automatic network search in WIN10 system. For more information, please follow other related articles on the PHP Chinese website!
 如何在 Mac 上关闭 AirPlayApr 16, 2023 am 09:49 AM
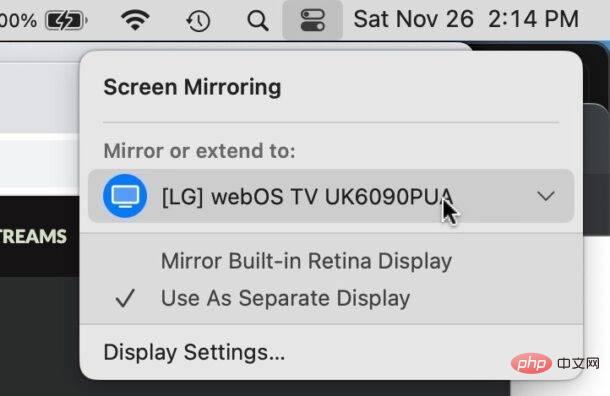
通过控制中心关闭Mac上的AirPlay您可以通过执行以下操作在MacOSVentura13或更高版本中快速关闭AirPlay:在启用了AirPlay的Mac上,通过单击两个开关外观图标转到右上角的控制中心选择“屏幕镜像”从出现的菜单中,选择Mac将AirPlay镜像到的屏幕,这将断开AirPlay并将其关闭您也可以通过这种方式打开ScreenMirroring和AirPlay,如果您首先启用它,您现在可能已经知道了。通过系统设置在Mac上断开AirPla
 win10自带的看图软件叫什么Oct 18, 2022 pm 02:48 PM
win10自带的看图软件叫“Microsoft照片”,其下载方法是:1、打开win10电脑;2、在Microsoft Store中搜索“Microsoft照片”并下载;3、将照片查看器的默认软件设置为【照片】即可。
 win10底部任务栏无响应怎么办Mar 17, 2023 am 11:47 AM
解决方法:1、先重启“Windows资源管理器”;然后以管理员身份运行powershell,执行命令重新部署进程;最后在“个性化”设置界面中,关闭加载最常访问列表功能。2、打开powershell窗口,利用命令检查并修复Windows文件。3、打开“本地组策略编辑器”,进入“内置管理员帐户的管理员批准模式”的属性窗口;然后在“本地安全设置”选项卡中,点击“启用”;最后重启电脑。
 win10右键没有管理员权限怎么办Feb 21, 2023 pm 04:22 PM
win10右键没有管理员权限的解决办法:1、在电脑桌面右键点击“此电脑”;2、在弹出的列表中找到“管理”,点击打开;3、依次选取“系统工具”->“本地用户和组”->“用户”;4、在中间栏找到并点击打开“Administrator”;5、取消勾选“账户已禁用”,然后点击“应用”和“确定”即可。
 4g内存win10够用吗Mar 15, 2023 pm 02:28 PM
不够用。虽然4G内存足够满足Windows 10系统的安装需求,但问题是不可能只在电脑里安装一个系统,还要安装其他应用,而这些应用也会占用一定的内存空间;先不考虑CPU、硬盘和显卡等配件是否能够满足需求,只单独说内存,假设用户安装的Windows 10系统占用了2G内存,但其他的辅助插件和应用可能还会占去2G内存,一旦内存被占满,必然会导致电脑出现卡顿、运行慢的情况。
 win10没有wlan只有以太网怎么办Mar 02, 2023 pm 04:27 PM
win10没有wlan只有以太网的解决办法:1、重启电脑,进入BIOS设置界面;2、进入“Advanced”高级界面;3、进入“Advanced Mode”;4、进入网络堆栈;5、将“Disabled”改成“Enabled”即可。
 win10自带录屏只能录游戏吗Mar 15, 2023 pm 05:55 PM
不是,也可以录制其他应用内容,但需要设置。win10自带录屏全称是XBox Game Bar,本来就是为录制Xbox上的游戏而生的,默认在玩游戏时电脑处于游戏模式下才能用。设置方法:1、打开开始菜单,找到“Xbox控制台小帮手”;2、在打开界面中,点击左侧第二个图标选项;3、点击“从我的电脑添加游戏”,选择要录制的应用,添加进去即可(录制桌面、文件夹要添加“文件资源管理器”)。
 win10中cad卸载不干净无法重装怎么办Jan 18, 2021 pm 02:34 PM
解决方法:1、卸载AutoCAD,并重启电脑;2、在c盘中删除关于Autodesk的全部文件;3、打开注册表,删除关于Autodesk的信息;4、在“运行”窗口中执行“%temp%”命令打开“time”文件夹,删除其中所有文件即可。


Hot AI Tools

Undresser.AI Undress
AI-powered app for creating realistic nude photos

AI Clothes Remover
Online AI tool for removing clothes from photos.

Undress AI Tool
Undress images for free

Clothoff.io
AI clothes remover

AI Hentai Generator
Generate AI Hentai for free.

Hot Article

Hot Tools

Safe Exam Browser
Safe Exam Browser is a secure browser environment for taking online exams securely. This software turns any computer into a secure workstation. It controls access to any utility and prevents students from using unauthorized resources.

Notepad++7.3.1
Easy-to-use and free code editor

MantisBT
Mantis is an easy-to-deploy web-based defect tracking tool designed to aid in product defect tracking. It requires PHP, MySQL and a web server. Check out our demo and hosting services.

Dreamweaver CS6
Visual web development tools

ZendStudio 13.5.1 Mac
Powerful PHP integrated development environment


