 Software Tutorial
 Office Software
 How to add a wavy border to text in wps2019_Detailed steps to add a wavy border to text in wps2019
php editor Youzi teaches you how to add a wavy border to WPS2019 text. This special effect can add a unique style to your document. Next, we will introduce in detail the steps to add a wavy line border, allowing you to easily personalize your document.
1. Select the required text in the text document.

2. Click the inverted triangle next to the [Border] tool in the [Start] tool list.

3. Click the [Border and Shading] option in the pop-up menu list.

4. Click the [Border] option in the [Border and Shading] window.

5. Select the [Box] on the left and select the wavy line in [Line Style].

6. Set the color of the wavy line in [Color] below.

7. The final result is as shown in the figure.

The above is the detailed content of How to add a wavy border to text in wps2019_Detailed steps to add a wavy border to text in wps2019. For more information, please follow other related articles on the PHP Chinese website!
 WPS2019工具栏看不到的处理方法Mar 27, 2024 pm 02:20 PM
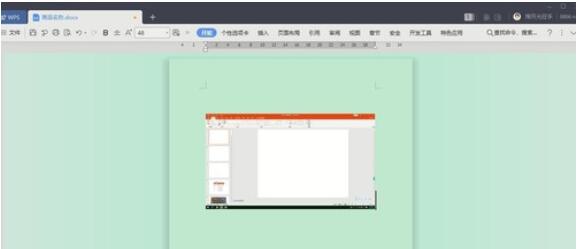
1、如下图,我们打开一个WPS文字软件后,看不到需要的工具栏或功能区,这是因为我们将其隐藏了。2、解决办法1:我们先点击菜单栏右上角的显示/隐藏功能区按钮,即可隐藏或显示功能区。3、点击该按钮即可显示功能区。4、方法2:当功能区被隐藏时,我们可以将鼠标放在功能区的名字,如开始、插入上方,即可显示被隐藏的功能区。5、但如果我们将鼠标移至编辑区域又长时间未动鼠标的话,如下图所示,功能区又会自动隐藏,这是因为我们开启了自动隐藏/显示功能。6、此时我们需要先点击右上角的界面设置按钮。7、然后点击下拉菜单
 wps2019怎么制作一款简洁名片_wps2019制作一款简洁名片的方法Mar 28, 2024 am 09:36 AM
1、打开wps2019,然后输入要编辑的名片信息。2、然后点击wps2019菜单栏中的【页面布局】的菜单项。3、接下来在打开的页面布局的工具栏上找到【页面设置】的展开按钮。4、这时就会弹出页面设置的窗口,在窗口中把页边距全部设为05、接下来在打开的页面设置窗口中点击【纸张】的选项卡。6、然后点击纸张大小下拉按钮,在弹出菜单中选择【自定义大小】的菜单项就可以了。7、接下来我们把宽度设置为9厘米,高度设置为5.4厘米,最后点击确定按钮。8、到这里名片就已设置好了。只要打印出来就可以了。
 wps2019文件怎样插入约等于特殊符号_插入约等于特殊符号的操作方法Mar 27, 2024 am 11:26 AM
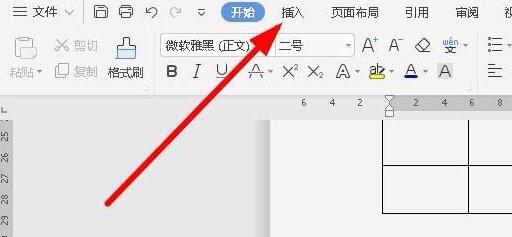
1、在打开的wps2019软件主界面,点击菜单栏中的【插入】菜单。2、在打开的插入工具栏上,找到【符号】的图标。3、在弹出的符号下拉菜单中,点击【其它符号】菜单项。4、这时就会弹出wps2019的符号窗口,在窗口中点击【数学运算符】菜单项。5、在打开的数学运算符窗口中,点击【约等于】按钮,最后点击确定按钮。6、这时就可以在wps2019的编辑区域看到插入的约等于符号了。
 wps2019图片添加边框的详细步骤Mar 27, 2024 pm 04:01 PM
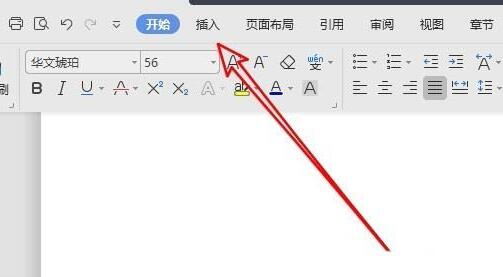
1、打开wps2019,点击wps2019主界面上的【插入】菜单项。2、在打开的插入工具栏上点击【图片】的下拉按钮,再在弹出菜单中选择要插入的图片。3、返回到wps2019文档编辑区域,可以看到并选中已插入的图片。4、这时点击wps2019菜单栏上的【图片工具】的菜单项。5、在打开的图片工具的工具栏上点击【图片轮廓】的按钮。6、返回到wps2019的编辑区域,可以看到已为图片添加好轮廓了。
 wps2019禁止自动升级的简单教程Mar 28, 2024 am 08:11 AM
1、在打开wps2019,点击左上角的【wps】菜单。2、在新打开的页面中,找到并点击右上角的【设置】按钮。3、在打开的设置下拉菜单中,点击【配置和修复工具】菜单项。4、这时就会打开wpsOffice配置工具窗口,在窗口中点击【高级】按钮。5、在打开的wpsOffice配置工具窗口中,点击【升级设置】选项。6、在打开的升级设置窗口中,点击【关闭自动升级】选项即可。
 WPS2019并排比较并实现同步滑动的操作过程Mar 27, 2024 pm 07:31 PM
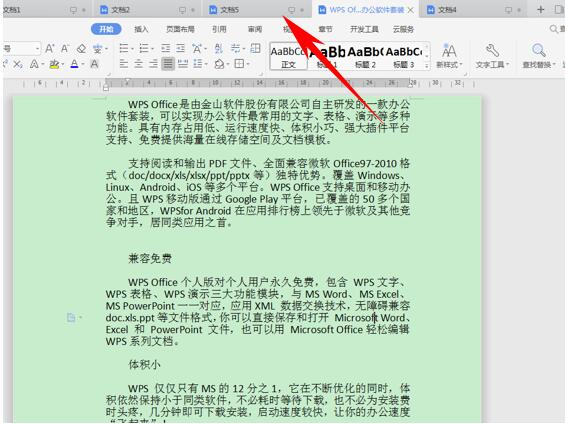
1、首先,我们看到如下文档,最上方显示着我们打开的所有文档,他们都是并列显示在窗体当中的。2、这时候,我们单击工具栏视图下的并排比较选项。3、弹出并排窗口的对话框,选择当前窗口将要与哪一个文档进行比较,在这里我们选择文档4,单击确定。4、这样我们看到两个文档就已经显示在一个窗口当中了,但还有一个问题,就是我们只能滑动一个窗当中的界面,这该怎么办呢?。5、如果想要实现同步滑动,单击并排比较旁边的同步滑动选项,单击就可以在拉动鼠标到时候,使两个文档的文字同时滑动。
 wps2019表格设置顶端标题行的操作流程Mar 28, 2024 am 10:46 AM
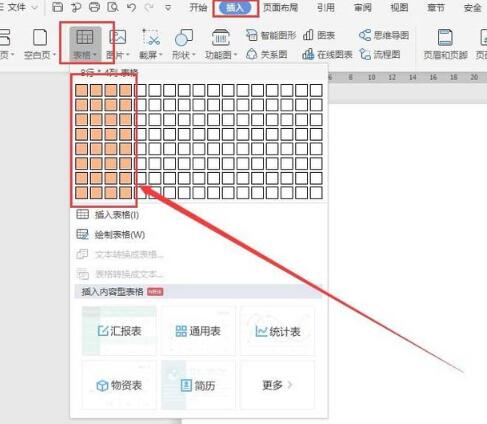
1、打开wps2019,新建一个空白文档,选择菜单栏【插入】按钮,然后点击【表格】,插入一个8*4的表格(如下图)。2、在表格第一行中输入一些文字,并进行字体、字号大小的设置。3、然后进行表格内容的输入,并对表格进行美观处理,此时,表格显示2页纸的内容,第一页有标题,第二页就直接显示数据了。4、首先选中第一页第一行,右击,在弹出的选项中,选择【表格属性】(如下图)。5、在弹出的对话框中,选择【行】,然后将选项【在各页顶端以标题形式重复出现】打勾,点击【确定】。6、此时,文档里,第二页就显示标题了
 wps2019文章分三栏显示的操作教程Mar 28, 2024 pm 01:51 PM
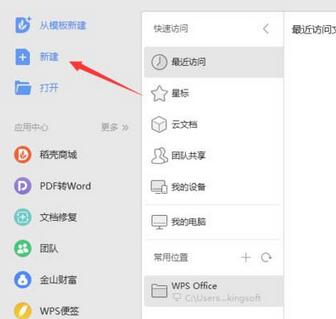
1、打开wps2019,然点击新建。2、选择文字,点击新建空白文档。3、输入内容4、点击工具栏上的页面布局。5、选择分栏。6、在分栏下可以看到一栏二栏和三栏,我们点击三栏就可以了。


Hot AI Tools

Undresser.AI Undress
AI-powered app for creating realistic nude photos

AI Clothes Remover
Online AI tool for removing clothes from photos.

Undress AI Tool
Undress images for free

Clothoff.io
AI clothes remover

AI Hentai Generator
Generate AI Hentai for free.

Hot Article

Hot Tools

Notepad++7.3.1
Easy-to-use and free code editor

PhpStorm Mac version
The latest (2018.2.1) professional PHP integrated development tool

SublimeText3 Mac version
God-level code editing software (SublimeText3)

EditPlus Chinese cracked version
Small size, syntax highlighting, does not support code prompt function

mPDF
mPDF is a PHP library that can generate PDF files from UTF-8 encoded HTML. The original author, Ian Back, wrote mPDF to output PDF files "on the fly" from his website and handle different languages. It is slower than original scripts like HTML2FPDF and produces larger files when using Unicode fonts, but supports CSS styles etc. and has a lot of enhancements. Supports almost all languages, including RTL (Arabic and Hebrew) and CJK (Chinese, Japanese and Korean). Supports nested block-level elements (such as P, DIV),


