 System Tutorial
 Windows Series
 Operation process for setting time synchronization interval in WIN10 system
php editor Youzi today will share with you the operation process of setting the time synchronization interval in WIN10 system. In the WIN10 system, correctly setting the time synchronization interval can ensure the accuracy of the system time and avoid various problems caused by time errors. Next, we will introduce in detail how to set the time synchronization interval in the WIN10 system to keep your system time accurate.
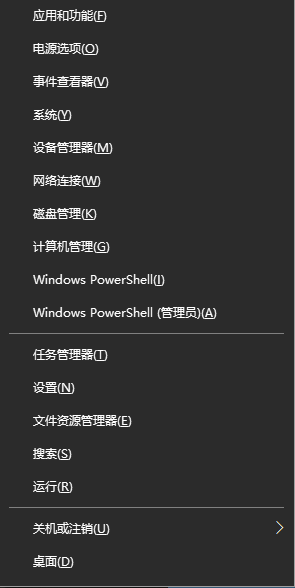
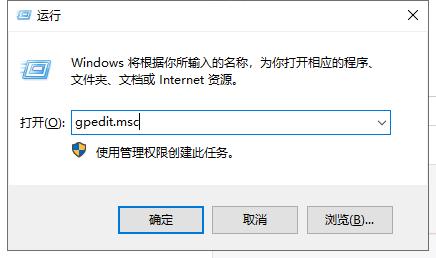
1. Use the Win R shortcut key to open "Run" and execute the regedit command to open the registry editor.

2. Navigate to the following path: HKEY_LOCAL_MACHINESYSTEMControlSet001servicesW32TimeTimeProvidersNtpClient.

3. Double-click the DWORD (32-bit) value named SpecialPollInterval on the right, change the base from "Hex" to "Decimal" to see the default synchronization time is 604800 seconds.

4. You can extend or shorten this value as needed. After "OK", the Win10 time synchronization interval will be changed.
The above is the detailed content of Operation process for setting time synchronization interval in WIN10 system. For more information, please follow other related articles on the PHP Chinese website!
 电脑鼠标左键失灵该如何解决Jan 29, 2024 pm 04:39 PM
电脑鼠标左键点击没反应是怎么回事呢?很多小伙伴在使用电脑的时候,有一个问题是关于鼠标的问题的。使用左键没反应,但是点击右键是可以操作的。那么遇到这种情况我们要怎么去解决呢?下面为大家带来详细的解决方法介绍,快一起来看看吧!电脑鼠标左键点击没反应怎么办软件问题1、检查更新鼠标驱动。同时按下win+x打开电脑系统的管理界面,键盘上下键选择其中的设备管理器打开。2、使用键盘上的方向键选中鼠标和其他指针设备,这时候按下方向键的向右箭头,可以打开下拉,下拉里面就是正在使用的鼠标。3、选中按下回车打开该鼠标
 win10系统如何设置管理员权限Jan 11, 2024 pm 09:00 PM
近来有不少网友询问win10系统怎么设置以管理员身份运行。大家都知道,超级管理员权限具有最高权限,如果我们没有开启管理员权限就会处处碰壁。接下来,我就给大家分享一下win10管理员权限的设置方法。跟多win10教程,尽在小白系统官网。win10系统是微软2015年发布的一款可以跨平台和设备的操作系统,随着win10系统的完善,很多小伙伴都将升级了win10系统,但是有些新手朋友对于win10系统设置管理员权限不怎么了解。下面,我们就来瞧瞧设置方法win10系统管理员权限设置的详细步骤1、win+
 如何将win10系统音量显示设置为垂直条Jan 29, 2024 pm 03:33 PM
win10系统如何设置音量显示条为竖条Win10系统默认的音量显示条是水平的,但是有些用户可能更喜欢将其设置为竖条,本文将介绍如何在Win10系统中设置音量显示条为竖条的方法。一、使用系统设置1.首先,点击任务栏右下角的音量图标,打开音量控制面板。2.在音量控制面板中,点击右下角的“音量选项”按钮,弹出更多选项。3.在弹出的选项中,找到“垂直音量控制”选项,并勾选上。4.点击“应用”按钮,保存设置。二、使用第三方软件如果系统自带的设置无法满足你的需求,你还可以使用第三方软件来实现音量显示条的竖条
 linux同步时间命令有哪些Jul 14, 2021 am 11:08 AM
linux同步时间命令:1、hwclock命令,可以让系统时间和硬件时间的同步,例“hwclock -w”或“hwclock -s”;2、ntpdate命令,可以让不同机器间同步时间。
 探索3.7GB大小的达人改造微软Win10系统,带给您完整的WinXP使用体验Dec 27, 2023 pm 05:15 PM
WinXP系统虽然早已停止支持,但在全球范围内依然有不少拥趸,近日推出了WindowsEXPERIENCEFreestyleUpdate更新,大小为3.7GB,基于Win10系统改造,让你重新体验WinXP系统。WindowsEXPERIENCEFreestyleUpdate系统并不是什么早期验证版本,而是一个功能完善、基于Win10系统的改造镜像,经过了长期的测试和优化,整个WinXP体验是比较完整的。虽然该镜像经过了多次的打磨,但是依然存在一些问题,IT之家汇总如下:主题从Luna更改为其它
 华为笔记本win11如何降级为win10系统?华为笔记本win11回退到win10的步骤Jan 30, 2024 am 08:33 AM
华为笔记本win11怎么回退到win10系统?不少的用户们在购买完华为笔记本后用不习惯win11系统就想着能不能更改为win10系统,其实是可以的,下面就让本站来为用户们来仔细的介绍一下华为笔记本win11改win10方法教程吧。华为笔记本win11改win10方法教程创建Windows10安装媒体的步骤如下:首先,你需要准备一个可引导的Windows10安装媒体。可以使用官方的Windows10安装媒体创建工具,也可以下载Windows10ISO镜像文件并制作USB安装盘。2、进入BIOS设置
 如何强制卸载Edge浏览器?Jan 29, 2024 pm 08:12 PM
edge浏览器怎么强制卸载?edge浏览器一般是Windows系统的默认浏览器软件,我们在上网的过程中,也会优先打开edge浏览器。但是有些小伙伴不喜欢使用edge浏览器,想要切换浏览器,却发现每次打开网页的首选浏览器都是edge浏览器,所以想将其强制性卸载掉,下面就由小编为大家带来edge浏览器强制卸载教程一览。edge浏览器怎么强制卸载1、右击左下角开始,点击“windowspowershell(管理员)”打开。2、进入命令界面,输入代码get-appxpackage*edge*,查找edg
 Win11系统时间不同步如何解决Jun 29, 2023 pm 03:46 PM
Win11系统时间不同步如何解决?使用win11系统的时候,发现电脑右下角的时间和真实时间不一致,这样他平时使用win11的时候就很不方便,希望可以让电脑自动校正时间,但是他们不知道应该如何操作,如果你不知道如何解决这个情况,小编下面整理了Win11系统时间不同步解决办法,感兴趣的话,跟着小编一起往下看看吧!Win11系统时间不同步解决办法1、首先点击Win11的开始菜单,默认位置是在任务栏中间位置。在开始菜单打开后,选择设置(形状像一个齿轮状的图标),如图所示;2、在进入Settings(设置


Hot AI Tools

Undresser.AI Undress
AI-powered app for creating realistic nude photos

AI Clothes Remover
Online AI tool for removing clothes from photos.

Undress AI Tool
Undress images for free

Clothoff.io
AI clothes remover

AI Hentai Generator
Generate AI Hentai for free.

Hot Article

Hot Tools

SublimeText3 Chinese version
Chinese version, very easy to use

mPDF
mPDF is a PHP library that can generate PDF files from UTF-8 encoded HTML. The original author, Ian Back, wrote mPDF to output PDF files "on the fly" from his website and handle different languages. It is slower than original scripts like HTML2FPDF and produces larger files when using Unicode fonts, but supports CSS styles etc. and has a lot of enhancements. Supports almost all languages, including RTL (Arabic and Hebrew) and CJK (Chinese, Japanese and Korean). Supports nested block-level elements (such as P, DIV),

Notepad++7.3.1
Easy-to-use and free code editor

DVWA
Damn Vulnerable Web App (DVWA) is a PHP/MySQL web application that is very vulnerable. Its main goals are to be an aid for security professionals to test their skills and tools in a legal environment, to help web developers better understand the process of securing web applications, and to help teachers/students teach/learn in a classroom environment Web application security. The goal of DVWA is to practice some of the most common web vulnerabilities through a simple and straightforward interface, with varying degrees of difficulty. Please note that this software

SecLists
SecLists is the ultimate security tester's companion. It is a collection of various types of lists that are frequently used during security assessments, all in one place. SecLists helps make security testing more efficient and productive by conveniently providing all the lists a security tester might need. List types include usernames, passwords, URLs, fuzzing payloads, sensitive data patterns, web shells, and more. The tester can simply pull this repository onto a new test machine and he will have access to every type of list he needs.


