Home >Software Tutorial >Office Software >Graphical tutorial on inserting pictures into elliptical annotations in PPT documents
Graphical tutorial on inserting pictures into elliptical annotations in PPT documents
- WBOYWBOYWBOYWBOYWBOYWBOYWBOYWBOYWBOYWBOYWBOYWBOYWBforward
- 2024-03-26 19:50:261131browse
php editor Zimo brings you a graphic tutorial on inserting pictures into oval annotations in PPT documents. When making PPT, how to label pictures skillfully is an important skill. Through oval annotation, you can highlight the key points of the picture and make the content more vivid. This tutorial will introduce in detail how to use oval annotations to insert pictures in PPT documents to make your PPT works more eye-catching.
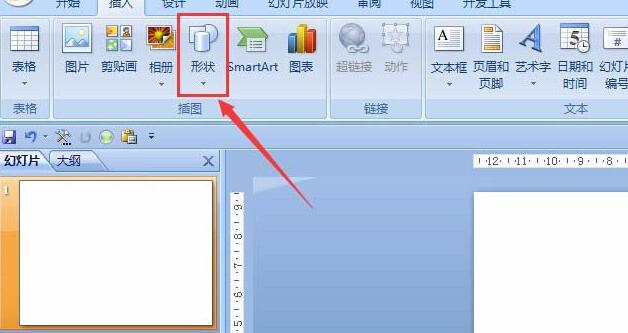
1. Open PPT and select [Shape] in the [Illustration] palette of the Insert menu.
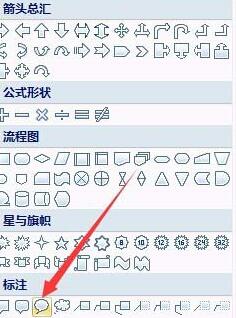
2. Find the oval annotation shape in the shape panel that appears.
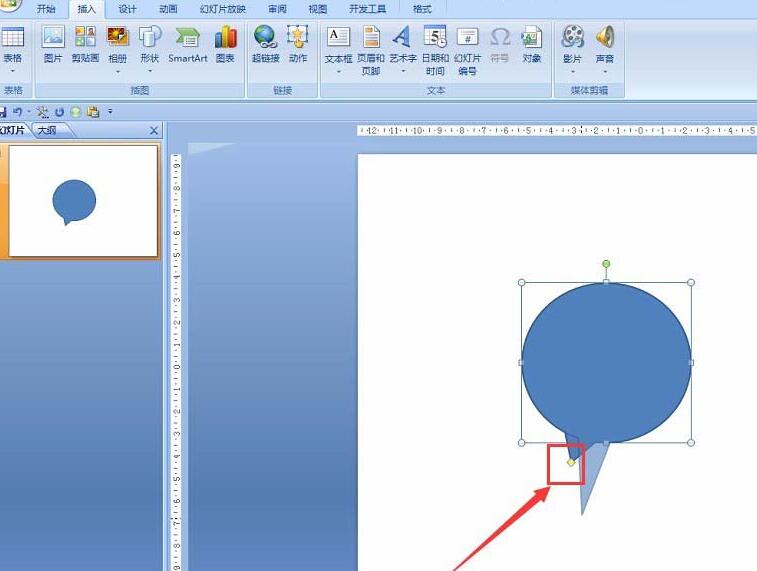
3. Drag the mouse in the blank area, select the yellow part and stretch it as shown in the picture.
4. Right-click on the shape and select [Format Shape],
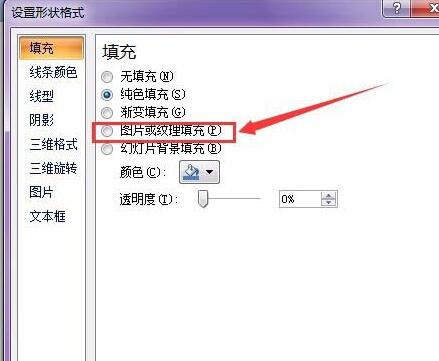
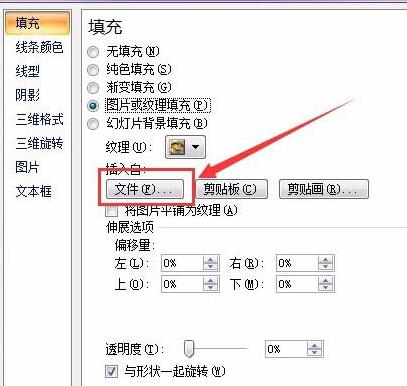
5. Select [Picture and Texture Fill] in the open panel, such as Selected by the red line.
6. Click the [File] button as shown in the figure, then click and select the picture you want to insert in the dialog box that opens.
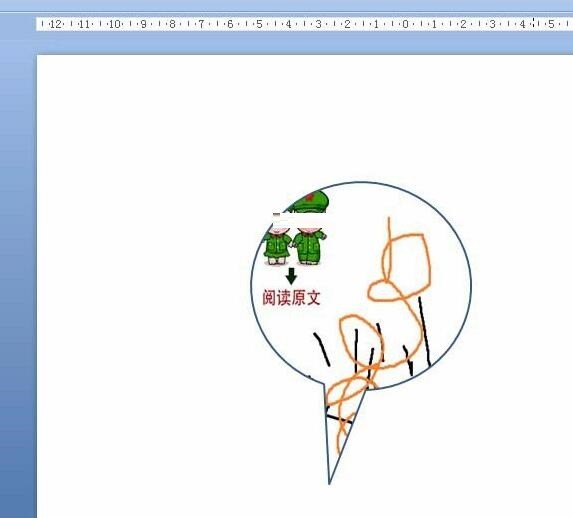
7. The final effect is as shown in the picture. The operation method for other shapes is similar. The demo pictures here are just randomly selected. You can choose the appropriate picture according to your needs.
The above is the detailed content of Graphical tutorial on inserting pictures into elliptical annotations in PPT documents. For more information, please follow other related articles on the PHP Chinese website!

