Home >Mobile Tutorial >Android Phone >Opporeno3pro operation tutorial for using cloud backup
Opporeno3pro operation tutorial for using cloud backup
- WBOYWBOYWBOYWBOYWBOYWBOYWBOYWBOYWBOYWBOYWBOYWBOYWBforward
- 2024-03-26 13:16:05756browse
php editor Xigua brings you a tutorial on using cloud backup for OPPO Reno3 Pro. Cloud backup is a convenient and fast way to back up your data, protecting your important information from the risk of loss or damage. In this tutorial, we will introduce in detail how to set up cloud backup on the OPPO Reno3 Pro mobile phone, allowing you to easily back up important data and ensure data security. Let’s find out next!
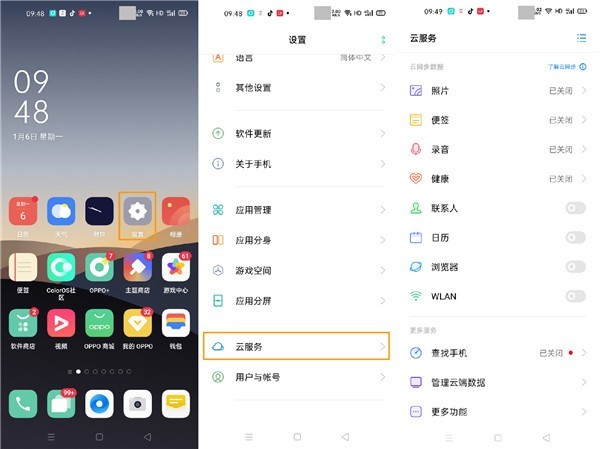
1. Enter through [Settings] - [Cloud Service] on the desktop. You can see that photos, notes, recordings, health, contacts, calendars, browsers, WLAN and other contents can be backed up. Just open the corresponding Just click the setting switch.

2. After cloud backup is turned on, when the phone is powered on and connected to WLAN, your application list and desktop layout, text messages, call records, and system settings will be automatically backed up to the cloud. The automatic backup frequency is once a day. You can also click [Manual Backup] to back up your data at any time. Friends who need it can make relevant settings and use it according to their personal needs.
3. Through [Manage Cloud Data], you can see how much space is used by various data items in the cloud space usage.
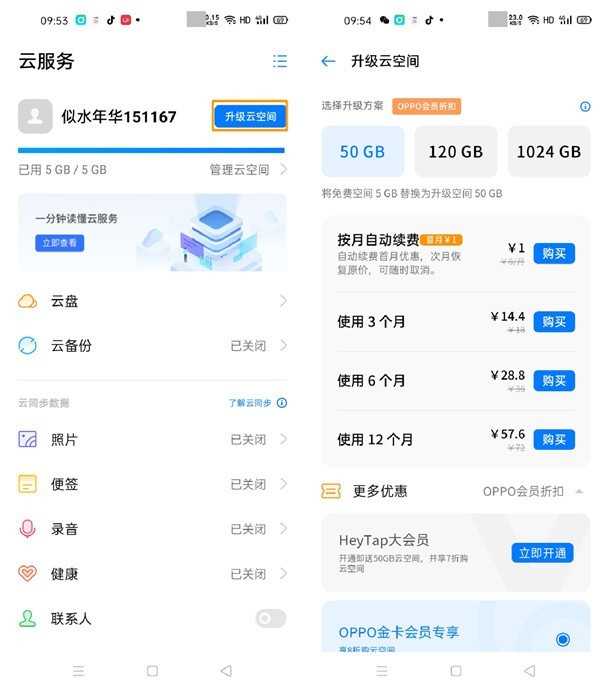
4. It comes with 5G free space. If you feel that the space is not enough, you can enter [Upgrade Cloud Space] and make relevant purchases according to your needs. (Cloud space can be used together with family members, and sharing is only space sharing. Data between family members will not be read from each other; the size of the cloud space purchased by the sharer is the space size shared by the family, and the size cannot be set.)

The above is the detailed content of Opporeno3pro operation tutorial for using cloud backup. For more information, please follow other related articles on the PHP Chinese website!

