 Computer Tutorials
 System Installation
 BIOS settings for U disk boot: Detailed explanation of how to enter the BIOS and set the U disk as the first boot item
php editor Xiaoxin explains in detail how to set up the BIOS for USB boot. When the computer starts, BIOS is a key component. By entering the BIOS setting interface, various hardware parameters can be adjusted, including the order of startup items. In this article, we will introduce how to enter the BIOS interface and set the USB flash drive as the first boot item so that you can start the computer through the USB flash drive and perform system maintenance or install the operating system. Let’s take a look at the specific steps next!

Tool materials:
System version: Windows 10 20H2
Brand model: Lenovo Xiaoxin Pro 13 2021 model
Software version: None
1. Prepare a bootable U disk
1. First, you need to prepare a U disk that has been made into a bootable disk. It can be made using micro PE, Laomaotao and other tools. For specific methods, please refer to relevant tutorials.
2. Insert the prepared bootable USB disk into the USB interface of the computer.
2. Enter the BIOS setting interface
1. Restart the computer. When the brand logo screen appears, press the F2 key continuously (some brand computers may have other keys such as F1, F10, Del, etc.) You can check the prompt information at the bottom of the startup screen) until you enter the BIOS setup interface.
2. If you miss the timing of pressing the key, the computer will enter the system. At this time, you need to restart the computer and try again.
3. Set the U disk as the first boot item
1. After entering the BIOS setting interface, use the left and right arrow keys on the keyboard to move the cursor to the "Boot" tab superior.
2. Under the "Boot" tab, you will see the priority list of boot devices. Find your U disk device, which usually starts with "USB", "Removable", etc.
3. Move the U disk device to the first place in the boot sequence. The operation method varies depending on the BIOS version. Usually, you use the " " or "-" key to change the priority of the device, or press the Enter key to enter the submenu and select "Move First".
4. After the adjustment is completed, press the F10 key to save the settings and exit the BIOS. The computer will automatically restart, and if everything is normal, it will boot from the USB flash drive into the PE system.
Content extension:
1. The hotkeys to enter the BIOS may be different for different brands and models of computers, but there are usually prompts on the startup screen. If you are not sure, you can try a few more common hotkeys when booting, such as F1, F2, F10, F12, Del, etc.
2. If you cannot find the U disk boot item in the BIOS, you can try to insert the U disk into the USB interface on the back panel of the motherboard to avoid using the USB interface on the front panel of the chassis.
3. Some BIOS may have "Quick Start", "Safe Start" and other options, which may affect U disk startup. If you encounter problems booting from a USB flash drive, you can try turning off these options.
Summary:
Through the introduction of this article, I believe you have mastered how to enter the BIOS and set the U disk as the first boot item. This is a very practical skill that may be used in system maintenance, reinstallation and other scenarios. Of course, different brands and models of computers may have slightly different BIOS interfaces and operating methods, but the basic principles are the same. If you encounter problems, don't be afraid. Try a few more times and I believe you will succeed.
The above is the detailed content of BIOS settings for U disk boot: Detailed explanation of how to enter the BIOS and set the U disk as the first boot item. For more information, please follow other related articles on the PHP Chinese website!
 华为P30反复重启的原因(揭秘华为P30重启问题背后的根源)Feb 02, 2024 pm 09:45 PM
华为P30智能手机反复重启的问题日益普遍,随着智能手机的普及和应用的增加,这个问题变得越来越常见。本文将探讨造成这个问题的主要原因,并提出相应的解决方案。硬件故障——电池老化电池的老化问题可能会导致华为P30反复重启、当手机使用一段时间后。电池内部电阻增加,电池容量减少,都可能导致电池的供电不稳定、从而导致手机反复重启。系统软件问题——系统崩溃华为P30系统软件出现问题也是导致手机反复重启的常见原因。系统可能会崩溃或出现意外错误,从而引发手机的自动重启,在一些极端情况下。第三方应用冲突——不兼容
 华硕机箱风扇设置转速?Feb 02, 2024 pm 01:21 PM
华硕机箱风扇设置转速?调风扇的转速方法如下:开机,然后不停的按右边小键盘上的Del键,系统会进入BIOS设置里,然后按上下方向键选择PCHealthStatus,其中CPUSmartFanControl就是风扇调速,选择enabled就是开启调速功能。设定CPUTargetTemp=50度,CPUToleranceTemp=5度,CPUFanStopPWM(%)=30%;保存设定后重启电脑再次进入BIOS中,查看“PCHealthStatus”。仔细观察风扇值,明显看观察家CPU智能风扇功能已经
 win11电脑屏幕黑屏但鼠标仍可移动的原因和解决方法Jan 30, 2024 am 09:06 AM
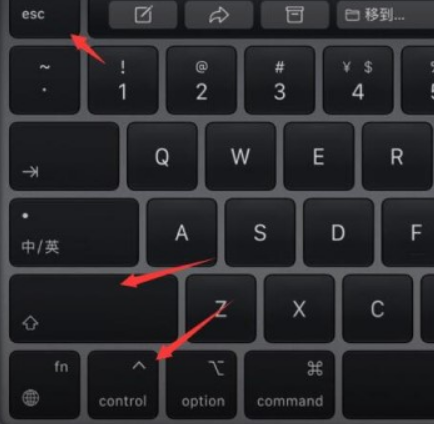
我们在使用win11系统的时候会遇到电脑开机的时候只有鼠标能动,电脑是黑屏的状态,那么win11电脑屏幕黑屏但鼠标能动是怎么回事?详情用户们可以使用ctrl+alt+del快捷键打开任务管理器来进行设置,如果还不行的话可以直接的重装系统,下面就让本站来为用户们来仔细的介绍一下win11电脑屏幕黑屏但鼠标能动的解决方法吧。win11电脑屏幕黑屏但鼠标能动的解决方法解决方法一:1、使用ctrl+alt+del组合快捷键,点击打开任务管理器。4、找到卸载程序,点击查看已安装的更新。解决方法二:1、如果
 win11系统磁盘占用100%怎么办Feb 04, 2024 pm 01:05 PM
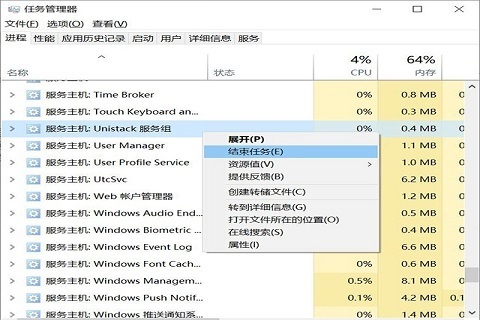
用户可以在任务管理器中可以看见各种应用程序的运行状态以及电脑磁盘的占用情况等,那么遇到win11系统磁盘占用100%怎么办呢?下面小编就给大家详细介绍一下win11系统磁盘占用100%解决办法,有需要的小伙伴可以来看一下。win11系统磁盘占用100%的解决方法:方法一:1、按下组合快捷键"Ctrl+Alt+Del",在给出的页面中点击"任务管理器"。2、在新界面中,找到"进程"选项卡下方的"服务主机:unistack服务组"
 win11关机后自动重启怎么办Jul 01, 2023 pm 04:41 PM
win11关机后自动重启怎么办?最近小编的windows11电脑每次在关机之后,除非把电源直接关了,不然电脑总是自己就进行重启了。这到底是是什么原因,又应该如何解决呢?小编在网上查找了许多教程,终于顺利解决。很多小伙伴不知道怎么详细操作,小编下面整理了win11自动重启频繁解决指南,如果你感兴趣的话,跟着小编一起往下看看吧!win11自动重启频繁解决指南具体步骤如下:1、首先,右键“此电脑”并打开“属性”2、接着打开其中的“高级系统设置”3、然后打开下方启动和故障恢复的“设置”4、随后将“自动重
 如何恢复出厂设置OPPO手机(简单操作,快速回到初始状态)Feb 03, 2024 am 08:48 AM
有时我们可能需要恢复手机的出厂设置来解决系统问题或清理个人数据。在使用OPPO手机时,我们可以轻松完成这个操作。下面将详细介绍如何恢复出厂设置OPPO手机。1.准备工作2.了解出厂设置的含义3.备份重要数据4.进入设置界面5.寻找并选择“备份与重置”选项6.选择“恢复出厂设置”7.确认操作8.输入解锁密码或账户密码9.阅读警告提示10.选择要保留的数据11.开始恢复出厂设置12.等待恢复完成13.设置初始配置14.登录OPPO账号15.恢复个人数据1.准备工作:以便在需要时连接到电脑,并准备好U
 如何使用Docker进行容器的故障恢复和自动重启Nov 07, 2023 pm 04:28 PM
Docker作为一种基于容器技术的轻量级虚拟化平台,已经被广泛应用于各种场景中。在生产环境中,容器的高可用性和故障自动恢复是至关重要的。本文将介绍如何使用Docker进行容器的故障恢复和自动重启,包括具体的代码示例。一、容器自动重启的配置在Docker中,通过在运行容器时使用--restart选项可以启用容器的自动重启功能。常见的选项有:no:不自动重启。默
 bios英文怎么变中文?Jan 30, 2024 pm 12:03 PM
bios英文怎么变中文?如果你的计算机的BIOS是英文的,你可以尝试以下方法将其变为中文:1.进入BIOS界面。开机时按下Del、F1、F2、F10或其他键(具体键位取决于计算机品牌和型号),进入BIOS界面。2.找到语言选项。在BIOS界面中,找到语言选项,通常在“Advanced”或“Setup”选项中。3.选择中文语言。在语言选项中,找到中文语言选项并选择。如果没有中文选项,可以尝试选择其他语言选项,例如日语或韩语,这些语言选项可能会有中文翻译。4.保存设置并退出。选择中文语言后,按照界面


Hot AI Tools

Undresser.AI Undress
AI-powered app for creating realistic nude photos

AI Clothes Remover
Online AI tool for removing clothes from photos.

Undress AI Tool
Undress images for free

Clothoff.io
AI clothes remover

AI Hentai Generator
Generate AI Hentai for free.

Hot Article

Hot Tools

EditPlus Chinese cracked version
Small size, syntax highlighting, does not support code prompt function

MinGW - Minimalist GNU for Windows
This project is in the process of being migrated to osdn.net/projects/mingw, you can continue to follow us there. MinGW: A native Windows port of the GNU Compiler Collection (GCC), freely distributable import libraries and header files for building native Windows applications; includes extensions to the MSVC runtime to support C99 functionality. All MinGW software can run on 64-bit Windows platforms.

SublimeText3 Chinese version
Chinese version, very easy to use

PhpStorm Mac version
The latest (2018.2.1) professional PHP integrated development tool

SublimeText3 Linux new version
SublimeText3 Linux latest version


