 Computer Tutorials
 System Installation
 [U disk boot disk creation tool: Easily create system installation disk]
php editor Yuzai introduces to you: [U disk boot disk production tool: easily create system installation disk]. Making a USB bootable disk allows you to easily install or repair the operating system and improve the security and stability of the system. This article will introduce you how to make a USB boot disk, allowing you to easily create your own system installation disk and achieve rapid system installation and maintenance.
![[U disk boot disk creation tool: Easily create system installation disk]](https://img.php.cn/upload/article/000/887/227/171110043160488.jpg?x-oss-process=image/resize,p_40)
Tool materials:
System version: Windows 11 21H2
Brand model: Lenovo Xiaoxin Pro 16 2022
Software version: Micro PE toolbox v2.1
1. Preparation work
1. Prepare a U disk with a capacity of not less than 8GB. It is recommended to use USB 3.0 and above interfaces for data transmission speed. Faster.
2. Download the micro PE toolbox and Windows system image file. The micro PE toolbox is a PE system that integrates a variety of practical tools and can be used to create a USB boot disk. Windows system image files can be downloaded from Microsoft's official website or obtained from reliable third-party websites.
2. Make a U disk boot disk
1. Insert the U disk into the computer and back up the important data in the U disk, because making a boot disk will format the U disk.
2. Unzip the micro PE toolbox, right-click and run "micro PE toolbox.exe" as an administrator.
3. Select "USB Startup Disk Creation" on the main interface, insert the U disk, select the U disk letter, and click "Start Creation".
4. After the production is completed, copy the previously downloaded Windows system image file to the root directory of the USB flash drive.
3. Use the U disk boot disk to install the system
1. Insert the prepared U disk boot disk into the computer where the system needs to be installed. Press F12 continuously when booting (different computers may have different shortcut keys) ) to enter the startup item selection interface.
2. Select the U disk to boot and enter the main interface of the micro PE system.
3. Select "One-click installation", select the system version to be installed according to the prompts, adjust the partition size, and start installing the system.
4. After the installation is completed, follow the prompts to set the user name, password and other information to enter the new Windows system.
Content extension:
1. In addition to making a USB boot disk, the micro PE toolbox also integrates a large number of system maintenance tools, such as partition assistant, data recovery, etc., which can help us solve Many system issues.
2. Before installing the system, it is recommended to check the hardware compatibility first. Especially for older computers, there may be driver incompatibility issues.
3. Regularly creating system restore points and backing up important data can minimize the losses caused by system crashes.
Summary:
U disk boot disk is a powerful assistant for computer system maintenance. Using the micro PE toolbox, you can easily create a U disk boot disk. No professional knowledge is required, and even computer novices can get started quickly. . Mastering how to make and use a USB boot disk can help us deal with various system failures and keep the computer in optimal condition.
The above is the detailed content of [U disk boot disk creation tool: Easily create system installation disk]. For more information, please follow other related articles on the PHP Chinese website!
 解决win11开机未能正确启动的方法Jan 29, 2024 pm 04:45 PM
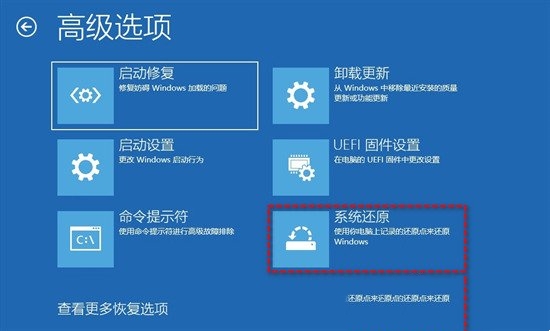
win11开机未能正确启动怎么办?我们在使用电脑的过程中会遇到电脑不能正常使用的问题出现,一般出现这种情况有很多,下面就让本站来为用户们来仔细的介绍一下win11开机未能正确启动解决方法吧。win11开机未能正确启动解决方法方法一:卸载新的应用程序如果电脑在安装新应用后未正确启动,可进入安全模式卸载它们以修复问题。1、在高级选项窗口中单击启动设置。2、在启动设置窗口中按F4以启用安全模式。3、成功进入安全模式系统之后按照正常流程卸载新安装的应用程序即可。方法二:执行系统还原之前我们提到了可能导致
 win10系统安装卡在海内存知己怎么办Jan 04, 2024 pm 11:50 PM
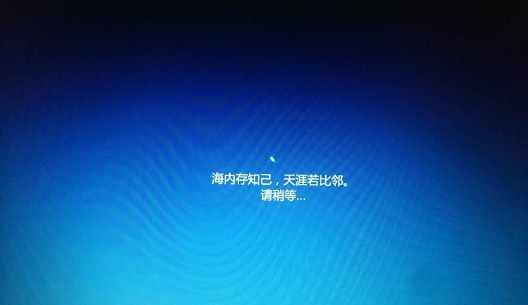
如果我们准备给自己的电脑安装win10操作系统的话,对于安装的过程中发现安装进度卡在海内存知己显示界面的情况,很多小伙伴不知道应该怎么解决。我们可以在系统设置中找到系统恢复,然后将电脑系统重置再重新升级安装即可。详细步骤就来看下小编是怎么解决的吧~win10系统安装卡在海内存知己怎么办方法一:大部分的时候,我们只需要重启电脑就可以正常进入系统了,非常方便。方法二:1、如果我们重启之后无法解决问题,那么可以进入安全模式下的windows设置当中。2、接着点击windows“更新和安全”选项。3、然
 Windows 7光盘系统的安装指南Dec 28, 2023 pm 08:41 PM
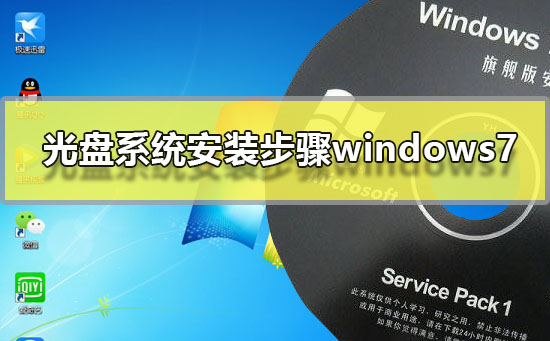
然后win10系统都已经出来很久了,但是win7系统依然是最受用户们喜爱的了,很多的用户们想要将电脑上的系统重装成win7系统,但是不知道怎么去操作,那就快来看看详细的教程吧~光盘系统安装步骤windows7:台式机win764位系统下载>>>台式机win732位系统下载>>>笔记本win764位系统下载>>>笔记本win732位系统下载>>>1.重启电脑,然后在开机界面出来的时候,按下U盘启动快捷键。点击查看你的电脑U盘启动键>
 台式电脑重装系统步骤图文说明Jul 19, 2023 am 11:41 AM
电脑是我们生活中和工作中的好帮手,电脑在使用了一段时间后,系统就会卡顿。此时,就需要重装系统来解决,那么台式电脑怎么安装系统呢?下面小编就和大家分享电脑如何安装系统的步骤吧。1、下后的系统格式ISO文件,将ISO文件和NT6安装器(可自行下载)复制到电脑除C盘以外的其他盘的根目录下,两个文件要在同一目录。2、打开NT6安装器,打开后出现如下图,选择模式2安装。3、重启后进入如下图,在启动选择菜单按下图选择进入。4、点击下一步进入,要全新安装,点击“自定义(高级)”选项。5、点击自定义高级后,出现
 如何删除联想预装系统重装Jan 29, 2024 pm 05:42 PM
如何删除联想预装系统重装联想电脑是一款备受欢迎的品牌,但很多用户可能对其预装的系统并不满意,希望能够删除预装系统并进行重装。本文将为大家介绍如何删除联想预装系统并进行重装的方法。第一步:备份重要数据在进行系统重装之前,务必备份重要的个人数据。因为重装系统会将硬盘上的所有数据清空,所以在操作之前,将重要的文件、照片、音乐等数据备份到外部存储设备或云盘中,以免丢失。第二步:准备系统安装介质在删除预装系统之前,需要准备一个可用的系统安装介质。可以选择使用官方原版的Windows系统安装盘或者制作一个启
 为什么在安装win10系统时常使用FAT32格式的U盘?Dec 27, 2023 pm 04:41 PM
采用U盘作为PE系统安装介质时,建议选择FAT32格式,而非NTFS格式。之所以选择FAT32格式,是因为其具有更好的兼容性,可有效避免在运行WINPE过程中发生崩溃现象。win10系统安装u盘为什么用fat32:答:具有更好的兼容性,避免发生崩溃尽管FAT32格式并不支持单个文件超过4GB的存储,但通常情况下,系统文件往往都超过了4GB大小。因此,使用FAT32格式来制作启动盘并随后通过系统命令提示符将其转换为NTFS格式是完全可行的,且在改造过程中不会影响启动盘的正常使用。以下是具体的操作步
 Windows 10如何安装纯净版系统Dec 23, 2023 pm 08:30 PM
我们在准备给自己的电脑安装操作系统的时候,对于现在市面上的诸多操作系统版本,许多小伙伴不知道该怎么选择安装。那么对于纯净版系统win10怎么安装这个问题小编觉得我们可以先在本站进行相关的下载,然后通过使用辅助工具进行安装即可。具体操作步骤就来看下小编是怎么做的吧~纯净版系统win10怎么安装一、升级win10系统准备工具:1、8G空U盘一个2、小白U盘启动盘制作工具windows10一键重装系统>>3、准备win10系统纯净版win10专业纯净版32位下载地址>>Win10纯净版6
 U盘启动工具一键制作,轻松搞定系统安装Jan 18, 2024 pm 03:27 PM
在现代社会,电脑已经成为我们生活中不可或缺的一部分。然而,有时我们需要重新安装操作系统,这对于一些不太懂电脑的人来说可能是一项困难的任务。幸运的是,有一种简单而有效的方法可以帮助我们轻松搞定系统安装,那就是使用U盘启动工具。本文将介绍一款一键制作U盘启动工具,让系统安装变得轻松愉快。工具原料:电脑品牌型号:小米Air13.3操作系统版本:Windows10软件版本:U盘启动工具v2.0一、选择合适的U盘首先,我们需要选择一款合适的U盘作为启动工具。一般来说,容量大于8GB的U盘即可满足需求。此外


Hot AI Tools

Undresser.AI Undress
AI-powered app for creating realistic nude photos

AI Clothes Remover
Online AI tool for removing clothes from photos.

Undress AI Tool
Undress images for free

Clothoff.io
AI clothes remover

AI Hentai Generator
Generate AI Hentai for free.

Hot Article

Hot Tools

EditPlus Chinese cracked version
Small size, syntax highlighting, does not support code prompt function

MantisBT
Mantis is an easy-to-deploy web-based defect tracking tool designed to aid in product defect tracking. It requires PHP, MySQL and a web server. Check out our demo and hosting services.

Safe Exam Browser
Safe Exam Browser is a secure browser environment for taking online exams securely. This software turns any computer into a secure workstation. It controls access to any utility and prevents students from using unauthorized resources.

Dreamweaver CS6
Visual web development tools

PhpStorm Mac version
The latest (2018.2.1) professional PHP integrated development tool


