 Computer Tutorials
 System Installation
 Teach you step by step how to make a USB boot disk and install the system easily
php editor Apple teaches you how to make a USB boot disk and install the system simply and easily. The process of making a boot disk is not complicated. You only need to prepare the USB flash drive and system image file and follow the steps. Through the USB boot disk, you can easily install the operating system, solve computer system problems, or perform system recovery. Next, let us learn how to make a USB boot disk and enjoy the convenient system installation experience!

Tool materials:
System version: Windows 11
Brand model: Lenovo Xiaoxin Pro 16 2022
Software version: Micro PE Toolbox v2.1
1. Preparation work
1. Prepare a U disk with a capacity of at least 8GB. It is recommended to use USB 3.0 and above U disk. The speed is Faster.
2. Download the micro PE toolbox and Windows 11 system image file. The micro PE toolbox can be downloaded from the official website, and the Windows 11 system image file can be downloaded from the Microsoft official website. Once the download is complete, place them both in the same folder.
2. Make a U disk boot disk
1. Insert the U disk, open the micro PE toolbox, click the "Select" button, and select the Windows 11 system image file just downloaded.
2. Click the "Startup Disk Creation" button, select the inserted U disk, click the "Execute" button, and wait for the creation to be completed. The production process may take a few minutes, please be patient.
3. After the production is completed, it will prompt "Production successful", click the "OK" button.
3. Install the system
1. Insert the prepared U disk boot disk into the computer, restart the computer, press the F12 key (different brands of computer hotkeys may be different) to enter the boot menu, and select Boot from USB drive.
2. After entering the PE system, click the "Install System" icon on the desktop, select the system version to be installed, and click the "Next" button.
3. Select the hard disk partition where you want to install the system, click the "Format" button, then click the "Next" button and wait for the system installation to be completed. The installation process may take anywhere from ten minutes to dozens of minutes, please be patient.
4. After the installation is complete, follow the prompts to set up and you can start using the new system.
Content extension:
1. In addition to the micro PE toolbox, there are many other excellent U disk boot disk production tools, such as Laomaotao, Chinese cabbage, etc. Everyone can choose according to their own preferences.
2. Before installing the system, it is recommended to back up important data to avoid data loss. You can use hard disk, cloud disk, etc. for backup.
3. If you encounter problems during the installation process, you can try to recreate the USB boot disk or replace other system image files. If the problem still cannot be solved, it is recommended to seek professional help.
Summary:
By making a USB boot disk, we can easily reinstall and upgrade the system and give the computer a new lease of life. This is an essential skill that every computer user should master. I hope that through the introduction of this article, everyone can learn and master this skill, making your computer use more convenient!
The above is the detailed content of Teach you step by step how to make a USB boot disk and install the system easily. For more information, please follow other related articles on the PHP Chinese website!
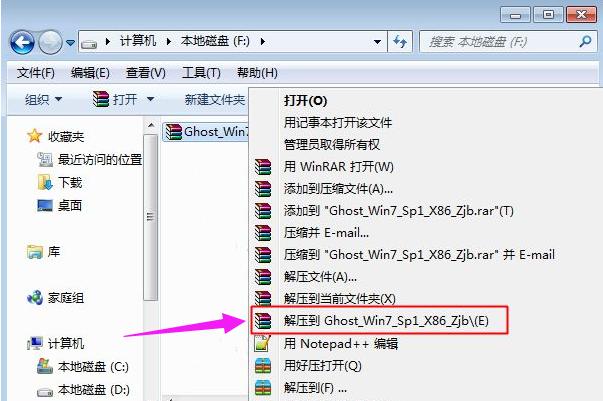 ghost安装器怎么用 小编教你安装ghost系统步骤Jan 11, 2024 pm 07:39 PM
ghost系统是一种免费的安装系统,之所以受欢迎,是因为ghost系统安装后会自动激活,而且自动安装对应的硬件驱动,不仅节省时间,还给小白用户提供了便利,不过很多人不知道ghost系统镜像怎么安装,其实安装步骤很简单,下面,小编给大家分享安装ghost系统步骤。U盘装系统越来越流行,现在的启动盘功能非常强大,既可以自动安装ghost系统,也可以手动ghost安装系统,不过由于手动ghost方法比较复杂,很多人都不懂怎么安装,让用户郁闷不已,下面,小编给大家带来了安装ghost系统步骤。最近小编在
 镜像安装和U盘安装:有何区别?Apr 09, 2024 pm 12:34 PM
镜像安装和U盘安装是两种常见的操作系统安装方式,它们在安装过程、需要的工具和步骤上有所不同。本文将就这两种安装方式进行比较分析,帮助读者更好地选择适合自己的安装方式。工具原料:系统版本:Windows10品牌型号:DellXPS13软件版本:最新版本一、镜像安装1、镜像安装是通过在已经运行的操作系统中创建一个系统镜像,然后将该镜像写入U盘或者光盘中,再从U盘或光盘中启动电脑进行安装。2、这种方式可以避免重复下载操作系统的问题,适合网络速度较慢或者需要安装多台电脑的用户使用。3、操作步骤:首先下载
 win10系统所需的最小U盘容量是多少Dec 31, 2023 pm 02:22 PM
对于Windows10操作系统来说,其ISO文件大小大约为4GB。由于4GBU盘的可用空间大约只有37GB,因此我们建议您使用8GBU盘进行安装。当然,使用更大容量的U盘也是完全可行的。win10系统安装u盘要多大:答:8G准备用u盘安装u盘只需要8G的u盘就可以了。为了顺利进行安装,建议您事先做好以下准备工作:-请您准备一个容量至少为4GB的U盘。-请您下载并安装U盘制作工具UltraISO启动盘制作工具。-请您获取系统镜像文件——Windows10ISO镜像。接下来,让我们一起学习如何通过U
 使用U盘安装ISO系统文件的步骤Jan 03, 2024 pm 03:44 PM
我们在准备使用U盘为自己的电脑进行系统重装的时候,有的小伙伴们可能就想要知道iso格式的系统文件怎么用u盘安装win10。那么据小编所知我们可以通过在本站网站下载我们所需要的iso格式操作系统到U盘中,然后通过相关的pe工具软件制作成U盘启动盘即可。相关步骤教程就来看下小编是怎么做的吧~iso系统文件怎么用u盘安装win10步骤一:1.本站下载的操作系统不需要复杂的步骤,直接使用傻瓜式装机,上手简单。2.在这里还有丰富的品牌系统:萝卜家园、深度技术、雨林木风、大地系统、电脑公司、番茄花园等等。3
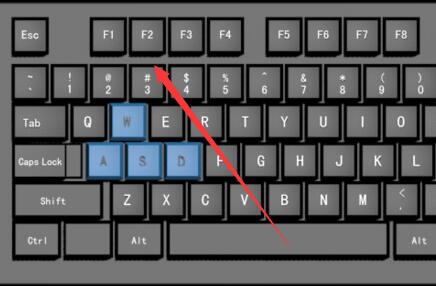 U盘安装原版win10系统教程Dec 25, 2023 am 10:49 AM
我们在使用计算机的时候,有的小伙伴可能想要将自己的系统升级到win10,或者是重装自己的win10系统。但是很多小伙伴对于U盘安装原版win10系统怎么安装的还不是很了解。那么据小编所知我们可以通过在本站下载u启动软件,准备好u盘来进行操作即可。具体步骤就来看下小编是怎么做的吧~U盘安装原版win10系统教程1、首先制作一个U盘启动盘,将win10系统放入启动盘中。详情>>2、完成后,插入U盘,然后将电脑开机,不停的按下,进入到启动项选择界面,然后选择你的U盘。3、进入微PE系统后,点击桌面上
 简单易学!快速制作U盘启动盘的方法大揭秘Feb 27, 2024 am 10:31 AM
大家好,今天我要揭秘的是一种简单易学的方法,可以快速制作U盘启动盘。相信很多人都遇到过这样的情况:电脑系统崩溃,无法正常启动,或者需要安装新的操作系统。这时候,一个U盘启动盘就能派上用场了。通过U盘启动盘,我们可以轻松修复系统问题或者安装新的操作系统。下面,我将介绍一种简单易学的方法,让你快速制作U盘启动盘。工具原料:在制作U盘启动盘之前,我们需要准备以下工具和原料:电脑品牌型号:任意品牌型号的电脑都可以使用这种方法制作U盘启动盘。操作系统版本:Windows7、Windows8、Windows
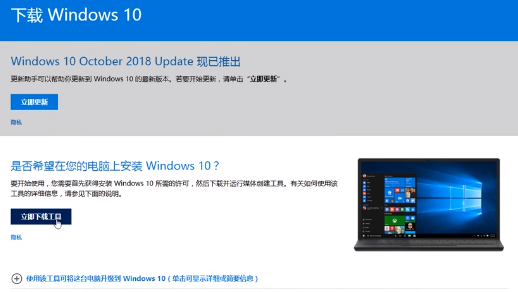 如何使用U盘安装原版Windows 10系统Dec 26, 2023 pm 04:25 PM
最近有小伙伴反应自己的win10原版系统崩溃了,无法开机进入安全模式系统里面修复,这可怎么办呢?其实我们可以从新下载一个系统,使用U盘进行安装,今天小编带来了详细的解决步骤,具体的一起来看看吧。U盘安装原版win10系统教程1、找到下载win10系统的链接2、使用微软提供的Win10下载工具下载原版镜像文件。3、将微软Win10系统原版镜像下载到U盘。4、重新启动电脑,选择U盘启动,等待系统自动安装完成即可
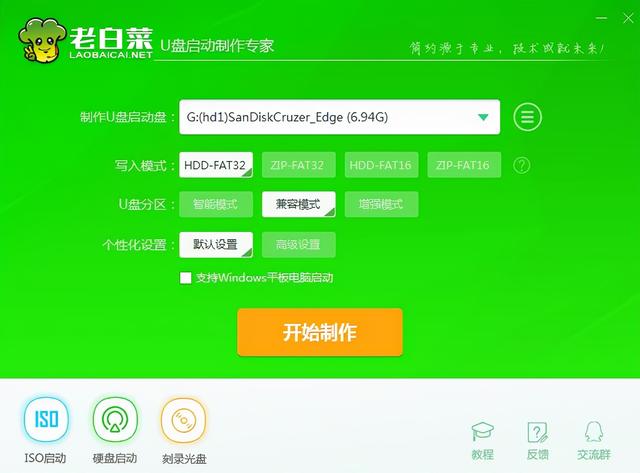 大白菜怎么还原u盘启动盘Feb 13, 2024 pm 04:40 PM
1、准备一块容量在8G以上的正常u盘;2、下载并安装老白菜装机版u盘启动盘制作工具。流程步骤:插入u盘,打开老白菜装机版u盘启动盘制作工具,确认软件识别u盘后点击“开始制作”。2、在还原提示窗中点击“确定”,如图:3、等待制作完成后,在测试提示框中点击“是”,如图:在测试中,如果能够成功启动并运行,这意味着U盘启动盘制作成功。请注意,模拟启动界面仅用于测试,无法进行进一步操作。完成测试后,退出模拟界面即可。不同品牌的电脑很少选择相同品牌的主板,因此对应的u盘启动快捷键也不尽相同。以下是各大品牌主


Hot AI Tools

Undresser.AI Undress
AI-powered app for creating realistic nude photos

AI Clothes Remover
Online AI tool for removing clothes from photos.

Undress AI Tool
Undress images for free

Clothoff.io
AI clothes remover

AI Hentai Generator
Generate AI Hentai for free.

Hot Article

Hot Tools

SAP NetWeaver Server Adapter for Eclipse
Integrate Eclipse with SAP NetWeaver application server.

EditPlus Chinese cracked version
Small size, syntax highlighting, does not support code prompt function

Dreamweaver Mac version
Visual web development tools

Notepad++7.3.1
Easy-to-use and free code editor

VSCode Windows 64-bit Download
A free and powerful IDE editor launched by Microsoft


