Home >Software Tutorial >Office Software >Excel introductory tutorial: How to automatically wrap lines in cells
Excel introductory tutorial: How to automatically wrap lines in cells
- WBOYWBOYWBOYWBOYWBOYWBOYWBOYWBOYWBOYWBOYWBOYWBOYWBforward
- 2024-03-20 21:56:11809browse
php Xiaobian Yuzai has carefully prepared an Excel introductory tutorial article for you. Today we will focus on how to implement automatic line wrapping in cells. In Excel, how to automatically wrap text when the text in a cell is too long is a problem that many beginners often encounter. Through the guidance of this article, you will learn how to easily wrap text in cells to make your table content clearer and easier to read. Start learning now!
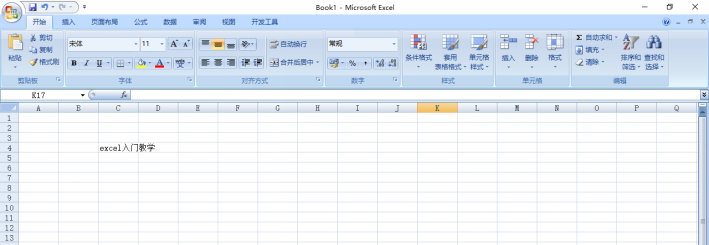
1. Open the excel form and enter the text "Excel Introductory Tutorial". You will find that the text is out of frame. At this time, select the content of the first cell first.

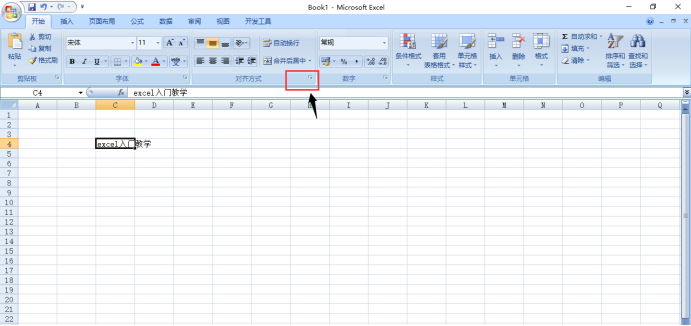
#2. Find "Alignment" in the upper menu bar and click the drop-down arrow in the lower right corner.

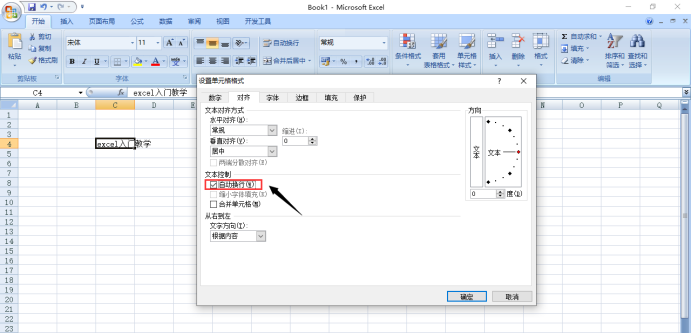
#3. You can clearly see the "Format Cells" window, select "Automatic Wrap" in "Text Control", and then click OK.

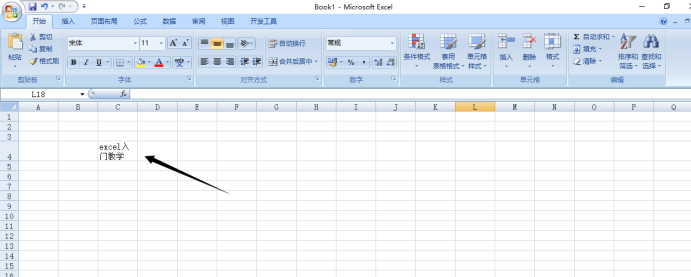
When you look back at the table, you will find that the text in the cell has been successfully wrapped.

In addition, there is a simple way. When you are entering text in the cell and you want to change the line immediately, you can press the "Alt Enter" combination keys, the effect is the same, simple and fast, greatly saving time. This operation is very simple, but it is easy to forget after a long time, so it requires us to remember and practice more. Even if we don't use it now, we will have to deal with Excel sooner or later in the future. Friends, do you understand?
This article uses the following hardware model: Lenovo Xiaoxin Air15; system version: win10; software version: Excel 2007.
The above is the detailed content of Excel introductory tutorial: How to automatically wrap lines in cells. For more information, please follow other related articles on the PHP Chinese website!

