
Home >Computer Tutorials >Computer Knowledge >How to install an agent using Windows Configuration Designer
How to install an agent using Windows Configuration Designer

- WBOYWBOYWBOYWBOYWBOYWBOYWBOYWBOYWBOYWBOYWBOYWBOYWBforward
- 2024-03-20 18:56:131256browse
Setting up new workstations for end users takes a lot of time. The complexity of workstation deployment can be reduced through the application of automation and a structured approach. To manage Windows workstations and computers, you first need to install the Windows agent. This article describes how to use Windows Configuration Designer to install agents and create custom settings, deployment scripts, and draft provisioning files to achieve automation goals on a variety of systems.
How to install the agent using Windows Configuration Designer?
To properly install the agent using Windows Configuration Designer, follow these steps.
Let’s talk about it in detail.
1]Install Windows Configuration Designer
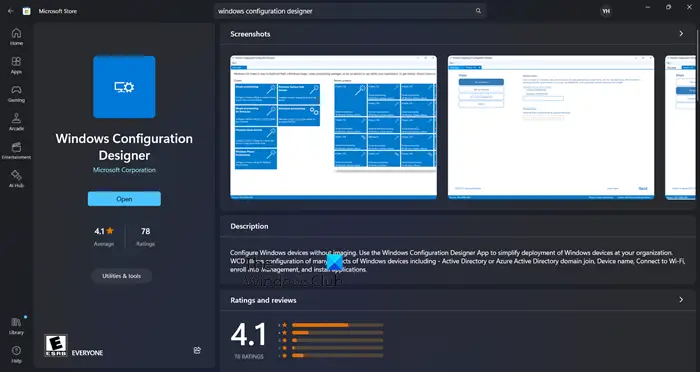
First, in order to start the workstation deployment process, we need to install Windows Configuration Designer. This free software tool makes it easy to set up and generate deployment scripts and configuration files that can be distributed to multiple computers. Through the Windows Configuration Designer, users can personalize settings according to their own needs. To get this tool, go to the microsoft.com website or open the Microsoft App Store and search for "Windows Configuration Designer".
2]Create Provision Desktop Devices project
After downloading Windows Configuration Designer, the next thing to do is to click on "Provision Desktop Device" in the creation options. Then, enter a project name, select a target location, and add a description if desired. Finally, click on the "Finish" button to start the creation process.
3]Configuration project
Now, let's start configuring the project.
First, we need to set up the device. You can use the format—CompanyName—% Serial %. This will add the company name in front of the device's service tag or serial number.
Before continuing with the installation, you need to configure your wireless network on this page. Wireless networks are not always connected until the agent is installed, so disabling this feature is a wise choice. To do this, simply turn off the toggle that says Establish Network.
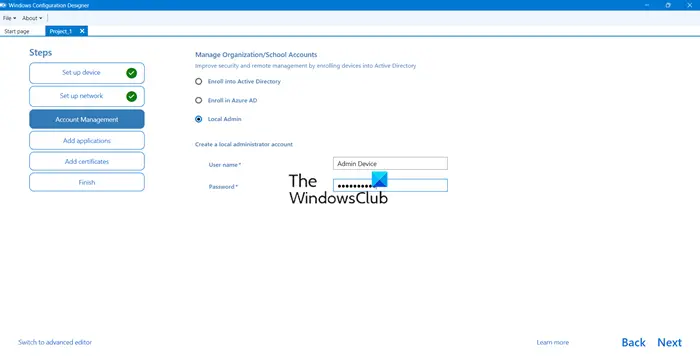
Now you have the option to join the domain at this point, but if the device is not connected to a network that can access the AD domain, just create a local administrator account and use a script to join the domain. To do this, simply check the Local Administrator checkbox and enter your credentials.
Here comes the most important part, we need to install a script that will complete the automation part. Therefore, we will use PowerShell. We will use the following script.
Note: The following is an example of a PowerShell script you can use, please make sure to make the necessary changes to the script before installing.
param(
[string]$SSID="Put SSID here",
[string]$PSK="Put your Wifi password here"
)

#Test whether the folder $TempFolder exists
$TempFiles = 'C:temp'
if(Test—Path $TempFiles){
"$TempFiles exists."
other{
"$TempFolder does not exist and is being created."
mkdir $TempFiles
}

#Record this script.
Start—Transcript—Append $TempFolderinstall.txt

#Create wireless configuration file
$guid=new guide
$HexArray =$sId.ToCharArray()|foreach—object {[System.String]::Format("{0:X}", [System.Convert]::ToUInt32($_))}
$HexSSID =$HexArray—join ""
@"
 xml version="1.0"? >
<wlanprofile xmlns="www.example.com">
<name>
<ssidconfig>
<ssid>
<hex>
<name>
</name></hex></ssid>
</ssidconfig>
<connectiontype ess>
<connectionmode auto>
<msm>
<security>
<authentication encryption>
<authenticationwpa2psk>
<encryption aes>
<useonex false>

<sharedkey>
<keytype passphrase>
<protected false>
<keymaterial>
</keymaterial></protected></keytype></sharedkey>
</useonex></encryption></authenticationwpa2psk></authentication></security>
</msm>
<macrandomization xmlns="www.example.com">
<enablerandomization false>
<randomizationseed>
</randomizationseed></enablerandomization></macrandomization>
</connectionmode></connectiontype></name></wlanprofile>
"@|Output File"$TempFiles$guid.SSID"

#Import wireless configuration file
netsh wlan add profile file file="$TempFiles$guid.SSID"user = all
Start sleeping seconds 5

#Delete wireless configuration file
remove—item "$TempFiles$guid.SSID"—mandatory

#Connect to new Wifi network
netsh wlan connect name =$SSID

#Check the connection to download the agent
$timeout = new time span - minutes 2
$endTime = (Get—Date). Add ($timeout)
$testSite="Download URL"

while(!(Test—Connection $testSite){
Start sleeping seconds 5
if ((Get—Date)—>$endTime){
$connectivity = Test—Connection—TargetName $testSite
"$connectivity"
"Exceeded. Network connection not established"
break in
}
}

#Paste the operating system's installer command

Senv:API_KEY="fuARsf8hj6xTgtHctGSJzW4a";Set—ExecutionPolicy Remote Signed—Scope Process—Enforce;[Net.ServicePointManager]::SecwrityProtocol=[Net.SecurityProtocolType]::T1s12;iwr—useb https://download URL/installation_windows. ps1| IEX

Stop transcribing
Create a .PS1 file, copy the script to Notepad, and save it with the extension described.
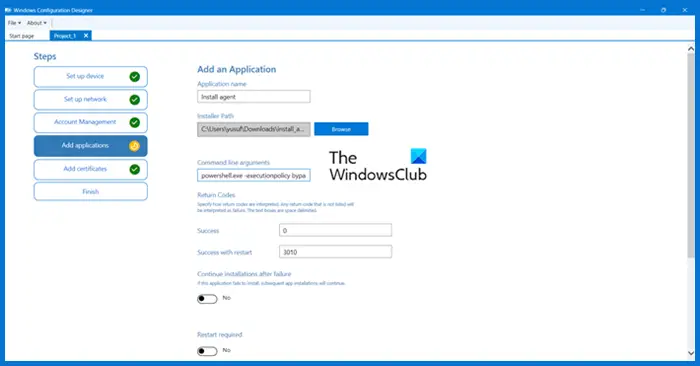
Press the button on the Add App page and give the app a name. Browse to the .ps1 script in the "Remove Path" field. Next, change the command line arguments field to:
powershell.exe—executionpolicy bypass—file "install_agents.ps1"
Finally, go to Add Input Certificate if you have a certificate, or leave it unchanged and create it. >>
Read: How to automate tasks using PowerShell?
4]Deploy the created package
To prepare a new computer for deployment, generate a .ppkg file and copy it to a USB drive. This file contains all necessary information, including the .ps1 file created previously.
When setting up a new computer, it will prompt for the language to use. Don't answer any questions, just insert the USB drive. The system will read the settings file and the computer will be renamed and restarted. Additionally, an administrator account will be created, joined to the wireless network, and Level installed. After completing all these steps, the device will appear in Level and you can start deploying automation scripts to complete the workstation deployment.
that's all!
The above is the detailed content of How to install an agent using Windows Configuration Designer. For more information, please follow other related articles on the PHP Chinese website!