Home >Software Tutorial >Office Software >How to create a WPS document directory?
How to create a WPS document directory?
- WBOYWBOYWBOYWBOYWBOYWBOYWBOYWBOYWBOYWBOYWBOYWBOYWBforward
- 2024-03-20 16:41:141576browse
php editor Xigua brings you a method to create a WPS document directory, allowing you to easily manage documents and improve work efficiency. The setting of the WPS document directory is very important for organizing files. With a good directory structure, you can quickly locate the required files and improve work efficiency. Next, we will introduce several simple and practical methods to create a WPS document directory to make your file organization more convenient!
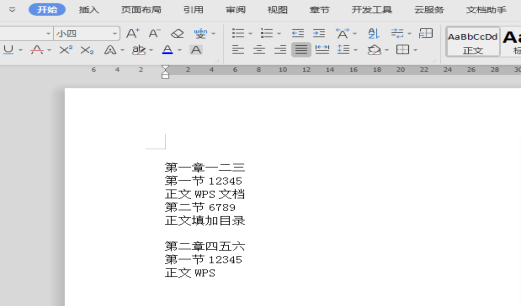
1. The document has not yet generated a table of contents, and the text format is the same. Next, we will modify the chapter text format one by one.
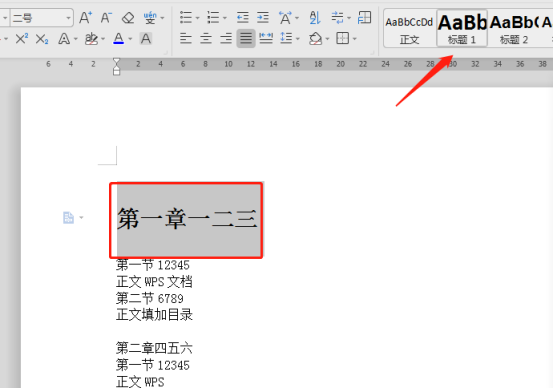
#2. Select the chapter to generate a table of contents, as shown in the figure, select the first chapter, and then click "Title 1" under the "Start" menu.
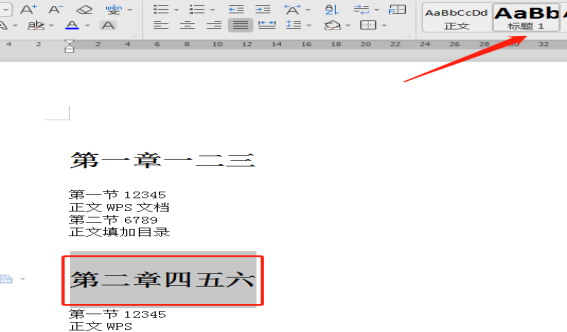
#3. Similarly, do the same for other chapters, or use the format brush to copy the text format.
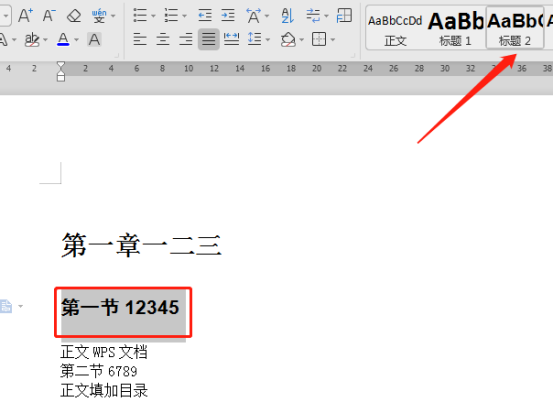
4. Next, modify the format of each section, as shown in the figure, select the first section, and then click "Title 2" under the "Start" menu.
#5. Similarly, do the same for other sections, or use the format painter to apply the format of the first section to other sections.
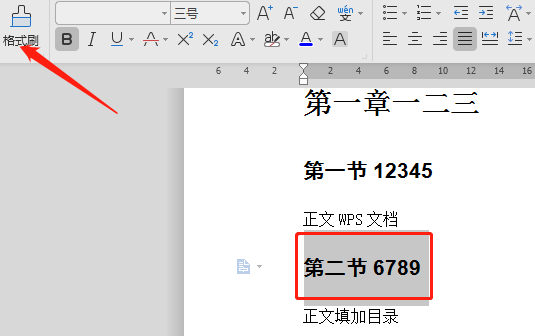
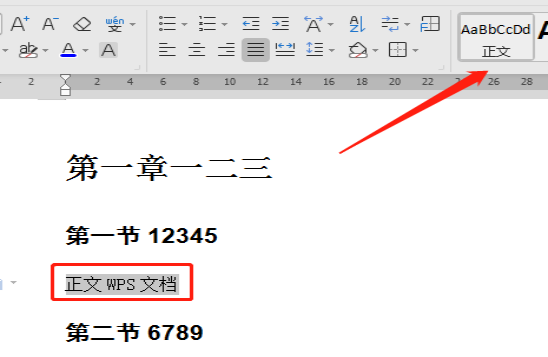
#6. To finally modify the text format, select "Text" under the "Start" menu.
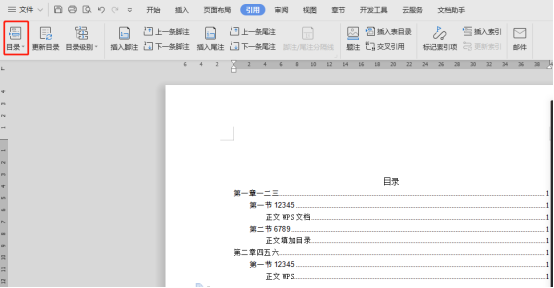
#7. After the text format of all chapters has been modified, click "Table of Contents" under the "Citation" menu. The table of contents is generated and other content starts from the next page of the table of contents page.
The above is the detailed content of How to create a WPS document directory?. For more information, please follow other related articles on the PHP Chinese website!
Related articles
See more- Learn how to operate and deal with character constants in programming
- Master the meaning of the len function and its key role in programming
- Implicit type conversion: An exploration of different variations of types and their applications in programming
- The role and importance of implicit type conversion in programming
- Analysis of application scenarios of $stmt php in programming

