php editor Yuzi brings a guide to setting the row height of WPS tables! When using WPS tables, the row height setting is very important to make the table clearer and easier to read. But many people may not know how to set the row height. Today we will introduce in detail how to set the row height in WPS tables to make your table creation more convenient!
Today we will explain in detail the issue of [WPS table row height setting]; you no longer have to worry about finding the row height in the future!
The steps are as follows:
1. We need to open our own WPS table and open the WPS file where you need to set the row height.

#2. Here, we select the content you need to set the row height. We can use the mouse to select the content you want to set the row height; another method, we can keep pressing the [Shift key] until the selection is completed.

3. In the [Toolbar], click the [Start] button; then find the [Rows and Columns] option in the upper right corner.

4. After finding it, we click [Rows and Columns]; then, we find the [Row Height] option in the drop-down menu.

5. Let’s click on the [Row Height] option; then start setting it to the row height you want; here I set the [Row Height Value] to [50] .

#6. After setting, we click the [OK] button; at this time, we will find the effect of the setting! Isn't it amazing?

The above is the detailed content of Do you know how to set the row height of WPS table?. For more information, please follow other related articles on the PHP Chinese website!
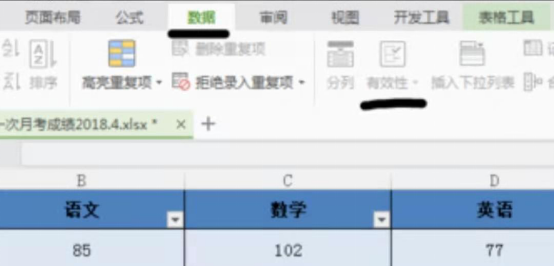 WPS表格下拉菜单怎么做Mar 21, 2024 pm 01:31 PM
WPS表格下拉菜单怎么做:选中要设置下拉菜单的单元格后,依次点击“数据”,“有效性”,再在弹出的对话框中进行相应设置后,以此来下拉我们的菜单。WPS作为一款功能强大的办公软件,其自身拥有的能够编辑文档、统计数据表格等的功能,为很多需要和文字、数据等打交道的人们提供了很多的方便。而要想熟练地运用WPS软件为我们提供很多方便,就需要我们能够先掌握住WPS软件的各种非常基本的操作,在这篇文章里,小编就给大家分享一下怎么在用WPS软件做出的WPS表格中进行下拉菜单的操作。在打开WPS表格后,首先用鼠标选
 WPS某个表格反应很慢怎么办?wps表格卡顿反应慢怎么回事?Mar 14, 2024 pm 02:43 PM
WPS某个表格反应很慢怎么办?用户们可以尝试着关闭其他的程序或者是更新软件来进行操作,下面就让本站来为用户们来仔细的介绍一下wps表格卡顿反应慢怎么回事吧。 wps表格卡顿反应慢怎么回事 1、关闭其他程序:关闭其他正在运行的程序,特别是占用大量系统资源的程序。这样可以为WPSOffice提供更多的计算资源,减少卡顿和延迟。 2、更新WPSOffice:确保你使用的是最新版本的WPSOffice。在WPSOffice官方网站上下载并安装最新版可以解决一些已知的性能问题。 3、减少文件大
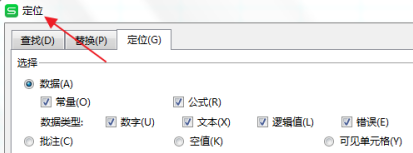 WPS表格怎么删除空白行Mar 20, 2024 pm 01:40 PM
WPS表格怎么删除空白行:标记了单元格里数据的空格处之后,右键删除整行。如今,WPS软件已成为许多人日常办公中经常使用的办公工具之一。WPS软件拥有许多强大的功能,想要熟练地运用WPS软件进行办公,就必须掌握一些常用的操作方法。其中,如何在WPS表格中删除空白行是一项必须掌握的技巧。在这里,我将与大家分享一下如何在WPS表格中快速删除空白行的操作方法。在WPS表格中,可以先选择需要删除空白行的数据范围,然后按下“Ctrl”和“G”键来打开定位功能窗口,这样可以快速定位到所需操作的数据区域。然后,
 vue怎么修改table行高Jan 31, 2023 pm 04:11 PM
vue修改table行高的方法:1、打开相应的vue文件;2、查看表格样式代码;3、通过修改“:row-style="{height:'20px'}" :cell-style="{padding:'0px'}"”中属性值即可修改表格行高。
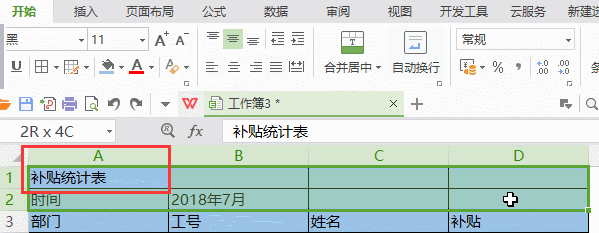 WPS表格怎么合并单元格Mar 21, 2024 am 09:00 AM
我们在使用WPS制作自己的表格时,制作出来的表格表头需要在一个单元格内,这时候问题就来了,WPS怎么合并单元格呢?这期我给各位小伙伴们带来了具体的操作步骤,就在下方,大家认真的来学习一下!1.首先,在电脑上打开WPS的EXCEL文件,可以看到当前的首行文字在A1单元格中,(如图红色圈出部分所示)。2.然后,需要将“补贴统计表”几个字合并到A1到D1的整个行中,则使用鼠标选中A1单元格在拉动鼠标选中到D1单元格。可以看到已经选中从A1到D1之间的所有单元格了,(如图红色圈出部分所示)。3.在选中A
 wps表格找不到正在搜索的数据,请检查搜索选项位置Mar 19, 2024 pm 10:13 PM
智能为主导的时代,办公软件也普及开来,Wps表格由于它的灵活性被广大的办公人员采用。在工作中要求我们不只是要学会简单的表格制作和文字录入,我们要掌握更多的操作技能,才能完成实际工作中的任务,有数据的报表,运用表格更方便更清楚更准确。今天我们给大家带来的课程是:wps表格找不到正在搜索的数据,为什么请检查搜索选项位置?1、首先选中Excel表格,双击打开。然后在该界面中,选中所有的单元格。 2、然后在该界面中,点击顶部工具栏里“文件”里的“编辑”选项。 3、其次在该界面中,点击顶部工具栏里的“
 WPS表格如何自动换行和强制换行Mar 20, 2024 pm 07:46 PM
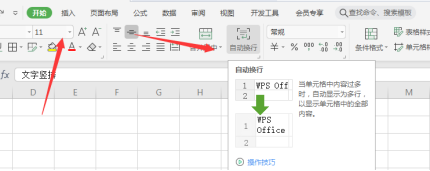
对于一些新手朋友来说,Excel中的自动换行与强制换行都还搞不太清除。所以今天,小编就来给大家讲讲关于Excel中自动换行与手动换行的那些事儿!Excel自动换行功能首先,选择要应用换行的单元格区域,然后单击「开始」-「对齐方式」-「自动换行」按钮。单元格中文本换行的长度取决于单元格的列宽。如果调整列宽,文本将自动调整换行位置。Excel强制换行快捷键如果需要根据自己所要的位置进行换行,可以双击单元格,将光标定位到换行内容后面,然后使用组合键「ALT+回车」即可。自动换行与强制换行的区别这里给大
 WPS表格折线图怎么做你真的会吗Mar 21, 2024 am 08:36 AM
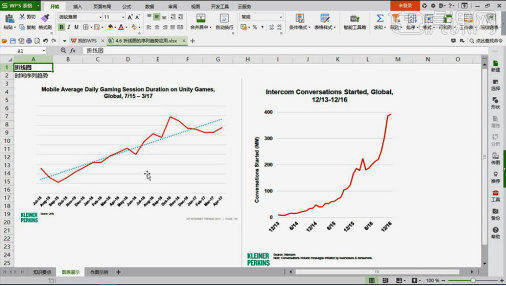
使用wps表格进行大量的数据处理可以使我们的工作更加有效率,当然,wps表格不光能处理数据,还可以根据数据制定折线图图表等数据,这样查看时更佳直观。可对于有些新手来说,不知道wps表格折线图怎么做,今天我就跟大家讲解下制作折线图的详细步骤:1、首先查看【折线图的使用场景】。2、制作方法:首先选择【数据源-插入图表-折线图】点击【图表元素-勾选趋势线-图表中会相应的出现一道虚线】。3、然后在【数据源中插入一列为平均值】使用【AVERAGE进行求平均值】下拉填充的方法【先复制粘贴值-然后在下拉填充】


Hot AI Tools

Undresser.AI Undress
AI-powered app for creating realistic nude photos

AI Clothes Remover
Online AI tool for removing clothes from photos.

Undress AI Tool
Undress images for free

Clothoff.io
AI clothes remover

AI Hentai Generator
Generate AI Hentai for free.

Hot Article

Hot Tools

DVWA
Damn Vulnerable Web App (DVWA) is a PHP/MySQL web application that is very vulnerable. Its main goals are to be an aid for security professionals to test their skills and tools in a legal environment, to help web developers better understand the process of securing web applications, and to help teachers/students teach/learn in a classroom environment Web application security. The goal of DVWA is to practice some of the most common web vulnerabilities through a simple and straightforward interface, with varying degrees of difficulty. Please note that this software

Atom editor mac version download
The most popular open source editor

SecLists
SecLists is the ultimate security tester's companion. It is a collection of various types of lists that are frequently used during security assessments, all in one place. SecLists helps make security testing more efficient and productive by conveniently providing all the lists a security tester might need. List types include usernames, passwords, URLs, fuzzing payloads, sensitive data patterns, web shells, and more. The tester can simply pull this repository onto a new test machine and he will have access to every type of list he needs.

Dreamweaver Mac version
Visual web development tools

Zend Studio 13.0.1
Powerful PHP integrated development environment


