Home >Software Tutorial >Office Software >How to set page margins for Word
How to set page margins for Word
- 王林forward
- 2024-03-19 22:00:081551browse
When using Microsoft Word to process documents, it is very important to set appropriate margins. With appropriate margin settings, you can make your document more beautiful and easier to read and edit. This article will introduce you to how to set page margins for Word so that your document can present the best effect. Next, let PHP editor Xiaoxin explain in detail how to set the margins of Word.
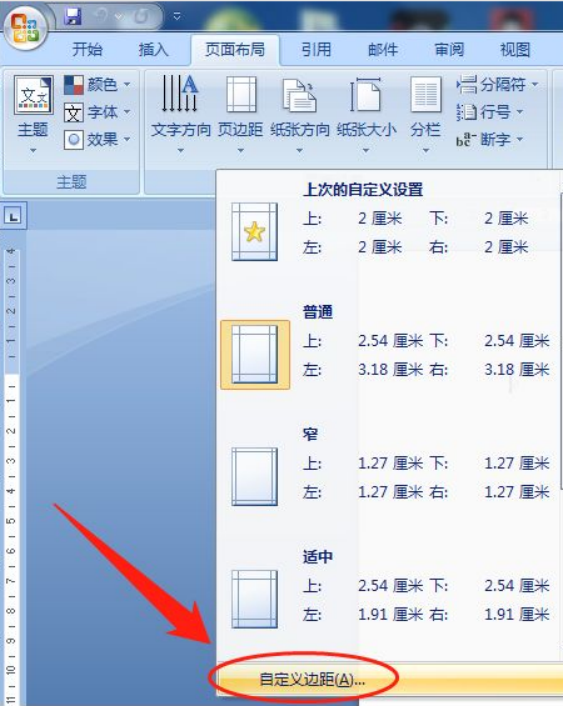
1. Open or create a new word document and click the "Page Layout" menu on the menu bar.

#2. Click the "Margins" button of the "Page Setup" option.

#3. Select a commonly used page margin in the list.

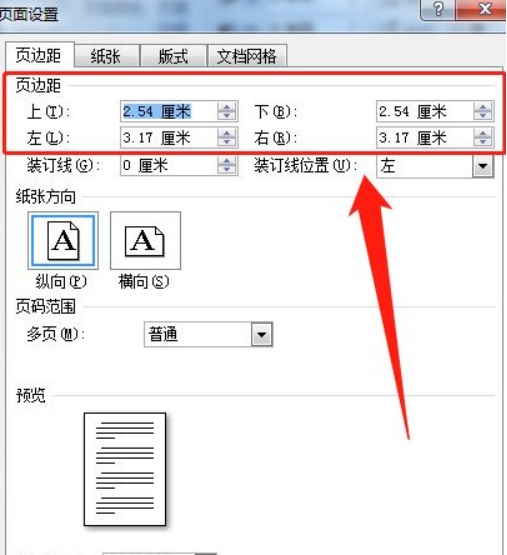
4. If there is no suitable margin in the list, click "Custom Margins".

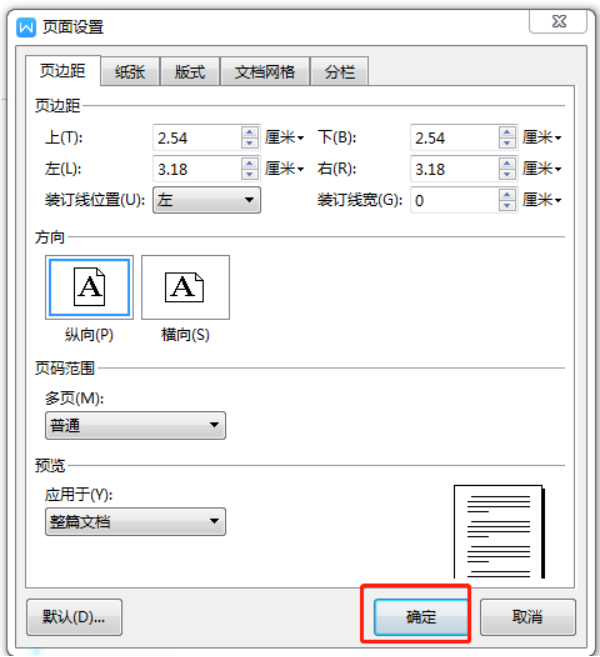
#5. The "Page Setup" dialog box pops up. In the "Margins" option, enter the size of the top, bottom, left, and right margins respectively.

#6. After inputting, click the "OK" button in the lower right corner to complete the setting.

#7. After completing the adjustment, the page margins are narrowed.

Through the demonstration of the above steps, we have successfully set the page margins, so that you can see the printed renderings in the print preview, one article It is important to have good content in the article, but you must learn how to adjust these details and master the skills. Perfect detail processing can give the document structure a different visual effect.
The above is the detailed content of How to set page margins for Word. For more information, please follow other related articles on the PHP Chinese website!

