Home >Software Tutorial >Office Software >How to remove red lines in word
How to remove red lines in word
- WBOYWBOYWBOYWBOYWBOYWBOYWBOYWBOYWBOYWBOYWBOYWBOYWBforward
- 2024-03-19 19:37:181956browse
php editor Zimo will show you how to remove red lines in Word documents. In Word, red lines usually indicate spelling errors or grammatical issues, but can sometimes mislead users. To remove a redline, simply right-click on the redline in the document, select the "Spelling & Grammar" option, and then click "Ignore this error." If you want to permanently remove red lines, you can turn off the spell check function in Word's option settings. This way you can easily remove the red lines in your Word document!
First, we open a new Word document and enter some text as a demonstration. In the document, we can observe some red wavy lines appearing on specific words or phrases. These squiggly lines usually indicate spelling or grammatical errors.
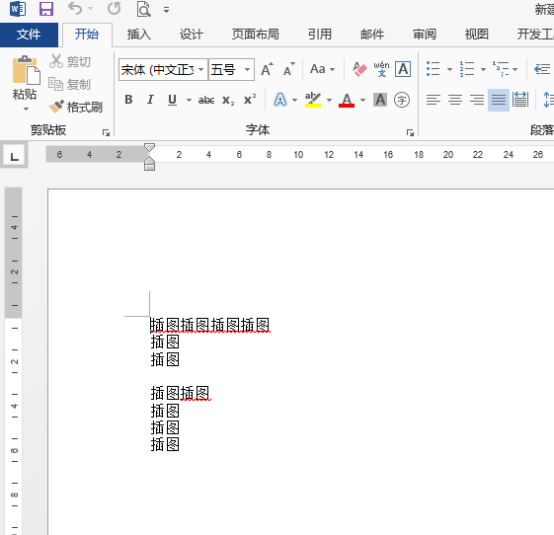
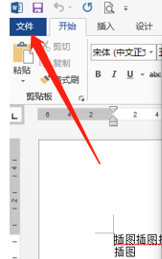
#2. If we want to remove these red wavy lines, we need to set up the word. We need to click [File] in the upper left corner of the document, as shown in the figure below:
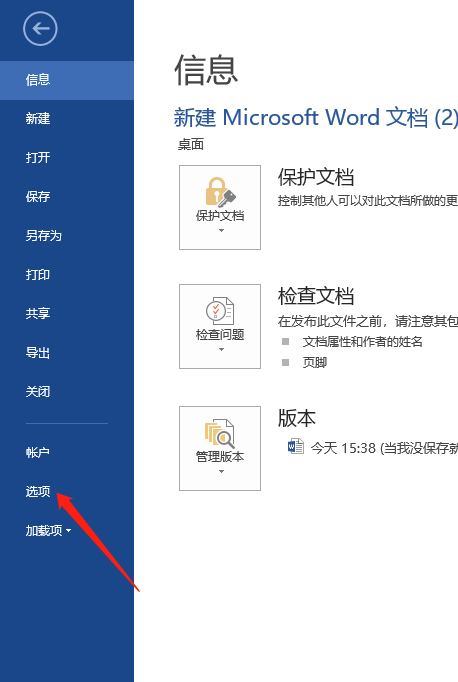
3. Then click [Options] in the drop-down selection, as shown below:
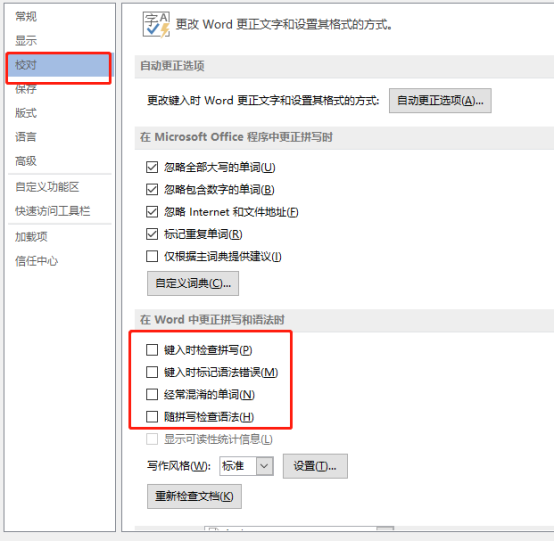
4. Click Options, the settings dialog box pops up, there is the [Proofreading] option on the left, we click Proofing, as shown in the figure below, we uncheck some boxes to cancel the operation, and click the [Confirm] button after completion.
#5. After completing the above wave of operations, we can look at the word document and the red wavy line has disappeared. As shown in the picture below:
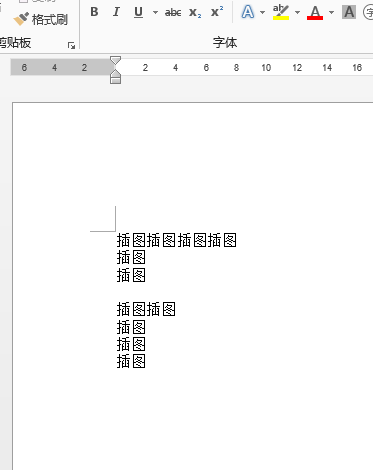
#Have you learned how to remove the word red line? In fact, it’s because of the word settings. The operation is very simple. Share the method with your friends quickly!
The above is the detailed content of How to remove red lines in word. For more information, please follow other related articles on the PHP Chinese website!

