Home >Software Tutorial >Office Software >How to do split screen in word
How to do split screen in word
- PHPzforward
- 2024-03-19 18:19:211320browse
php editor Xinyi introduces to you how to use the word split screen function. When working with large documents, the split-screen function can help you edit and view more efficiently. With simple operations, you can easily display different parts of the same document on a split screen to improve work efficiency. Next, we will explain in detail how to implement split screen in word documents, allowing you to easily cope with various editing needs.
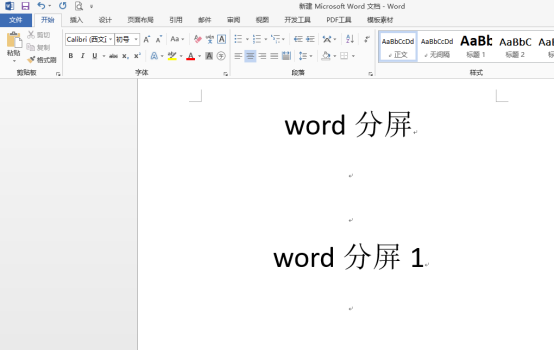
1. First, we create and open a word document, and we simply edit the document, as shown below:

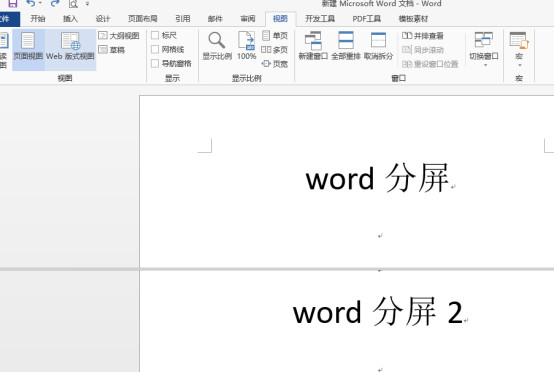
2. Then, We find [View] from the menu bar above the document, and find the [Split] button as shown in the figure below.

3. We click the [Split] button, and the split effect is as shown below:

We found A document is split into two parts, which we can view at will. That is, when we edit a part of the content, we can view the content of the lower page at the same time. Through word split screen, it becomes less troublesome to check and edit during the editing process.
4. If we want to cancel the split screen after we finish editing, follow the same steps of splitting and click [View]-[Split] to complete the cancellation.
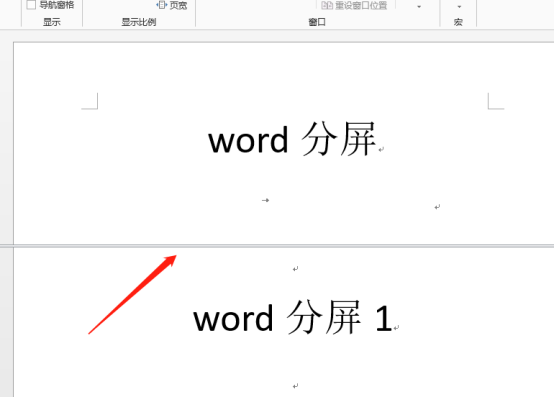
5. The split-screen effect can be adjusted freely. There is a line between the two split-screens, which can be pulled at will with the mouse. Double-clicking this line with the mouse can also cancel the split-screen effect.

#Have you mastered the steps of word split screen? In fact, it is a simple view and split window operation process. Word split screen can bring a lot of convenience in actual operation, so you must learn and use it!
The above is the detailed content of How to do split screen in word. For more information, please follow other related articles on the PHP Chinese website!

