


php editor Zimo brings a tutorial on "Steps to Install System on Toshiba Laptop USB Disk". Through the USB disk installation system, you can quickly and easily install the latest operating system for Toshiba laptops. This tutorial will introduce in detail how to prepare a USB flash drive, download the system image, make a boot disk, set up the BIOS and other steps to help users easily complete the system installation and make the laptop look brand new.
Toshiba laptop reinstallation system steps:
1. Toshiba laptop reinstallation tool preparation:
*Back up computer information;
*WIN 7 64 Bit system download address: www.xitongzu.net
*Prepare a U disk of about 5G
*Make a U disk boot disk, production tutorial: Micrope toolbox to make U disk boot disk | Share the method of making a U disk boot disk in uefi mode
*A Toshiba P50-BT03M1 notebook
2. Copy the downloaded win7 image file into the prepared U disk boot disk and insert it Computer USB interface, restart the computer and press the boot shortcut key, select your own USB flash drive (usually with a USB option or USB flash drive name), and enter the USB installation PE. Select the run win8pe menu and press Enter, as shown in the picture:


## I would like to share with you the steps to reinstall the WIN 7 system on Toshiba P50-BT03M1 notebook. Now that all the introductions are complete, if you want to reinstall the WIN 7 system on the Toshiba P50-BT03M1 notebook, you can refer to the editor's above-mentioned operation methods to reinstall the system. During the reinstallation process, be sure to keep the USB disk from being tampered with to avoid failure. I hope this tutorial will be helpful to everyone. If you want to know more installation tutorials or other tutorials, please continue to follow our system family.
The above is the detailed content of Toshiba notebook USB disk installation system steps. For more information, please follow other related articles on the PHP Chinese website!

 ghost安装器怎么用 小编教你安装ghost系统步骤Jan 11, 2024 pm 07:39 PM
ghost系统是一种免费的安装系统,之所以受欢迎,是因为ghost系统安装后会自动激活,而且自动安装对应的硬件驱动,不仅节省时间,还给小白用户提供了便利,不过很多人不知道ghost系统镜像怎么安装,其实安装步骤很简单,下面,小编给大家分享安装ghost系统步骤。U盘装系统越来越流行,现在的启动盘功能非常强大,既可以自动安装ghost系统,也可以手动ghost安装系统,不过由于手动ghost方法比较复杂,很多人都不懂怎么安装,让用户郁闷不已,下面,小编给大家带来了安装ghost系统步骤。最近小编在
 win11关机后自动重启怎么办Jul 01, 2023 pm 04:41 PM
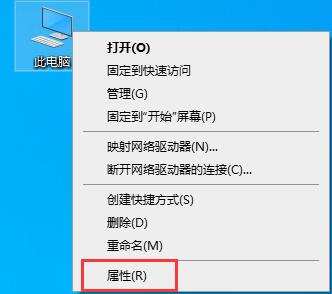
win11关机后自动重启怎么办?最近小编的windows11电脑每次在关机之后,除非把电源直接关了,不然电脑总是自己就进行重启了。这到底是是什么原因,又应该如何解决呢?小编在网上查找了许多教程,终于顺利解决。很多小伙伴不知道怎么详细操作,小编下面整理了win11自动重启频繁解决指南,如果你感兴趣的话,跟着小编一起往下看看吧!win11自动重启频繁解决指南具体步骤如下:1、首先,右键“此电脑”并打开“属性”2、接着打开其中的“高级系统设置”3、然后打开下方启动和故障恢复的“设置”4、随后将“自动重
 如何使用Docker进行容器的故障恢复和自动重启Nov 07, 2023 pm 04:28 PM
Docker作为一种基于容器技术的轻量级虚拟化平台,已经被广泛应用于各种场景中。在生产环境中,容器的高可用性和故障自动恢复是至关重要的。本文将介绍如何使用Docker进行容器的故障恢复和自动重启,包括具体的代码示例。一、容器自动重启的配置在Docker中,通过在运行容器时使用--restart选项可以启用容器的自动重启功能。常见的选项有:no:不自动重启。默
 镜像安装和U盘安装:有何区别?Apr 09, 2024 pm 12:34 PM
镜像安装和U盘安装是两种常见的操作系统安装方式,它们在安装过程、需要的工具和步骤上有所不同。本文将就这两种安装方式进行比较分析,帮助读者更好地选择适合自己的安装方式。工具原料:系统版本:Windows10品牌型号:DellXPS13软件版本:最新版本一、镜像安装1、镜像安装是通过在已经运行的操作系统中创建一个系统镜像,然后将该镜像写入U盘或者光盘中,再从U盘或光盘中启动电脑进行安装。2、这种方式可以避免重复下载操作系统的问题,适合网络速度较慢或者需要安装多台电脑的用户使用。3、操作步骤:首先下载
 Win10自动关机重启指南Jan 03, 2024 pm 01:17 PM
我们在使用win10系统电脑时,有时候会遇到系统突然自动重启的情况,这一般是因为系统出现了某些错误。但是我们也可以将自动重启关闭,这样即使出现相关错误也不会自动重启,下面就来看一下小编是怎么操作的吧。win10自动重启关闭教程1、右键选择“此电脑”点击“属性”2、点击左边栏的“高级系统设置”3、点击“高级”选项卡、4、选择图中位置的“设置”5、取消勾选“自动重新启动”即可。
 如何解决win7关机后自动重启的问题Dec 23, 2023 pm 07:43 PM
我们在使用win7操作系统的时候,可能就会遇到电脑关机之后又开始无限重启的情况。如果发生这种情况先不要着急,小编觉得可以尝试在系统注册表中进行数值的修改便可以轻松解决此类问题。那么详细的操作步骤就来和小编一起看一下吧~希望可以帮助到你。win7关机后又自动重启怎么办1、首先按下快捷键“win+r”打开运行,输入:regedit,进入注册表。2、然后,依次点击:HKEY_LOCAL_MACHINE\SOFTWARE\Microsoft\WindowsNT\CurrentVersion\Winlog
 win10系统所需的最小U盘容量是多少Dec 31, 2023 pm 02:22 PM
对于Windows10操作系统来说,其ISO文件大小大约为4GB。由于4GBU盘的可用空间大约只有37GB,因此我们建议您使用8GBU盘进行安装。当然,使用更大容量的U盘也是完全可行的。win10系统安装u盘要多大:答:8G准备用u盘安装u盘只需要8G的u盘就可以了。为了顺利进行安装,建议您事先做好以下准备工作:-请您准备一个容量至少为4GB的U盘。-请您下载并安装U盘制作工具UltraISO启动盘制作工具。-请您获取系统镜像文件——Windows10ISO镜像。接下来,让我们一起学习如何通过U
 手机老是自动重启是什么原因Aug 29, 2023 am 10:51 AM
手机老是自动重启是软件问题、硬件问题或者用户操作不当引起。其解决方法有:1、尝试清理手机内存关闭一些不必要的后台应用程序,清理缓存文件;2、尝试卸载一些不稳定的应用程序;3、尝试重启手机,通过重启手机可以重新加载系统和应用程序;4、恢复出厂设置。


Hot AI Tools

Undresser.AI Undress
AI-powered app for creating realistic nude photos

AI Clothes Remover
Online AI tool for removing clothes from photos.

Undress AI Tool
Undress images for free

Clothoff.io
AI clothes remover

AI Hentai Generator
Generate AI Hentai for free.

Hot Article
Hot Tools

mPDF
mPDF is a PHP library that can generate PDF files from UTF-8 encoded HTML. The original author, Ian Back, wrote mPDF to output PDF files "on the fly" from his website and handle different languages. It is slower than original scripts like HTML2FPDF and produces larger files when using Unicode fonts, but supports CSS styles etc. and has a lot of enhancements. Supports almost all languages, including RTL (Arabic and Hebrew) and CJK (Chinese, Japanese and Korean). Supports nested block-level elements (such as P, DIV),

SublimeText3 Linux new version
SublimeText3 Linux latest version

Notepad++7.3.1
Easy-to-use and free code editor

PhpStorm Mac version
The latest (2018.2.1) professional PHP integrated development tool

Dreamweaver CS6
Visual web development tools

