 Software Tutorial
 Computer Software
 How to create a blue sky and white clouds in the Chinese version of Adobe PhotoShop CS6 - How to create a blue sky and white clouds in the Chinese version of Adobe PhotoShop CS6
php Xiaobian Xigua will introduce to you how to create blue sky and white clouds in the Chinese version of Adobe PhotoShop CS6. By rationally using PS tools and filters, you can easily achieve realistic blue sky and white cloud effects. Next, we will introduce the specific steps in detail so that you can quickly master this technique.
Create a new layer.

Set the foreground color and background color, use color gradient, and direction from top to bottom.


Create a new layer. Select the menu "Filter>Rendering>Clouds" and perform two operations.

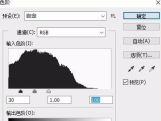
Adjust color levels.

Duplicate the layer, go to Filter-Style-Extrude.


Set the mode of the above two layers to Screen. Execute "Filter>Blur>High-Period Blur" on the copy of layer 1, with a radius value of 1.6

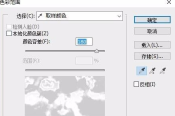
Now select the menu "Select >Color Range". Change the color tolerance to 180. Click on an area of the image where there are no clouds, then click OK.

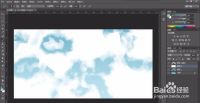
manufacture complete.

The above is the detailed content of How to create a blue sky and white clouds in the Chinese version of Adobe PhotoShop CS6 - How to create a blue sky and white clouds in the Chinese version of Adobe PhotoShop CS6. For more information, please follow other related articles on the PHP Chinese website!
 How much does Microsoft PowerToys cost?Apr 09, 2025 am 12:03 AM
Microsoft PowerToys is free. This collection of tools developed by Microsoft is designed to enhance Windows system functions and improve user productivity. By installing and using features such as FancyZones, users can customize window layouts and optimize workflows.


Hot AI Tools

Undresser.AI Undress
AI-powered app for creating realistic nude photos

AI Clothes Remover
Online AI tool for removing clothes from photos.

Undress AI Tool
Undress images for free

Clothoff.io
AI clothes remover

Video Face Swap
Swap faces in any video effortlessly with our completely free AI face swap tool!

Hot Article

Hot Tools

Safe Exam Browser
Safe Exam Browser is a secure browser environment for taking online exams securely. This software turns any computer into a secure workstation. It controls access to any utility and prevents students from using unauthorized resources.

SublimeText3 Linux new version
SublimeText3 Linux latest version

DVWA
Damn Vulnerable Web App (DVWA) is a PHP/MySQL web application that is very vulnerable. Its main goals are to be an aid for security professionals to test their skills and tools in a legal environment, to help web developers better understand the process of securing web applications, and to help teachers/students teach/learn in a classroom environment Web application security. The goal of DVWA is to practice some of the most common web vulnerabilities through a simple and straightforward interface, with varying degrees of difficulty. Please note that this software

SublimeText3 English version
Recommended: Win version, supports code prompts!

Dreamweaver Mac version
Visual web development tools


