
Home >Software Tutorial >Computer Software >How to cut out the chapter in ps - tutorial on how to cut out the chapter in ps
How to cut out the chapter in ps - tutorial on how to cut out the chapter in ps

- WBOYWBOYWBOYWBOYWBOYWBOYWBOYWBOYWBOYWBOYWBOYWBOYWBforward
- 2024-03-05 08:49:052194browse
The "How to Cut Out Chapters in PS - Tutorial on Cutting Out Chapters in PS" carefully prepared for you by php editor Xigua will give you a detailed analysis of the techniques and methods of cutting out pictures in Photoshop. Whether you are cutting out people, products or scenery, this tutorial will provide you with simple and easy-to-understand operating steps, allowing you to easily master the skills of cutting out images and make your design works more outstanding!
Opening an official seal image in Photoshop is easy: just click "File" in the menu bar and select "Open." Then browse your computer folders to find the location where the official seal image is stored, and finally click the "Open" button.

When opening the official seal image, please make sure the background of the image is transparent. In the Layers panel, click the Lock icon in the lower right corner of the layer to unlock the image for editing.

3. Select the Quick Selection tool: Click the Quick Selection tool in the main toolbar, or press the "W" key on your keyboard to select the tool.
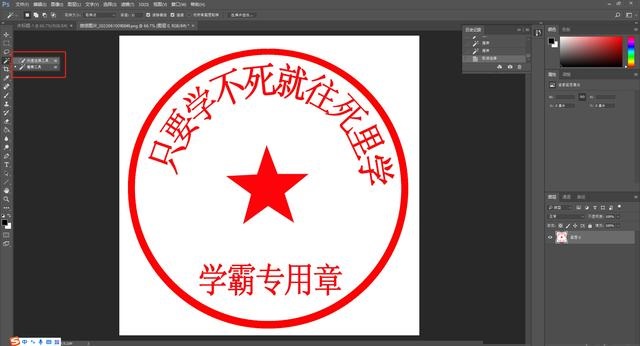
4. Select the official seal area: Use the "Quick Selection" tool to draw a selection box in the official seal area. It is not necessary to completely cover the official seal, just roughly cover the main part of the official seal. If the selection is not perfect, you can add to the selection by holding down the "SHIFT" key and clicking additional areas, or reduce the selection by holding down the "ALT" key and clicking on the selection area.

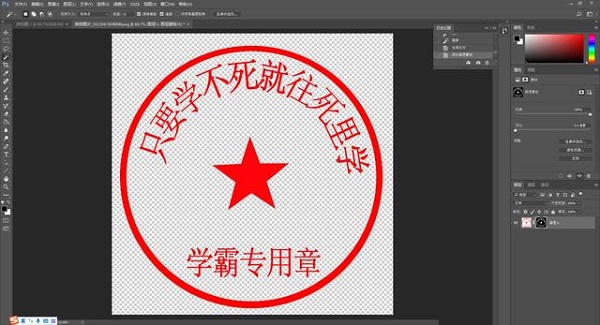
5. Create a layer mask: In the Layers panel, click the Add Layer Mask button. This will create a mask on the image and apply your selection to the mask. Now, only the area within the official seal is shown in the image, while other areas are hidden.
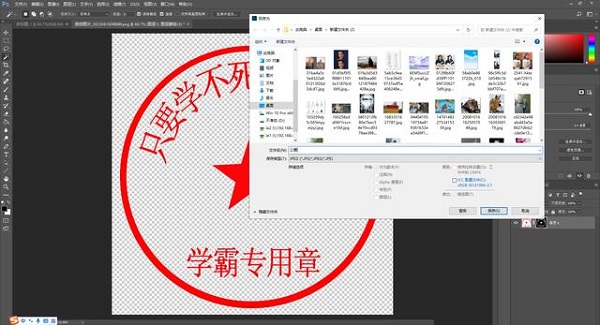
6. Save the image: After you finish cutting out the image, you can click the "File" option in the menu bar, select "Save As", and then choose PNG or other formats that support transparent backgrounds to save the image. Now, you have successfully cut out the official seal.

The above is the detailed content of How to cut out the chapter in ps - tutorial on how to cut out the chapter in ps. For more information, please follow other related articles on the PHP Chinese website!
Related articles
See more- What does phpstudy do? phpstudy usage tutorial
- The latest 18 dark horse programmers full set of video tutorial recommendations in 2023 (free)
- Detailed tutorial for using PyQt5 in python (code example)
- phpMyAdmin usage tutorial (detailed graphic and text explanation)
- A step-by-step detailed tutorial on how to open dll files