Home >Software Tutorial >Computer Software >How to create a picture fade effect in Macromedia Flash 8 - How to create a picture fade effect in Macromedia Flash 8
How to create a picture fade effect in Macromedia Flash 8 - How to create a picture fade effect in Macromedia Flash 8
- 王林forward
- 2024-03-04 12:57:27897browse
php editor Zimo will introduce to you how to create a picture fade effect in Macromedia Flash 8. With simple operations, you can easily achieve the effect of gradually displaying images, adding more visual charm to your works. Follow our guide and master the art of creating a fade effect for images to make your work more vivid and attractive.
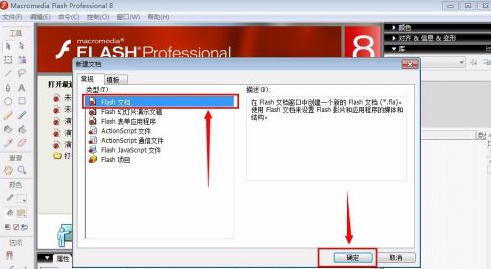
Click "File" - "New" in the upper left corner of the software to open the following dialog box, select "flash document", and then "OK", as shown in the figure below.
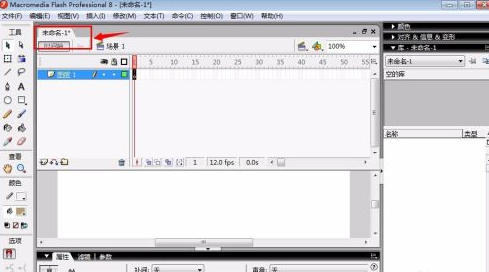
After creating a new document, there will be an *"unnamed-1*" with a label, which is your newly created document file.
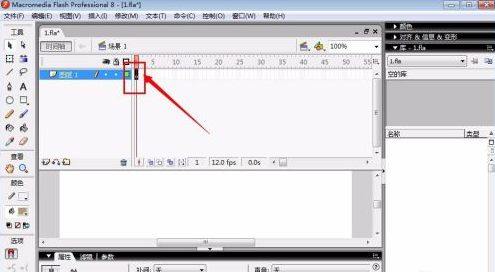
In the newly created document, the scene is opened by default, and the layer is also the first layer. We directly click on the small circle mark on layer 1. This is the first frame.
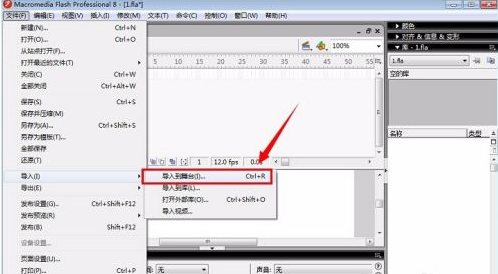
Toolbar: Select "File" - "Import" - "Import to Stage", or directly use the shortcut key "crtl r", as shown in the figure.
Select the picture and press "f8". The following dialog box will appear. Just select the default and then "OK".

Click on the component of the first frame, check the "Color" in the "Properties" of the software and select "Alpha". A selection from 0% to 100% will appear on the right, here select 0%.


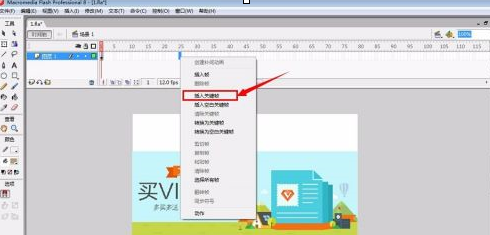
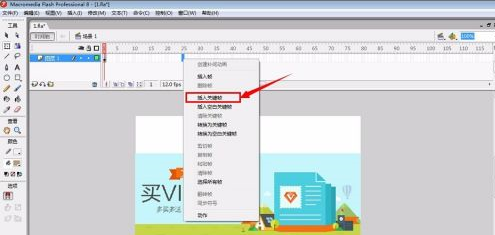
We right-click under frame 25 and select "Insert Keyframe". The effect is as shown in the figure:

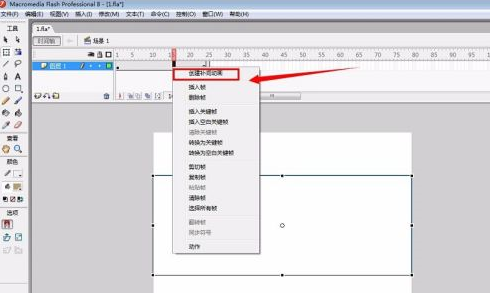
Right-click in the middle area and select "Create Tween Animation", as shown in the red line box in the selected part.
After the animation is completed, you can directly press the "enter" key on the keyboard to test the effect, as shown in the figure below:

The above is the detailed content of How to create a picture fade effect in Macromedia Flash 8 - How to create a picture fade effect in Macromedia Flash 8. For more information, please follow other related articles on the PHP Chinese website!

